How To Put Shelf Liner In Cabinets
Installing shelf liner in cabinets is a straightforward and effective way to protect cabinet surfaces, prevent items from sliding, and add a touch of personal style to interior spaces. This process, although seemingly simple, requires careful planning and execution to ensure a clean and lasting result. The following article details the necessary steps and provides valuable insights into selecting the appropriate materials and techniques for successful shelf liner installation.
Preparation and Material Selection
The initial stage of installing shelf liner involves thoroughly preparing the cabinets and selecting the appropriate type of liner. The type of cabinet and intended use will heavily influence the type of liner chosen. For instance, wire shelving requires a different type of liner than solid wood shelves. Preparation also involves cleaning the surfaces of the cabinets to ensure proper adhesion and a clean, hygienic environment.
Begin by completely emptying the cabinets of all contents. Remove any items that could obstruct the installation process, such as loose shelves or drawers. A clean, unobstructed workspace is crucial for accurate measurements and a precise fit. This step also allows for a comprehensive assessment of the cabinet’s condition, revealing any imperfections or areas that require special attention.
Next, meticulously clean the interior surfaces of the cabinets. Use a mild detergent solution and a soft cloth to remove any dust, dirt, grease, or debris. Pay particular attention to corners and edges, where grime tends to accumulate. Allow the cabinets to dry completely before proceeding. This ensures that the adhesive on the shelf liner will adhere properly and prevents the growth of mold or mildew underneath the liner.
Choosing the right type of shelf liner is critical. Several varieties are available, each offering distinct advantages. Non-adhesive liners, often made of textured rubber or plastic, are easy to install and reposition but may not be suitable for heavy items or angled shelves. Adhesive liners, conversely, provide a secure bond to the cabinet surface, preventing slippage and offering greater stability. However, they require precise installation and can be more challenging to remove without damaging the underlying surface.
Another consideration is the material of the shelf liner itself. Options include vinyl, rubber, cork, and even fabric-backed varieties. Vinyl liners are durable and easy to clean but may contain volatile organic compounds (VOCs). Rubber liners provide excellent grip and cushioning but may have a distinct odor. Cork liners offer a natural and eco-friendly alternative but may be more susceptible to moisture damage. When selecting a liner, consider its durability, ease of cleaning, resistance to moisture, and potential impact on indoor air quality.
Beyond the liner itself, gather the necessary tools. A measuring tape is essential for accurate measurements. A sharp utility knife or scissors will be needed for cutting the liner to size. A straight edge, such as a ruler or level, will ensure clean, precise cuts. A pencil or marker will be useful for marking cutting lines. A smoothing tool, such as a plastic scraper or credit card, will help to eliminate air bubbles and ensure a smooth, even application.
Measuring and Cutting the Shelf Liner
Accurate measurements are paramount to achieving a professional-looking installation. Careless measurements can result in wasted material, gaps between the liner and the cabinet walls, and an overall untidy appearance. Take the time to measure each shelf carefully and precisely. This process involves multiple measurements, confirming consistency and avoiding errors.
Begin by measuring the width and depth of each shelf or cabinet surface that will be lined. For recessed shelves, measure the interior dimensions, ensuring to account for any lips or edges that may reduce the usable area. For adjustable shelves, measure the shelf in its intended position to ensure an accurate fit. Record each measurement clearly, labeling it with the corresponding shelf or cabinet location. This prevents confusion during the cutting and installation phases.
Once the measurements are recorded, transfer them to the shelf liner. Lay the liner flat on a clean, stable surface, such as a cutting mat or workbench. Using a ruler or measuring tape, mark the outline of each shelf onto the liner, adding a small allowance (approximately 1/4 to 1/2 inch) to each dimension. This excess material will allow for minor adjustments during installation and prevent gaps along the edges. For adhesive liners, consider marking the cutting lines on the backing paper to avoid scratching or damaging the adhesive surface.
Using a sharp utility knife or scissors, carefully cut the shelf liner along the marked lines. Employ a straight edge to ensure clean, precise cuts. For thicker liners, a utility knife may provide a cleaner and more accurate cut than scissors. When using a utility knife, work in a well-lit area and exercise caution to avoid injury. Replace the blade frequently to maintain sharpness and prevent tearing the liner.
After cutting each piece, test its fit within the corresponding shelf or cabinet. Trim any excess material as needed until the liner fits snugly but not too tightly. Ensure that the cuts are straight and even, and that the liner conforms to the shape of the shelf or cabinet. This iterative process of cutting and fitting ensures a perfect fit and minimizes the risk of errors during the final installation.
Installing the Shelf Liner
The final stage involves installing the shelf liner into the cabinets. The process varies depending on whether the liner is adhesive or non-adhesive. Adhesive liners require a more meticulous approach to ensure proper alignment and adhesion, while non-adhesive liners offer greater flexibility and ease of adjustment.
For non-adhesive liners, simply place the cut liner onto the shelf or cabinet surface. Ensure that it is positioned correctly and that there are no gaps along the edges. If necessary, trim any excess material to achieve a snug fit. Non-adhesive liners are easy to reposition, allowing for adjustments as needed. However, they may shift or wrinkle over time, particularly with heavy items or frequent use.
For adhesive liners, begin by peeling back a small portion of the backing paper, exposing the adhesive surface. Align the liner with the edge of the shelf or cabinet, ensuring that it is positioned correctly. Gently press the exposed adhesive onto the surface, working from the edge towards the center. Use a smoothing tool, such as a plastic scraper or credit card, to eliminate air bubbles and ensure a smooth, even adhesion.
Gradually peel back more of the backing paper, continuing to press the liner onto the surface and using the smoothing tool to remove air bubbles. Work slowly and methodically, taking care to align the liner properly and avoid wrinkles or creases. If air bubbles persist, gently prick them with a pin or needle and smooth the area with the smoothing tool.
For corner shelves or cabinets with intricate shapes, consider making small cuts or slits in the liner to allow it to conform to the contours of the surface. Overlapping pieces may create a smoother finish on complex shapes. These overlaps should be carefully executed to minimize visible seams.
Once the shelf liner is fully installed, allow the adhesive to set for the recommended time, typically 24 to 48 hours. During this time, avoid placing heavy items on the lined surface to ensure proper adhesion. After the adhesive has set, the cabinets are ready for use. Regular cleaning with a damp cloth will help to maintain the appearance and functionality of the shelf liner.

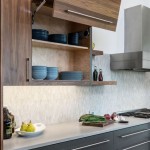
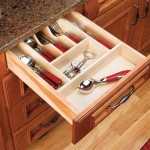
Simple Diy Drawer And Shelf Liners

How To Install Cabinet Cupboard Liner For Cupboards

Simple Diy Drawer And Shelf Liners

Simple Diy Drawer And Shelf Liners

Simple Diy Drawer And Shelf Liners

Simple Diy Drawer And Shelf Liners

Shelf Liners For Kitchen Cabinets Drawers A How To Guide Diy

Shelf Liners For Kitchen Cabinets Drawers A How To Guide Diy

How To Install Easy Liner Shelf Duck Brand

Simple Diy Drawer And Shelf Liners
Related Posts