How to Assemble a Kitchen Cabinet
Installing kitchen cabinets is a challenging task that necessitates meticulous preparation and execution. In this comprehensive guide, we will delve into the essential steps involved in assembling a kitchen cabinet, ensuring a successful and seamless installation process.
Step 1: Gather the Necessary Equipment
Before commencing the assembly process, ensure you have the following tools and materials readily available:
- Phillips head screwdriver
- Electric drill
- Drill bits
- Measuring tape
- Level
- Hammer
- Nails
- Wood filler
- Sandpaper
- Cabinet hardware (knobs, pulls)
Step 2: Prepare the Cabinet Parts
Unpack the cabinet components carefully and lay them out in a designated work area. Inspect each part for any damage or defects. If any issues are discovered, address them promptly before proceeding with the assembly.
Next, identify the cabinet's base, sides, back, and shelves. Ensure that all parts are oriented correctly by matching the notches and grooves on the respective pieces.
Step 3: Assemble the Cabinet Base
Begin assembling the cabinet base by attaching the sides to the front and back pieces. Use the pre-drilled holes and insert screws using the Phillips head screwdriver. Ensure that the screws are tightened snugly but not excessively.
Once the sides are secured, insert the base panel into the grooves provided at the bottom of the cabinet. Secure it with nails or screws, evenly spacing them along the base.
Step 4: Attach the Shelves
Align the shelves with the pre-drilled holes in the cabinet sides. Insert shelf pins or supports into the holes and carefully slide the shelf into place. Repeat this process for all remaining shelves.
Ensure that the shelves are level by using a spirit level. Adjust the shelf pins or supports as necessary until the shelves are perfectly aligned.
Step 5: Install the Doors and Drawers
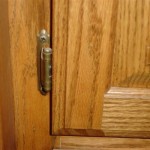
Hang the cabinet doors by inserting the hinges into the pre-drilled holes on the cabinet frame and door. Secure the hinges with screws. Adjust the hinges to ensure that the doors open and close smoothly.
Install the drawer slides into the cabinet sides. Insert the drawers into the slides and adjust them until they operate smoothly.
Step 6: Attach the Hardware
Once the cabinet is fully assembled, it's time to add the finishing touches by installing the hardware such as knobs and pulls. Mark the desired locations and drill pilot holes using the appropriate drill bit. Secure the hardware with screws.
Step 7: Finishing Touches
Inspect the cabinet for any gaps or irregularities. Fill any gaps with wood filler and sand until smooth. Apply a fresh coat of paint or stain to match the existing cabinetry.
Finally, carefully lift the assembled cabinet into place and secure it to the wall or floor brackets for added stability.

Here S How Install New Upper Kitchen Cabinets

How To Install Kitchen Cabinets The Home Depot

How To Build Kitchen Cabinets Start Finish

How To Install Kitchen Cabinets Diy Family Handyman

How To Install Upper Cabinets Like A Pro Cabinetselect Com

How To Install Kitchen Cabinets Diy Family Handyman

Installing Kitchen Cabinets Momplex Vanilla Ana White

How To Build Kitchen Cabinets Install Drawer Slides

How To Install Kitchen Cabinets And Remove Them Remodel Pt 1 Crafted Work

Diy Kitchen Cabinets Made From Only Plywood
Related Posts


