Redoing Flat Kitchen Cabinets: A Step-by-Step Guide
Flat kitchen cabinets, with their clean lines and minimalist aesthetic, can instantly elevate any kitchen decor. If your existing flat kitchen cabinets are looking a bit worn or you're simply ready for a change, redoing them is a great way to refresh the look of your kitchen without the expense of a complete remodel.
Here's a comprehensive step-by-step guide to help you redo your flat kitchen cabinets like a pro:
Step 1: Gather Your Materials and Tools
Before you begin, gather the necessary materials and tools. You'll need:
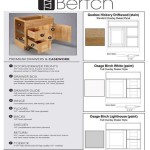
- New cabinet doors and drawer fronts
- New hardware (handles and knobs)
- Wood filler
- Paintable caulk
- Paint (optional)
- Paintbrush or roller
- Screwdriver
- Drill
- Clamps
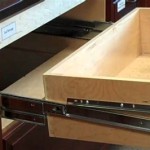
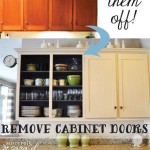
Step 2: Remove Existing Cabinets Doors and Drawer Fronts
Start by removing the doors and drawer fronts from the cabinets. Use a screwdriver to remove the hinges and drawer slides. Once the doors and drawer fronts are removed, label them so you know which ones belong to which cabinets.
Step 3: Prepare the Cabinets for New Fronts
Inspect the cabinets for any damage or imperfections. Fill any holes or dents with wood filler and sand them smooth. Caulk around the edges of the cabinets to create a watertight seal.
Step 4: Install New Cabinet Doors and Drawer Fronts
Align the new cabinet doors and drawer fronts with the cabinets. Use clamps to hold them in place while you drill pilot holes for the screws. Secure the doors and drawer fronts with screws.
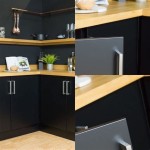
Step 5: Paint the Cabinets (Optional)
If you wish to change the color of your cabinets, now is the time to paint them. Apply a coat of paint using a brush or roller and allow it to dry completely. Once the paint is dry, apply a second coat for full coverage.
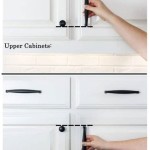
Step 6: Install New Hardware
Choose new hardware that complements the style of your cabinets and kitchen. Mark the placement of the hardware on the doors and drawer fronts, then drill pilot holes and secure the hardware with screws.
Step 7: Make Minor Adjustments
Once the new cabinet doors, drawer fronts, and hardware are installed, make any necessary minor adjustments. Check that the doors and drawers open and close smoothly and that the hardware is securely attached.
Tips for Success:
- Take your time and measure carefully to ensure that the new cabinet doors and drawer fronts fit perfectly.
- Use a high-quality paint that is specifically designed for cabinets.
- Allow the paint to dry completely before using the cabinets.
- If you're not comfortable doing the work yourself, consider hiring a professional cabinetmaker to redo your kitchen cabinets.

Kitchen Diy Shaker Style Cabinets Cherished Bliss

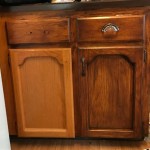
Can You Reface Kitchen Cabinets With Flat Panel Doors Redo

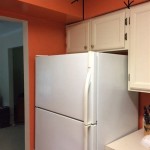
How Can I Redo My Rounded Edge Flat Cabinet In Style Hometalk

How To Paint Kitchen Cabinets In 7 Simple Steps

21 Diy Affordable Ways To Redo Kitchen Cabinets Extra Space Storage

How Can I Redo My Rounded Edge Flat Cabinet In Style Kitchen Cabinets Decor Remodel Renovation

21 Diy Affordable Ways To Redo Kitchen Cabinets Extra Space Storage

25 Easy Ways To Update Kitchen Cabinets

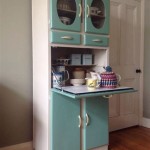
Transform Old Flat Cabinet Doors Hometalk

Kitchen Diy Shaker Style Cabinets Cherished Bliss
Related Posts