How To Redo Kitchen Cabinets With Paint
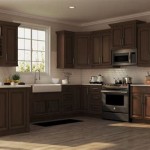
Revamping kitchen cabinets with a fresh coat of paint is a cost-effective and impactful home improvement project. Instead of replacing cabinets, painting offers a relatively straightforward way to modernize the kitchen's appearance. This process involves careful preparation, selection of appropriate materials, and precise application techniques. A well-executed paint job can significantly extend the life of existing cabinets and enhance the overall aesthetic of the kitchen space.
The success of this project hinges on meticulous planning and execution. Rushing through any stage, from preparation to the final topcoat, can compromise the finished result. This article will provide a comprehensive guide to redoing kitchen cabinets with paint, covering key steps and offering practical advice for achieving a professional-looking outcome.
Planning and Preparation: The Foundation of a Flawless Finish
Before lifting a paintbrush, a thorough assessment of the existing cabinets is crucial. This includes identifying the type of cabinet material (wood, laminate, metal) as well as any existing damage, such as scratches, dents, or peeling paint. The nature of the cabinet material will dictate the appropriate primers and paints to be used for optimal adhesion and durability. Identifying and addressing any existing damage will ensure a smooth and even surface for painting.
Gathering the required materials and tools is the next essential step. A shopping list should include: degreaser or TSP (trisodium phosphate) for cleaning, painter’s tape, drop cloths, a variety of sandpaper grits (from coarse to fine), wood filler (if needed for repairs), primer, paint, paintbrushes (both angled and flat), rollers (foam and microfiber), paint trays, and possibly a paint sprayer. The selection of high-quality tools and materials will directly impact the quality and longevity of the finished paint job.
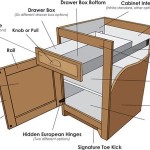
Protecting the surrounding work area is vital to prevent paint splatters and damage. Drop cloths should be placed on the floor to cover the entire kitchen area. All hardware, including knobs, pulls, and hinges, must be removed from the cabinets. These items can be cleaned and reused, or replaced with new hardware for an updated look. If the hinges are to be reused, consider labeling them to ensure they are reinstalled in their original positions. Painter's tape should be used to mask off any areas that should not be painted, such as walls, countertops, and the inside of cabinet frames.
Cleaning the cabinets thoroughly is a critical step that ensures proper paint adhesion. Use a degreaser or TSP solution to remove any grease, dirt, or grime that has accumulated on the cabinet surfaces. For cabinets with a particularly heavy buildup of grease, multiple cleaning cycles may be necessary. After cleaning, rinse the cabinets thoroughly with clean water and allow them to dry completely. This cleaning process removes contaminants that would otherwise prevent the primer and paint from bonding effectively to the cabinet surface.
Sanding the cabinets is essential for creating a suitable surface for primer and paint adhesion. The goal of sanding is not to completely remove the existing finish, but to roughen the surface slightly to provide "tooth" for the primer to grip. Start with a coarser grit sandpaper (around 120-grit) to address any imperfections or smooth out any rough areas. Then, switch to a finer grit sandpaper (around 220-grit) to refine the surface and remove any sanding marks. After sanding, thoroughly wipe down the cabinets with a tack cloth to remove any sanding dust. This ensures a clean and smooth surface for priming.
Repairing any damage to the cabinets before priming is important for achieving a flawless finish. Use wood filler to fill any scratches, dents, or holes in the cabinet surfaces. Allow the wood filler to dry completely according to the manufacturer's instructions, and then sand it smooth with fine-grit sandpaper. Wipe away any sanding dust with a tack cloth. Addressing these imperfections before priming will prevent them from being visible through the final paint finish.
Priming the cabinets is a crucial step that should not be skipped. Primer seals the cabinet surface, provides a uniform base for the paint, and improves paint adhesion. Choose a primer that is compatible with both the cabinet material and the type of paint being used. Apply a thin, even coat of primer to all cabinet surfaces, using a brush for corners and edges and a roller for larger areas. Allow the primer to dry completely according to the manufacturer’s instructions. After the primer is dry, lightly sand it with fine-grit sandpaper to smooth out any imperfections or brushstrokes. Wipe away any sanding dust with a tack cloth. A properly applied primer coat is the key to a durable and long-lasting paint finish.
Selecting Paint and Applying the Finish Coats
Choosing the right paint is essential for achieving a durable and aesthetically pleasing result. For kitchen cabinets, consider using alkyd or acrylic enamel paints. Alkyd paints offer excellent durability and a smooth, hard finish, but they can be more difficult to clean up and may have a stronger odor. Acrylic enamel paints are easier to clean up, have lower VOCs (volatile organic compounds), and offer good durability. Both types of paint are available in a variety of sheens, from matte to high gloss. The choice of sheen depends on personal preference and the desired look for the kitchen. A semi-gloss or gloss finish is generally recommended for kitchen cabinets, as they are easier to clean and more resistant to moisture.
Before applying the first coat of paint, stir the paint thoroughly to ensure that the pigments are evenly distributed. Use a brush to paint the corners and edges of the cabinets, and then use a roller to paint the larger surfaces. Apply the paint in thin, even coats, avoiding drips and runs. Allow the first coat of paint to dry completely according to the manufacturer's instructions. This is important because applying a second coat before the first coat is dry leads to the paint peeling off. Lightly sand the first coat of paint with fine-grit sandpaper to smooth out any imperfections or brushstrokes. Wipe away any sanding dust with a tack cloth.
Apply a second coat of paint using the same techniques as the first coat. Again, apply the paint in thin, even coats, avoiding drips and runs. Allow the second coat of paint to dry completely according to the manufacturer's instructions. For a more durable finish, a third coat of paint can be applied. However, two coats are typically sufficient for most kitchen cabinet painting projects.
If using a paint sprayer, thin the paint according to the manufacturer’s instructions. This is important for achieving a smooth and even finish. Apply the paint in thin, even coats, holding the sprayer at a consistent distance from the cabinet surfaces. Overlapping each pass slightly is critical to prevent streaks or uneven coverage. Practice using the paint sprayer on a piece of cardboard or scrap wood before painting the cabinets to get a feel for the spray pattern and paint flow. Paint sprayers can provide a very smooth and professional-looking finish, but they require practice and careful attention to detail.
Reassembly and Final Touches
Once the paint is completely dry, the hardware can be reinstalled. If the original hardware is being reused, clean it thoroughly before reattaching it to the cabinets. If new hardware is being installed, ensure that it is properly aligned and securely fastened. Reinstalling the cabinet doors and drawers with care to avoid scratching or damaging the new paint finish. This is important as scratches can be really visible if the color beneath is a contrasting color. Check the alignment of the doors and drawers and adjust the hinges as needed.
Carefully remove the painter’s tape, pulling it away from the painted surface at a 45-degree angle. This will help prevent the paint from peeling or chipping. If any paint has seeped under the tape, use a utility knife to score along the edge of the tape before removing it. This will create a clean line and prevent any damage to the surrounding surfaces.
Inspect the painted cabinets for any imperfections, such as drips, runs, or missed spots. Touch up any imperfections with a small brush and allow the touch-up paint to dry completely. Clean the painted cabinets with a mild soap and water solution. Avoid using harsh chemicals or abrasive cleaners, as these can damage the paint finish.
Allow the paint to cure completely before using the kitchen cabinets extensively. Curing is the process by which the paint hardens and becomes more durable. The curing time can vary depending on the type of paint used, but it typically takes several days or weeks. During the curing period, avoid placing heavy objects on the cabinets or subjecting them to excessive moisture. Proper curing will ensure a long-lasting and durable paint finish.
By following these steps, redoing kitchen cabinets with paint can transform the look of the kitchen without the expense of a full remodel. Attention to detail and careful execution are key to achieving a professional-looking result that will enhance the beauty and value of the home.

Avoid These Mistakes How To Paint Cabinets That Are Already Painted Grace In My Space

15 Diy Kitchen Cabinet Makeovers Before After Photos Of Cabinets

Painted Kitchen Cabinet Makeover Tips Perfecting Places

Diy Painted Oak Kitchen Cabinets Makeover

Painting Your Kitchen Cabinets White

How To Paint Kitchen Cabinets Budget Friendly Makeover

How To Paint Kitchen Cabinets A Step By Guide Confessions Of Serial Do It Yourselfer

Cabinet Refinishing Guide

Painting Your Kitchen Cabinets White

How To Paint Kitchen Cabinets Budget Friendly Makeover
Related Posts

