How To Redo Laminate Kitchen Cabinets
Laminate kitchen cabinets, a common feature in many homes, offer a cost-effective and durable surface. However, over time, they can become outdated, worn, or simply no longer align with the homeowner's aesthetic preferences. Redoing laminate cabinets presents a viable alternative to complete replacement, allowing for a fresh, updated look without the significant expense and disruption of a full renovation. This process involves careful preparation, appropriate material selection, and meticulous execution to achieve a professional and lasting result. This article will detail the necessary steps to successfully redo laminate kitchen cabinets.
Before embarking on the project, a comprehensive assessment of the existing cabinets is crucial. This evaluation determines the viability of redoing the cabinets versus replacing them. Look for signs of significant damage, such as water damage, warping, or extensive delamination of the laminate. Minor scratches, dents, or discoloration are generally manageable, but severe structural issues may necessitate replacement. A thorough cleaning is also essential at this stage to remove grease, grime, and any residue that could interfere with the adhesion of primer and paint.
Gather all necessary materials and tools before beginning the project. This proactive approach minimizes delays and ensures a smooth workflow. Essential supplies include: sandpaper (various grits, typically starting with 120-grit for initial scuffing and moving to finer grits like 220-grit for smoothing), a high-quality bonding primer specifically designed for laminate surfaces, cabinet paint (either latex or oil-based, chosen for its durability and finish), paintbrushes, paint rollers (foam rollers are often preferred for a smooth finish), painter's tape, cleaning supplies (degreaser, mild soap, and water), a screwdriver or drill for removing hardware, drop cloths or plastic sheeting to protect surrounding areas, and safety glasses and gloves.
Key Point 1: Preparing the Laminate Surface
Proper preparation is paramount for achieving a successful paint job on laminate cabinets. Laminate, by its nature, is a non-porous surface, making it difficult for paint to adhere properly. Therefore, the surface must be adequately prepared to create a mechanical bond that will allow the paint to adhere effectively and prevent chipping or peeling in the future. This preparation involves thorough cleaning, scuff sanding, and the application of a bonding primer.
Begin by removing all cabinet doors and drawers. Take the time to label them with corresponding numbers or letters on the cabinet frame. This step ensures that each component is reinstalled in its original position, maintaining alignment and functionality. Remove all hardware, including knobs, pulls, and hinges. Store these items in a safe place or consider replacing them with new hardware for an updated look.
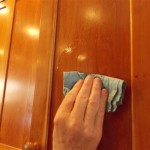
Clean the cabinet doors, drawers, and frames meticulously. Use a degreasing cleaner to remove any grease or oil buildup, particularly around handles and frequently touched areas. Follow with a mild soap and water solution to remove any remaining residue. Rinse thoroughly with clean water and allow the surfaces to dry completely before proceeding to the next step. Drying time is critical; it may be necessary to wait overnight to ensure complete dryness, especially in humid environments.
Scuff sanding is crucial for creating a surface that the primer can grip. Use 120-grit sandpaper to lightly sand the entire laminate surface. The goal is not to remove the laminate but to create a slightly rough texture that will allow the primer to adhere effectively. Apply even pressure and avoid excessive sanding that could damage the laminate. After sanding, wipe down the surfaces thoroughly with a tack cloth to remove all sanding dust. Dust is the enemy of a smooth paint finish, so this step is essential.
Apply painter's tape to protect any areas that should not be painted, such as the inside edges of the cabinet frames or adjacent walls. Use a high-quality painter's tape that provides a clean, crisp line and minimizes the risk of paint bleeding. Press the tape firmly along the edges to ensure a tight seal.
Apply a bonding primer specifically designed for laminate surfaces. These primers are formulated to adhere to non-porous surfaces and provide a solid base for the paint. Apply the primer in thin, even coats using a high-quality brush or foam roller. Avoid applying the primer too thickly, as this can lead to drips and uneven coverage. Allow the primer to dry completely according to the manufacturer's instructions. This drying time is crucial for proper adhesion. Some primers may require multiple coats for optimal performance.
Key Point 2: Painting the Laminate Cabinets
Once the primer has dried completely, the next step is to apply the paint. The choice of paint is crucial for the durability and appearance of the finished cabinets. Both latex and oil-based paints can be used, each with its own advantages and disadvantages. Latex paints are generally easier to work with, dry faster, and are easier to clean up. They also have lower VOC (volatile organic compound) emissions, making them a more environmentally friendly choice. Oil-based paints, on the other hand, tend to be more durable and provide a harder, more resistant finish. However, they require more skill to apply, take longer to dry, and require mineral spirits for cleanup.
Apply the paint in thin, even coats using a high-quality brush or foam roller. Avoid applying the paint too thickly, as this can lead to drips, runs, and uneven coverage. Working in sections, apply the paint in smooth, overlapping strokes, maintaining a wet edge to prevent lap marks. Allow each coat to dry completely according to the manufacturer's instructions before applying the next coat. Multiple thin coats are always preferable to one thick coat.
Between coats, lightly sand the painted surfaces with 220-grit sandpaper to remove any imperfections, such as dust particles or brushstrokes. Wipe down the surfaces thoroughly with a tack cloth to remove all sanding dust before applying the next coat of paint. This step will help create a smooth, professional-looking finish.
Consider using a paint sprayer for a smoother, more even finish. A paint sprayer can provide a professional-quality finish with minimal brushstrokes or roller marks. However, using a paint sprayer requires practice and careful preparation to prevent runs, drips, and overspray. If using a paint sprayer, be sure to follow the manufacturer's instructions carefully and wear appropriate safety gear, including a respirator.
Apply at least two coats of paint for optimal coverage and durability. Depending on the color and type of paint used, additional coats may be necessary to achieve the desired level of coverage. Allow the final coat of paint to dry completely for at least 24 hours before handling the cabinets or reattaching hardware.
Key Point 3: Reassembling and Finishing Touches
After the paint has completely dried, the final step is to reassemble the cabinets and add the finishing touches. This involves reattaching the hardware, reinstalling the doors and drawers, and making any necessary adjustments to ensure proper alignment and functionality.
Carefully remove the painter's tape, pulling it away at a 45-degree angle to avoid chipping the paint. If any paint has bled under the tape, use a razor blade or utility knife to carefully score along the edge of the tape before removing it. This will help prevent the paint from chipping or peeling.
Reattach the hardware, including knobs, pulls, and hinges. If replacing the hardware, be sure to use screws that are the correct length to avoid damaging the cabinets. Tighten the screws securely, but avoid overtightening, which could strip the screw holes. If the screw holes are stripped, use wood glue and toothpicks to fill the holes before reinserting the screws.
Reinstall the cabinet doors and drawers, ensuring that they are properly aligned and functioning smoothly. Adjust the hinges as needed to ensure that the doors hang straight and close properly. Check the alignment of the drawers and adjust the drawer slides if necessary to ensure that they slide in and out smoothly.
Apply a clear topcoat for added protection and durability. A clear topcoat can help protect the painted finish from scratches, stains, and other types of wear and tear. Choose a topcoat that is compatible with the type of paint used and apply it according to the manufacturer's instructions. Allow the topcoat to dry completely before using the cabinets.
Clean up any spills or splatters and dispose of all painting supplies properly. Store leftover paint and primer in airtight containers for future use. Inspect the finished cabinets carefully and touch up any areas that require additional attention. With proper preparation and execution, redoing laminate kitchen cabinets can be a cost-effective and rewarding way to update the look of the kitchen.
Consider adding new backsplashes or countertop to go with the newly refinished cabinet. A newly designed kitchen can bring a new life to the home and increase your property values.

How To Paint Laminate Kitchen Cabinets Perfect Finish Tips

How To Paint Laminate Cabinets The Interiors Addict

How To Add Trim And Paint Your Laminate Cabinets

How To Paint Laminate Kitchen Cabinets Perfect Finish Tips

How To Paint Laminate Cabinets Everything You Need Know

Painted Laminate Cupboards Kitchen Painting Cabinets

A Year In Review Of How I Painted My Laminate Cabinets With Two Methods

Painting Laminate Cupboards Crowies Paints

How To Paint Kitchen Cabinets Like The Pros

How To Update Dated Laminate Cabinets The Handyman S Daughter
Related Posts

