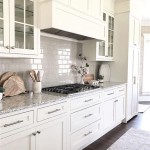
Reviving Your Kitchen: A Comprehensive Guide to Refacing Painted Cabinets
Transforming the heart of your home without the hefty expense of a complete remodel is now within reach. Kitchen cabinet refacing offers an economical and practical solution to breathe new life into outdated cabinetry. While refacing can be undertaken by professionals, it's also a project that DIY enthusiasts can tackle with the right preparation and materials.
Here's a comprehensive guide to refacing painted kitchen cabinets, empowering you to achieve a stunning update with meticulous precision:
1. Preparation: The Key to a Seamless Refacing
a) Remove Doors and Hardware: Carefully remove all cabinet doors and drawers, along with their hardware. Label each piece meticulously to ensure effortless reassembly during the final stage.
b) Clean and Degrease Surfaces: Using a mild detergent and degreaser, thoroughly clean all cabinet surfaces that will be refaced. This step ensures optimal adhesion of the new veneer.
c) Repair Imperfections: Inspect cabinets for any blemishes, scratches, or dents. Repair these imperfections using wood filler and sandpaper to create a smooth and even surface.
2. Applying the New Veneer: Precision and Technique
a) Choose the Right Veneer: Select a veneer that complements your kitchen's décor and personal style. Options include wood veneers, laminate, and thermofoil.
b) Cut the Veneer: Measure and cut the veneer to the exact dimensions of each cabinet surface. Use a sharp utility knife and a straight edge for precise cuts.
c) Apply Contact Cement: Evenly apply contact cement to both the cabinet surface and the backside of the veneer. Allow the cement to set according to the manufacturer's instructions.
d) Apply the Veneer: Carefully align the veneer with the cabinet surface and press it firmly into place. Use a roller or a flat block to ensure a secure bond.
3. Refinishing the Doors and Drawers: A Touch of Elegance
a) Clean and Repair: Clean the doors and drawers with a mild detergent and repair any imperfections using wood filler and sandpaper.
b) Paint or Stain: Refresh the doors and drawers by painting or staining them in your desired color or finish. Allow ample drying time.
c) Apply Protective Finish: Protect the painted or stained surfaces with a polyurethane or lacquer finish. This step enhances durability and resistance to wear and tear.
4. Reassembly: Completing the Transformation
a) Reattach the Hardware: Reinstall the hardware, ensuring it is securely fastened to the doors and drawers.
b) Hang the Doors and Drawers: Carefully hang the doors and drawers back into their respective positions. Adjust the hinges and drawer slides as necessary to ensure smooth operation.
c) Install the Trim: Install cabinet trim, such as crown molding or baseboards, to complete the refaced look and enhance the overall aesthetics of your kitchen.
5. Enjoying Your Refaced Kitchen: A Renewed Space
Congratulations on successfully refacing your painted kitchen cabinets! With meticulous preparation and precision, you have now transformed the heart of your home into a rejuvenated and inviting space. Cherish the newfound aesthetic appeal and functionality while enjoying the cost-effective benefits of cabinet refacing.

Cabinet Refacing Process And Cost Compared To Painting

The Right Way To Paint Your Kitchen Cabinets And Save Factory Finish Guaranteed Emily Henderson

How To Refinish Cabinets Like A Pro

Cabinet Refacing Vs Painting

Painted Furniture Ideas Diy Refacing Kitchen Cabinets

Kitchen Cabinet Refacing Options And Tips

How To Reface Cabinets Diy Guide Replace Cabinet Doors Refacing Kitchen Makeover Replacing

Refacing Kitchen Cabinets Maison De Pax

Cabinet Refacing Vs Painting Which Is Right For You

How Do I Prepare My Kitchen For A Cabinet Refacing Project
Related Posts


