A Comprehensive Guide to Refinishing Kitchen Cabinets White
Revitalizing your kitchen's aesthetic with white cabinets is a project that not only enhances the ambiance but also adds value to your home. If you're looking to tackle this DIY endeavor, this comprehensive guide will walk you through the essential steps, ensuring a stunning and durable result.
Step 1: Preparation and Materials Gathering
Before delving into the refinishing process, meticulous preparation is crucial. Begin by emptying the cabinets and thoroughly cleaning their surfaces with a degreaser. Next, remove cabinet doors and hardware, labeling each piece for easy reassembly. Gather the necessary materials, including sandpaper, primer, paint, brushes, and rollers.
Step 2: Sanding and Repairing
Sanding removes the existing finish, creating a smooth canvas for the new paint. Use 120-grit sandpaper for initial sanding, advancing to finer grits (150-220) for a polished surface. If you encounter any imperfections, such as cracks or dents, use wood filler to repair them. Once filled, allow the filler to dry and sand the area flush with the surrounding surface.
Step 3: Priming the Surfaces
Primer acts as a bridge between the sanded surface and the paint, ensuring adhesion. Apply a thin, even coat of white primer using a brush or roller. Pay close attention to the edges and corners. Allow the primer to dry completely before proceeding to the next step.
Step 4: Painting the Cabinets
Now comes the transformative part - painting your cabinets white. Use high-quality paint specifically designed for cabinets. Apply two to three thin coats, allowing each coat to dry thoroughly before applying the next. For a flawless finish, use a brush for the edges and corners, and a roller for the larger surfaces.
Step 5: Distressing (Optional)
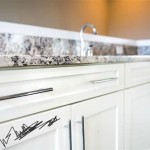
If you desire a distressed or antique look, you can add distressing marks to the painted surface before the final clear coat. Use a fine-grit sandpaper or a sanding block to lightly sand the edges and raised areas, creating a weathered effect.
Step 6: Protecting with Clear Coat
To safeguard your newly refinished cabinets, apply a clear coat. This adds durability and protection against wear and tear. Use a brush or roller to apply two to three thin coats of clear polyurethane, allowing each coat to dry completely.
Step 7: Reassembling the Cabinets
Once the clear coat is dry, it's time to reassemble your cabinets. Replace the cabinet doors and hardware, ensuring a snug fit. Double-check all screws and hinges for proper alignment and functionality.
Step 8: Enjoy Your Transformed Kitchen!
With your kitchen cabinets now adorned in a pristine white finish, you can appreciate the transformation and enhanced aesthetic of your cooking and gathering space. The newly refinished cabinets will not only elevate the ambiance but also add a touch of elegance and sophistication to your home.

How To Prep And Paint Kitchen Cabinets Lowe S

How To Paint Your Kitchen Cabinets White Colors And Craft

How To Paint Kitchen Cabinets White In 5 Days For 150 The Nutritionist Reviews

Painting Your Kitchen Cabinets White

Painting Dark Kitchen Cabinets White My Weathered Home

How To Paint Kitchen Cabinets White Let S Furniture

Pros And Cons Of Painting Kitchen Cabinets White De Manor Farm By Laura Janning

Update On Our Diy White Painted Kitchen Cabinets 2 Years Later

Painting Your Kitchen Cabinets White

Painting Oak Cabinets White Best Diy Tutorial 2024
Related Posts


