How To Refinish Kitchen Cabinets With Milk Paint
Giving your kitchen cabinets a fresh look with milk paint can transform the entire space. Milk paint is a natural, eco-friendly option that provides a charming, rustic finish. It's known for its versatility, allowing you to achieve a range of styles, from distressed and farmhouse to modern and sleek. This guide will walk you through the process of refinishing kitchen cabinets with milk paint, covering essential steps and considerations.
Preparing the Cabinets
Proper preparation is crucial for a successful milk paint application. This involves cleaning, sanding, and priming the cabinets, ensuring a smooth, even surface for the paint to adhere to. Begin by removing all hardware, including knobs, handles, and hinges. Clean the cabinets thoroughly with a degreaser to remove any grease, oil, or residue. Allow the cabinets to dry completely before proceeding.
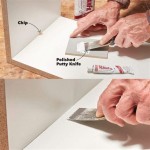
Sand the cabinets lightly using fine-grit sandpaper (120-180 grit) to remove any imperfections and create a slightly rough surface for the paint to grip. Pay attention to corners and edges, ensuring they are smooth. After sanding, wipe down the cabinets with a damp cloth to remove dust. If the cabinets have a high-gloss finish, a deglossing solution can help the paint adhere better. Allow the cabinets to dry completely before applying primer.
Prime the cabinets with a good quality bonding primer that is compatible with milk paint. This helps to seal the surface, preventing the wood from absorbing the paint and creating an uneven finish. Apply the primer evenly using a brush or roller, ensuring all areas are covered. Allow the primer to dry thoroughly before moving on to the next step.
Applying Milk Paint
Milk paint comes in a powdered form and needs to be mixed with water before use. Follow the manufacturer's instructions for mixing ratios and consistency. Typically, you'll want a paint consistency similar to heavy cream. Apply the milk paint using a brush or roller, working in thin, even coats. Allow each coat to dry completely before applying the next. For a more rustic look, consider using a dry brush technique, which involves applying paint with a brush that has been partially dried. This creates a textured, uneven finish.
Milk paint dries quickly, so it's important to work in small sections and avoid overworking the paint. If you notice any streaks or brush marks, smooth them out with a damp cloth before the paint dries completely. Milk paint can also be tinted with pigments to achieve desired colors.
Finishing and Protecting the Cabinets
Once you've achieved the desired number of coats, let the paint cure for at least 24 hours before applying a sealant. Milk paint is porous and susceptible to water damage, so sealing is essential for protection and durability. There are various sealant options available, including wax, polyacrylic, and polyurethane. Choose a sealant that suits your needs and desired finish.
For a natural, rustic look, wax is a good choice. It provides a protective layer while maintaining the character of the milk paint. For a more durable and glossy finish, polyacrylic or polyurethane are preferred. Apply the sealant evenly using a brush or roller, following the manufacturer's instructions. Allow the sealant to dry completely before reattaching the hardware.
Additional Tips
Here are some additional tips for successful milk paint refinishing: * Practice on scrap wood before applying paint to the cabinets. * Consider using a respirator and gloves while working with milk paint and sealant. * Work in a well-ventilated area. * Clean up spills immediately with soap and water. * Store milk paint and sealant properly to prevent them from drying out.
With proper preparation, application, and finishing, milk paint can provide a charming and unique update to your kitchen cabinets. Its natural qualities and versatility allow for endless creative possibilities, making it a popular choice for homeowners seeking a sustainable and aesthetically pleasing finish.

Milk Paint Kitchen Cabinets General Finishes

How To Paint Kitchen Cabinets With General Finishes Milk

Diy Painting Our Kitchen Cabinets With White Milk Paint Catz In The

Diy Painting Our Kitchen Cabinets With White Milk Paint Catz In The

An Honest Review Of My Milk Paint Kitchen Cabinets One Year Later

Milk Paint Kitchen Cabinets General Finishes

Painting Kitchen Cabinets With General Finishes Milk Paint

Painting Your Kitchen Cabinets White

A Review Of My Milk Paint Cabinets 6 Month Follow Up

Painting Kitchen Cabinets With General Finishes Milk Paint
Related Posts


