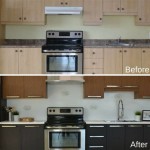
How To Refinish Painted Kitchen Cabinets
Refinishing painted kitchen cabinets offers a cost-effective way to update a kitchen's appearance without the expense of full replacement. This process involves removing the existing finish, preparing the surface, and applying a new coat of paint. While seemingly straightforward, successful refinishing requires careful planning and execution.
The initial step involves assessing the current condition of the cabinets. Inspect for any damage, such as deep scratches, water damage, or loose hardware. Minor imperfections can often be addressed during the preparation phase, but significant structural issues may necessitate professional repair or cabinet replacement.
Next, gather the necessary supplies and tools. These typically include sandpaper in varying grits, a deglosser or liquid sandpaper, painter's tape, drop cloths, screwdrivers, a putty knife, wood filler, primer designed for adhesion to existing finishes, high-quality paint suitable for cabinets (typically semi-gloss or satin), paintbrushes, and rollers designed for smooth finishes. Selecting appropriate tools and materials ensures professional-looking results.
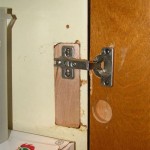
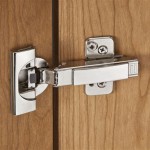
Preparation is crucial for a durable and attractive finish. Begin by removing all hardware, including knobs, pulls, hinges, and any decorative elements. Label and store hardware carefully for reinstallation. Thoroughly clean the cabinet surfaces with a degreaser to remove grease, grime, and cooking residue. This ensures proper adhesion of the new paint.
Once clean and dry, the cabinets require surface preparation. If the existing finish is glossy, it needs to be deglossed. This can be achieved with a liquid sandpaper product or by lightly sanding with fine-grit sandpaper. The objective is not to remove the existing paint entirely, but to create a slightly rough surface to which the primer and paint can adhere effectively. For cabinets with a non-glossy finish, a thorough cleaning may be sufficient.
Fill any dents, scratches, or imperfections with wood filler, applying it with a putty knife. Allow the filler to dry completely according to the manufacturer's instructions. Once dry, sand the filled areas smooth, blending them seamlessly with the surrounding surface. This attention to detail contributes significantly to the final appearance.
Protecting surrounding areas is essential. Cover countertops, appliances, and flooring with drop cloths. Use painter's tape to mask off areas that should not be painted, such as walls, backsplashes, and adjacent cabinetry. Careful masking minimizes cleanup and ensures clean lines.
Applying a primer specifically designed for adhesion to painted surfaces is a critical step. Primer improves paint adhesion, durability, and color consistency. Apply the primer evenly, using a brush or roller, ensuring complete coverage. Allow the primer to dry thoroughly according to the manufacturer's instructions before proceeding with the topcoat.
Choosing the right paint is essential for longevity and aesthetics. High-quality paints formulated specifically for cabinets provide superior durability and resistance to moisture and wear. Semi-gloss and satin finishes are popular choices for kitchen cabinets, offering a balance of durability and cleanability. Select a color that complements the kitchen's overall design.
Apply the paint in thin, even coats, using a high-quality brush or roller designed for smooth finishes. Multiple thin coats provide better coverage and durability than one thick coat. Allow each coat to dry completely before applying the next. Maintain a consistent application technique to minimize brush marks and ensure a uniform finish.
Once the final coat of paint is thoroughly dry, lightly sand the cabinets with very fine-grit sandpaper to create a smooth, even surface. This step is optional but can enhance the final appearance, especially for high-gloss finishes. Care should be taken not to sand through the paint layers.
Carefully remove the painter's tape once the final coat of paint is completely dry. This prevents the tape from pulling up any freshly dried paint. Pull the tape slowly and at a consistent angle to ensure clean lines.
Reinstall the hardware, ensuring it is aligned correctly and securely fastened. This final touch completes the refinishing process and restores the cabinets to full functionality.
Proper ventilation during the entire process is crucial. Open windows and doors to allow fresh air circulation and to dissipate paint fumes. Consider using a respirator or mask, especially if working with oil-based paints or primers.
Cleaning up promptly after each stage of the process is important. Clean brushes and rollers thoroughly according to the paint manufacturer's instructions. Dispose of used paint and supplies responsibly according to local regulations.

How To Refinish Cabinets Like A Pro

Cabinet Refinishing Guide

Cabinet Refinishing An 8 Step Guide For Pro Painters Ppc

How To Paint Kitchen Cabinets Like The Pros

Should I Paint Or Refinish My Kitchen Cabinets

The Fast Affordable Way To Upgrade Your Kitchen Cabinet Refinishing

How To Refinish Kitchen Cabinets Diy

Avoid These Mistakes How To Paint Cabinets That Are Already Painted Grace In My Space

How To Paint Kitchen Cabinets Like The Pros

Refinish Kitchen Cabinets With Kilz Restoration Primer
Related Posts


