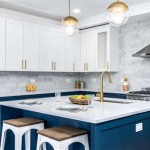
How to Remove Corner Kitchen Cabinet Doors
Corner kitchen cabinets, particularly those configured as lazy Susans or blind corner units, present unique challenges when maintenance or replacement of the doors is required. The method for removing these doors differs significantly from that used for standard cabinet doors due to the specialized hardware and often intricate door mechanics employed. A clear understanding of these mechanisms is critical to prevent damage to the cabinets, doors, or surrounding hardware during the removal process. This article provides a detailed guide on how to safely and effectively remove corner kitchen cabinet doors.
Before initiating the removal process, it is essential to gather the necessary tools and materials. The following items are typically required:
- Screwdriver set (including Phillips head and flathead screwdrivers of various sizes)
- Pencil or marker
- Painter's tape
- Drill (optional, for stripped screws)
- Putty knife or similar thin, flat tool
- Step stool or ladder (if the cabinet is high)
- Work gloves
- Safety glasses
- Container or bag for storing screws and hardware
Ensuring these tools are readily available will streamline the process and minimize potential delays.
Identifying the Door Type and Hardware
The first and arguably most crucial step is to accurately identify the type of corner cabinet door and the hardware used to attach it. Corner cabinets typically fall into one of several categories, each with unique door configurations:
- Lazy Susan Cabinets: These cabinets feature a rotating shelf or shelves inside, and the doors are often hinged together or connected to a central support that rotates with the shelves. The hinges may be concealed or exposed.
- Blind Corner Cabinets: These cabinets extend deep into the corner, with a portion of the cabinet space inaccessible from the main opening. Doors for blind corner cabinets can be full-sized or use a hinged folding mechanism for improved access.
- L-Shaped Cabinets: Simple L-shaped corner cabinets may have a single door or two doors that meet at the corner. The hinges for these doors are generally standard but require careful adjustment to ensure proper alignment.
Once the cabinet type is identified, examine the door hinges and any associated hardware. Common hinge types include:
- European Hinges (Concealed Hinges): These hinges are hidden when the door is closed and are typically adjustable, allowing for precise alignment. They usually attach to the cabinet frame and door with screws to plates or cups.
- Face Frame Hinges (Exposed Hinges): These hinges are visible when the door is closed and are mounted directly to the face frame of the cabinet and the door.
- Pivot Hinges: Used particularly for lazy Susan doors, these hinges allow the door to swing open from a single pivot point.
- Folding Door Hinges: Present on blind corner cabinets, these hinges allow doors to fold in on themselves for better access.
Understanding the specific hardware configuration is paramount for a smooth and damage-free removal.
Step-by-Step Removal Process
With the tools prepared and the door and hardware identified, the actual removal process can begin. The following steps provide a general guide, but adaptation may be necessary based on the specific cabinet and door type:
- Preparation: Clear the area around the cabinet to provide ample workspace. Protect the flooring with a drop cloth or old towel if necessary. Open the cabinet door(s) and assess the hinge locations and screw placements.
- Marking Door and Hinge Positions: Use a pencil or marker to lightly trace around the hinges on both the door and the cabinet frame. This will help with realignment during reinstallation. Applying painter’s tape around the hinge area and marking on the tape can prevent marking the cabinet itself.
- Loosening Set Screws (if applicable): Some European hinges have set screws that lock the hinge in place. These screws must be loosened before attempting to remove the hinge. Note their original position for reinstallation.
- Removing Screws: Using the appropriate screwdriver, carefully remove the screws that attach the hinges to the cabinet frame. Start with the screws on the cabinet frame side of the hinge. Support the door with one hand while removing the last screw to prevent it from falling. For doors with multiple hinges, remove the screws from the top hinge first, followed by the bottom hinge, and then any middle hinges.
- Detaching the Door: Once all screws are removed from the cabinet frame side of the hinge, gently detach the door. If the door is sticking, use a putty knife or similar thin, flat tool to gently pry it away from the frame. Be careful not to apply excessive force, as this could damage the cabinet or the door.
- Handling Folding Doors (Blind Corner Cabinets): For folding doors, the process is slightly different. First, remove the screws connecting the doors to each other through the folding hinges. Then, remove the screws connecting the remaining door to the cabinet frame, as described above.
- Removing Screws from Door (optional): If necessary, remove the screws that attach the hinges to the door itself. This may be required for replacing the hinges or the door. Store all screws and hardware in a labeled container to prevent loss and ensure proper reassembly.
This methodical approach minimizes the risk of damage and ensures a successful door removal.
Addressing Common Problems
During the removal process, several common problems may arise. Here are a few troubleshooting tips:
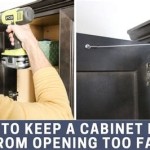
- Stripped Screws: If a screw is stripped, meaning the screwdriver cannot grip it properly, try several methods to remove it. First, try using a rubber band or steel wool between the screwdriver and the screw head to improve grip. If that fails, use a screw extractor kit or carefully drill out the screw head with a drill bit slightly smaller than the screw diameter.
- Stuck Doors: If the door is stuck to the cabinet frame due to paint or sealant, use a putty knife or utility knife to carefully score along the seam between the door and the frame. This will help to break the seal and allow the door to be removed more easily.
- Misaligned Hinges: If the hinges are misaligned, making it difficult to remove the screws, try gently rocking the door back and forth to loosen the hinges. You may also need to adjust the hinge position slightly to properly access the screws.
- Damaged Hinges: If a hinge is damaged or broken, it may be necessary to replace it before reattaching the door. Take the old hinge to a hardware store to find a suitable replacement.
Careful attention to detail and problem-solving skills will help overcome these challenges.
Specific Considerations for Lazy Susan Doors
Lazy Susan doors present unique complexities due to their rotating design and specialized hardware. The following considerations are essential when removing these doors:
- Door Interconnections: Lazy Susan cabinets often have two doors connected by hinges that allow them to open together. Before attempting to remove the doors, identify how they are connected and detach them from each other. This may involve removing screws or disconnecting a latch mechanism.
- Pivot Points: Lazy Susan doors often rotate on a pivot point located at the top or bottom of the cabinet. Carefully examine the pivot mechanism and determine how to detach the door from it. This may involve loosening a set screw or disengaging a locking mechanism.
- Central Support: Some lazy Susan cabinets have a central support that the doors are attached to. This support rotates with the shelves and must be detached before the doors can be removed. Identify how the doors are attached to the support and carefully disconnect them.
- Door Weight: Lazy Susan doors can be heavy, especially if they are made of solid wood. Ensure adequate support for the door during removal to prevent it from falling and causing damage or injury.
These specific considerations are important for a successful lazy Susan door removal.
Reinstallation Considerations
While this article focuses on removal, it is important to consider the subsequent reinstallation process. Before removing the doors, take detailed notes and pictures of the hinge placement, screw locations, and any other relevant details. This will make the reinstallation process much easier. When reinstalling the doors, follow these tips:
- Use the Original Screws: Whenever possible, use the original screws to reattach the hinges. This will ensure a proper fit and prevent the screws from stripping or damaging the wood.
- Align the Hinges Properly: Use the markings made before removal to align the hinges properly. This will ensure that the door closes smoothly and is properly aligned with the cabinet frame.
- Adjust the Hinges (if necessary): European hinges are often adjustable, allowing for fine-tuning of the door alignment. Use the adjustment screws to align the door properly and eliminate any gaps or rubbing.
- Tighten the Screws Carefully: Tighten the screws carefully to avoid stripping them. Do not overtighten the screws, as this could damage the wood.
- Test the Door Operation: After reattaching the doors, test their operation to ensure they open and close smoothly. Make any necessary adjustments to the hinges or alignment.
By following these tips, the doors can be successfully reinstalled and the cabinets will function properly.
Safety Precautions
Throughout the entire removal process, safety should be a primary concern. Adhering to the following safety precautions will help prevent accidents and injuries:
- Wear Safety Glasses: Wear safety glasses to protect eyes from flying debris, such as wood chips or screw fragments.
- Wear Work Gloves: Wear work gloves to protect hands from cuts and scrapes.
- Use a Step Stool or Ladder Safely: If the cabinet is high, use a sturdy step stool or ladder. Ensure the ladder is placed on a level surface and is properly secured.
- Support the Door During Removal: Always support the door with one hand while removing the screws to prevent it from falling and causing injury or damage.
- Be Aware of Surroundings: Be aware of surroundings and avoid working in areas with heavy traffic or other potential hazards.
- Disconnect Power (if applicable): If the cabinet contains any electrical components, such as lighting, disconnect the power before starting the removal process.
These safety measures are crucial for a safe and successful project.

Open Up The Kitchen Corner Cabinet With A Blast

How To Fix An Awkward Corner Cabinet In 5 Easy Steps

How To Fix An Awkward Corner Cabinet In 5 Easy Steps

How To Fix An Awkward Corner Cabinet In 5 Easy Steps

Open Up The Kitchen Corner Cabinet With A Blast

How To Deal With The Blind Corner Kitchen Cabinet Live Simply By Annie

Image Result For Removing Old Corner Built In Cabinets Kitchen Dining Room Small Cabinet

How To Fix An Awkward Corner Cabinet In 5 Easy Steps

Do You Have A Maid And Other Q S About Open Shelving The Inspired Room

Open Up The Kitchen Corner Cabinet With A Blast
Related Posts