How To Remove Kickboards From Kitchen Cabinets
Kickboards, also known as toe-kicks, are the recessed panels at the base of kitchen cabinets. They provide a comfortable space for feet while working at the counter and protect cabinets from damage. Occasionally, access behind the kickboard is required for plumbing repairs, electrical work, or cleaning. Removing them can seem daunting, but with the right approach and tools, it's usually a straightforward process.
Identifying the Fastening Method
The first step in removing a kickboard is identifying how it's attached. Common methods include clips, screws, or a combination. Carefully inspect the kickboard, looking for visible screws or clips. If no fasteners are readily apparent, the kickboard is likely held by hidden clips. Running a hand along the top edge of the kickboard can sometimes reveal the presence of clips. Examining the seam between the kickboard and the cabinet floor can also offer clues about the attachment method.
Gathering the Necessary Tools
Having the right tools simplifies the removal process and minimizes the risk of damage. A utility knife, putty knife, screwdriver (Phillips or flathead, depending on the screw type), and a small pry bar are typically sufficient. If the kickboard is attached with hidden clips, a specialized clip removal tool may be helpful, although a thin putty knife can often be used as a substitute.
Removing Kickboards Secured with Clips
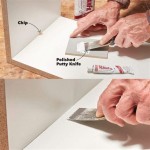
For kickboards held in place by clips, begin by inserting the putty knife or clip removal tool into the seam between the top of the kickboard and the cabinet. Gently apply pressure to release the clip. Start at one end of the kickboard and work your way across, releasing each clip in turn. Once all the clips are released, the kickboard should pull away from the cabinet. Exercise caution to avoid damaging the cabinet or the kickboard itself.
Removing Kickboards Secured with Screws
If the kickboard is fastened with screws, locate all the screws first. They are usually located along the top edge or underneath the kickboard. Using the appropriate screwdriver, carefully remove each screw. Once all screws are removed, the kickboard should be free to detach. Keep the screws in a safe place for reinstallation.
Dealing with Stubborn Kickboards
Sometimes, kickboards can be difficult to remove due to paint buildup, swelling from moisture, or other factors. If gentle pressure doesn't release the kickboard, try using a utility knife to score the paint seam along the top edge. This can break the paint seal and make it easier to detach the kickboard. If the kickboard still resists, applying a small amount of penetrating oil to the seams can help loosen it.
Removing Kickboards with a Combination of Fasteners
Some kickboards use a combination of clips and screws. In these cases, first remove any visible screws. Then, use the putty knife or clip removal tool to release the clips. If the kickboard remains stuck after removing the screws, check for hidden screws or additional clips along the sides or bottom.
Protecting the Surrounding Cabinetry
Throughout the removal process, take care to protect the surrounding cabinetry. Placing a thin piece of cardboard or wood between the pry bar and the cabinet can prevent scratches and dents. Avoid using excessive force, which could damage the cabinet or the kickboard. If the kickboard is particularly difficult to remove, seeking assistance from a qualified professional may be advisable.

Easiest Way To Remove A Kitchen Plinth Without Damaging It

Kitchen Kickboards Taken Fron The Renovation Series

How To Install Kickboard Diy At Bunnings

Tool For Removing Kitchen Cabinet Kickboard

Need To Know How Remove Kitchen Plinth

Kitchen Cabinet Repair

How To Go About Replacing Damaged Kickbo Bunnings Work Community

Solved How To Replace Kitchen Cabinet Kickboard Bunnings Work Community
How To Install Kickboards Bunnings New Zealand

Kickboards Old Or New School Mdc Furniture Design
Related Posts

