How To Remove Kitchen Cabinets From Wall
Removing kitchen cabinets is a common task undertaken during kitchen remodeling projects, renovations, or even simply for repairs. Proper removal techniques are essential to avoid damaging the cabinets themselves, the surrounding walls, or the plumbing and electrical systems that might be concealed behind or within them. This article provides a comprehensive guide to safely and effectively removing kitchen cabinets from the wall.
Preparation and Safety Measures
Before initiating the removal process, meticulous preparation is paramount. This stage aims to ensure personal safety, protect the surrounding environment, and facilitate a smooth and efficient operation. The first step involves gathering the necessary tools and materials. These typically include:
Safety Gear: Safety glasses are crucial to protect the eyes from falling debris. Work gloves safeguard hands from splinters, sharp edges, and potential chemical exposure. A dust mask or respirator is recommended to prevent inhalation of dust and other airborne particles.
Hand Tools: A screwdriver set (both Phillips head and flathead) is essential for removing screws holding the cabinets in place. A utility knife is useful for scoring paint or caulk along the cabinet edges to prevent damage to the wall during removal. A pry bar or putty knife assists in gently separating the cabinets from the wall. A hammer can be used in conjunction with the pry bar for added leverage, but should be employed cautiously to avoid damaging the wall or cabinets.
Power Tools: A power drill or impact driver with various bits can significantly expedite the screw removal process, especially when dealing with a large number of cabinets. A stud finder is crucial for locating the wall studs, which are where the cabinets are typically anchored. Knowing the stud locations helps in safely removing the screws and minimizing wall damage. A reciprocating saw (optional) can be used to cut through stubborn areas, such as glue or caulk that might be holding the cabinets in place; however, it should be employed with extreme caution to avoid damaging wiring or plumbing.
Other Materials: Drop cloths or tarps should be laid down to protect the flooring from falling debris and potential damage. Painter's tape can be used to mark cabinet locations and label wiring or plumbing connections. A pencil is helpful for marking stud locations and drawing guidelines. Plastic bags or containers are useful for storing screws and hardware, labeled according to the cabinet they belong to, to facilitate reinstallation if desired.
Once the tools and materials are gathered, it's crucial to assess the situation. Turn off the power to any electrical circuits that might be running through the cabinets or walls to prevent electrocution. Shut off the water supply to any plumbing fixtures connected to the cabinets, such as sinks or dishwashers. Disconnect any appliances, such as dishwashers or garbage disposals, and cap off any exposed plumbing lines.
Remove all items from the cabinets to reduce their weight and make them easier to handle. This includes dishes, cookware, food items, and any other stored items. Clear the workspace around the cabinets to provide ample room to maneuver and prevent tripping hazards. Finally, inspect the cabinets and surrounding walls for any signs of damage, such as water stains, mold, or insect infestations. Document these findings for future reference.
Step-by-Step Cabinet Removal Process
With the preparation complete, the actual removal process can begin. This involves systematically detaching the cabinets from the wall, starting with the upper cabinets and working downwards.
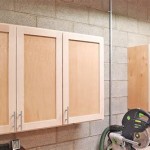
Removing Upper Cabinets: Begin by locating the screws that attach the upper cabinets to the wall studs. These screws are typically located along the top and bottom of the cabinet frame, inside the cabinet itself. Use a stud finder to verify the locations of the studs and mark them on the wall with a pencil.
Using a drill or screwdriver, carefully remove the screws from the wall studs. If the screws are stripped or difficult to remove, try using a screw extractor or penetrating oil. Work slowly and methodically, supporting the weight of the cabinet as you remove the screws to prevent it from falling.
Once all the screws are removed, gently pry the cabinet away from the wall using a pry bar or putty knife. Be careful not to damage the wall or the cabinet. If the cabinet is stuck, use a utility knife to score along the edges of the cabinet where it meets the wall to break any paint or caulk seals.
With the cabinet detached from the wall, carefully lift it down and set it aside. It's helpful to have a second person assist with this step, especially for larger or heavier cabinets. Place the cabinet on a protected surface to prevent scratches or damage.
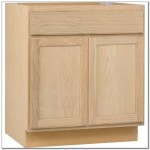
Removing Lower Cabinets: The process for removing lower cabinets is similar to that for upper cabinets, but there are a few key differences. Lower cabinets are often attached to the wall and the floor, and they may also be connected to countertops or adjacent cabinets.
First, locate and remove any screws that attach the lower cabinets to the wall studs. As with the upper cabinets, use a stud finder to verify the stud locations and mark them on the wall. Next, check for any screws or fasteners that connect the lower cabinets to the floor. These may be located inside the cabinet, near the bottom, or along the baseboard.
If the lower cabinets are connected to countertops, you may need to detach the countertops before removing the cabinets. This typically involves removing screws or bolts that attach the countertops to the cabinet frames. If the cabinets are glued to the countertop, it may be necessary to use a reciprocating saw to carefully cut through the adhesive. Exercise extreme caution when using a reciprocating saw to avoid damaging the countertop or adjacent cabinets.
Once the countertops are detached, and all screws and fasteners have been removed, gently pry the lower cabinets away from the wall and floor using a pry bar or putty knife. As with the upper cabinets, be careful not to damage the wall, floor, or cabinets. Lift the cabinets down and set them aside on a protected surface.
Dealing with Stubborn Cabinets: In some cases, cabinets may be difficult to remove due to glue, caulk, or other adhesives. If you encounter a stubborn cabinet, try using a utility knife to score along the edges of the cabinet where it meets the wall, floor, or countertops. You can also try using a heat gun to soften the adhesive, but be careful not to overheat the cabinet or surrounding surfaces.
If these methods are unsuccessful, you may need to use a reciprocating saw to carefully cut through the adhesive. Exercise extreme caution when using a reciprocating saw, and be sure to wear safety glasses and gloves. Cut slowly and methodically, and avoid cutting into wiring or plumbing.
Post-Removal Procedures and Considerations
After removing the cabinets, several post-removal procedures are necessary to prepare the space for the next phase of the remodeling project. This includes inspecting the walls, cleaning the area, and properly disposing of the old cabinets.
Wall Inspection and Repair: Carefully inspect the walls behind the cabinets for any signs of damage, such as water stains, mold, or insect infestations. Repair any damaged areas before proceeding with the remodeling project. This may involve patching holes, repairing drywall, or treating for mold or insects.
Also, examine the wiring and plumbing behind the cabinets to ensure that they are in good condition. Repair or replace any damaged wiring or plumbing before installing new cabinets. If you are not comfortable working with electricity or plumbing, it is best to hire a qualified professional.
Cleaning and Preparation: Thoroughly clean the area where the cabinets were located. Remove any debris, dust, or dirt. Vacuum the floor and walls to remove any remaining particles. Wipe down the walls with a damp cloth to remove any residue.
If you are planning to paint or wallpaper the walls, now is the time to do so. Patch any holes or imperfections in the walls and prime them before painting or wallpapering. Allow the paint or wallpaper to dry completely before installing new cabinets.
Cabinet Disposal or Reuse: Decide what to do with the old cabinets. If they are in good condition, you may be able to reuse them in another area of your home, such as a garage or basement. You can also donate them to a local charity or sell them online.
If the cabinets are damaged or beyond repair, you will need to dispose of them properly. Contact your local waste management company to find out about their policies for disposing of large items. You may need to take the cabinets to a landfill or recycling center.
Planning for New Cabinets: Begin planning for the installation of your new cabinets. Measure the space where the cabinets will be located and order the correct size and number of cabinets. Consider the layout of your kitchen and choose cabinets that will maximize storage and functionality.
Read the installation instructions carefully before beginning the installation process. If you are not comfortable installing the cabinets yourself, hire a qualified contractor to do the job. Proper installation is essential to ensure that the cabinets are secure and will last for many years.

How To Remove Kitchen Cabinets Budget Dumpster

How To Remove Kitchen Cabinets Budget Dumpster

Removing Some Kitchen Cabinets Rehanging One Young House Love

How To Remove Kitchen Cabinets Budget Dumpster

How To Remove Kitchen Cabinets

Removing Some Kitchen Cabinets Rehanging One Young House Love

How To Remove Kitchen Cabinets

How To Remove Kitchen Wall Cabinets Without Visible S Quora

How To Remove Kitchen Cabinets Budget Dumpster

How To Remove Kitchen Wall Cabinets And The Cabinet Bracket Works
Related Posts