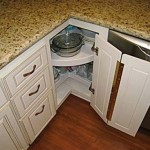
How To Remove Kitchen Cupboard Door Hinges
Removing kitchen cupboard door hinges is a task that might seem daunting at first, but with the right tools and a methodical approach, it's a manageable DIY project. This process is often necessary for various reasons, including replacing damaged hinges, refinishing cupboard doors, or simply giving the kitchen a fresh new look. The goal of this article is to provide a comprehensive guide on how to safely and effectively remove kitchen cupboard door hinges.
Before commencing the procedure, it is crucial to gather the necessary tools and materials. Having everything readily available will streamline the process and minimize potential delays or frustrations. The essential tools include a screwdriver (preferably both Phillips head and flathead), a drill with appropriate drill bits (depending on the type of hinge and screws), lubricating oil or penetrating fluid, a hammer, a punch or nail set, safety glasses, and a small container for storing screws. Depending on the age and type of hinges, some screws might be stubborn and require specialized techniques for removal. Furthermore, it's advisable to have a helper on hand, especially when dealing with larger or heavier cupboard doors, to prevent accidental damage or injury.
Safety should always be paramount when undertaking any DIY project. Wearing safety glasses will protect the eyes from debris and flying particles. Before starting, thoroughly inspect the hinges and the surrounding area for any signs of damage, rust, or loose screws. If the cupboard doors are particularly heavy, consider using clamps or props to support them during the hinge removal process. This will prevent the doors from falling and causing injury or damage to the surrounding cabinets or flooring. Remember to always exercise caution and proceed slowly and deliberately, especially when dealing with power tools.
Identifying the Type of Hinge
The first step in removing kitchen cupboard door hinges is to identify the type of hinge being used. This is critical because different hinge types require slightly different removal techniques. The most common types of kitchen cupboard door hinges include:
*Butt Hinges:
These are the most traditional type of hinge and consist of two rectangular leaves connected by a central pin. One leaf is mortised into the cupboard door, and the other is mortised into the cabinet frame. Removal typically involves unscrewing the leaves from both the door and the frame. *Surface Mount Hinges:
Unlike butt hinges, surface mount hinges are mounted on the surface of the door and the cabinet frame without requiring mortising. These are generally easier to remove as the screws are readily accessible. *Concealed Hinges (Euro-style):
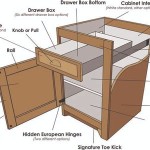
These hinges are also known as European hinges and are typically used in frameless cabinets. They are largely hidden when the door is closed and often have adjustment screws that allow for fine-tuning of the door's position. Removing concealed hinges often involves releasing a clip or unscrewing a set screw that secures the hinge to the mounting plate. *Wrap-Around Hinges:
These hinges wrap around the edge of the cabinet door and frame, providing a strong and durable connection. Removal is similar to surface mount hinges, but care should be taken not to damage the cabinet edge during the process.Once the type of hinge is identified, the appropriate removal technique can be determined. Examining the hinge closely will reveal the screw type, the presence of any clips or set screws, and the overall construction, providing valuable clues for a successful removal.
Removing Screws from Hinges
The most common method for removing kitchen cupboard door hinges involves unscrewing the screws that secure the hinge leaves to the door and the cabinet frame. However, this simple task can sometimes be complicated by stripped screw heads or corroded screws. Here's a step-by-step guide to overcoming these challenges:
-
Start with the Least Resistant Screws:
Begin by attempting to remove the screws that appear to be in the best condition. This will help gauge the overall condition of the screws and the level of difficulty that may be encountered. -
Use the Correct Screwdriver Size and Type:
Ensure that the screwdriver being used is the correct size and type for the screw head. Using a screwdriver that is too small or too large can strip the screw head, making it even more difficult to remove. A Phillips head screwdriver should be used for Phillips head screws, and a flathead screwdriver should be used for flathead screws. -
Apply Pressure and Turn Slowly:
Apply firm, even pressure to the screwdriver while turning it slowly and deliberately. Avoid applying excessive force, as this can strip the screw head or break the screw. -
Use Lubricating Oil or Penetrating Fluid:
If the screws are corroded or difficult to turn, apply a small amount of lubricating oil or penetrating fluid to the screw head and allow it to sit for a few minutes. This will help loosen the screw and make it easier to remove. -
Employ the Rubber Band or Steel Wool Trick:
If the screw head is slightly stripped, try placing a rubber band or a small piece of steel wool between the screwdriver and the screw head. This can provide additional grip and prevent the screwdriver from slipping. Press firmly and turn slowly. -
Use a Screw Extractor:
For severely stripped screws, a screw extractor may be necessary. A screw extractor is a specialized tool that bites into the stripped screw head and allows it to be turned out. Follow the manufacturer's instructions carefully when using a screw extractor. -
Heat the Screw (with Caution):
In some cases, applying heat to the screw head can help loosen it. Use a soldering iron to heat the screw for a short period (around 15-30 seconds). Be extremely careful not to damage the surrounding wood or ignite any flammable materials. -
Drill Out the Screw (as a Last Resort):
If all other methods fail, the screw may need to be drilled out. Use a drill bit that is slightly smaller than the diameter of the screw and carefully drill into the center of the screw head. Once the head is removed, the remaining screw shaft can often be removed with pliers or a screw extractor. Extreme caution should be exercised to avoid damaging the surrounding wood.
After removing the screws, carefully detach the hinge leaves from the door and the cabinet frame. If the hinge leaves are stuck, a gentle tap with a hammer may be necessary to loosen them. Remember to store the screws in a safe place to avoid losing them if they are to be reused.
Special Considerations for Different Hinge Types
While the basic principle of removing screws applies to most hinge types, certain hinges require special considerations due to their unique design and construction.
Concealed Hinges (Euro-style):
These hinges often have a clip or a set screw that secures the hinge to a mounting plate attached to the cabinet frame. To remove a concealed hinge, first, identify the clip or set screw. The clip is usually released by pressing or sliding it, while the set screw is loosened with a screwdriver. Once the clip or set screw is released, the hinge can be detached from the mounting plate. Some concealed hinges also have adjustment screws that allow for fine-tuning of the door's position. It's a good idea to make note of the position of these adjustment screws before removing the hinge, as this will make it easier to re-install the hinge in the same position.Butt Hinges:
These hinges are mortised into both the door and the cabinet frame, meaning that a recess has been cut into the wood to accommodate the hinge leaf. When removing butt hinges, it's important to be careful not to damage the surrounding wood. If the hinge leaf is stuck in the mortise, a gentle tap with a hammer and a punch or nail set may be necessary to loosen it. Place the punch or nail set against the edge of the hinge leaf and tap it gently until the hinge leaf comes loose. Avoid using excessive force, as this can damage the wood. Pay attention to the alignment and depth of the mortise for easy reinstallation.Wrap-Around Hinges:
Due to their design of wrapping around the door and frame edges, attention should be given to how the hinge interacts with the wood. Screws, as with other hinge types, are the primary means of attachment, but careful maneuvering might be needed due to the hinge's shape. Check for any embedded areas that may require gentle prying to release without causing damage.When reinstalling any type of hinge, ensure that the screws are properly tightened and that the door is aligned correctly. If the screw holes are stripped, consider using wood glue and toothpicks or wooden dowels to fill the holes before re-inserting the screws. This will provide a more secure hold and prevent the screws from stripping again in the future. Proper alignment is crucial for smooth operation and preventing undue stress on the hinges.
By carefully following these steps and considering the specific requirements of each hinge type, removing kitchen cupboard door hinges can be a straightforward and manageable task. Remember to prioritize safety, use the correct tools, and take your time. With patience and attention to detail, anyone can successfully remove and replace kitchen cupboard door hinges.

How To Removing Cabinet Doors With Concealed Hinges

How To Remove Soft Close Hinge Fast Easy
How To Replace Concealed Cabinet Hinges Ifixit Repair Guide

How To Fit Or Replace A Kitchen Hinge

Got Wonky Cabinet Doors Replace Those Bad European Hinges

How To Repair Or Replace Cabinet Hinges European

Condo Blues How To Repair A Loose Cabinet Door Hinge

Replacing Cabinet Hinges With Overlay Self Closing The Palette Muse

Replacing Outdated Cabinet Hinges The Hardware Hut

How Do You Remove Painted Striped S Off Old Cabinet Doors Hometalk
Related Posts

