How to Remove a Kitchen Sink Cabinet
Removing a kitchen sink cabinet can be a daunting task, but it's essential for remodeling or replacing the cabinet. Understanding the key aspects of this process will help ensure a successful removal without causing damage to your kitchen or plumbing. This article will guide you through the essential steps, highlighting the crucial aspects of removing a kitchen sink cabinet.
Before beginning, it's important to gather the necessary tools and materials. These include a wrench, screwdriver, pliers, utility knife, bucket, and a flashlight. Safety should be a priority, so wear gloves and safety glasses throughout the process.
Step 1: Disconnect Plumbing
Start by disconnecting the water supply lines. Use the wrench to turn off the valves under the sink and then disconnect the lines using pliers. Place a bucket underneath the connections to catch any water that may drain out. Disconnect the drain lines by loosening the slip nuts and carefully pulling the lines off.
Step 2: Remove Sink
Once the plumbing is disconnected, remove the sink. Use a utility knife to cut the sealant around the sink rim and then carefully lift the sink out of the cabinet. Place the sink in a safe location where it won't be damaged.
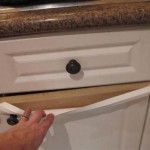
Step 3: Detach Cabinet
Locate the screws or nails securing the cabinet to the wall and floor. Use the screwdriver or nail puller to remove these fasteners. Once the cabinet is loose, carefully pull it forward to detach it from the countertop. It's helpful to have an assistant to support the cabinet while you disconnect it.
Step 4: Remove Countertop Support
If the sink cabinet is supporting the countertop, you'll need to remove the support brackets. Locate the screws holding the brackets in place and remove them. Carefully lift the countertop off the brackets and set it aside.
Step 5: Disconnect Electrical
Check if the cabinet has any electrical connections, such as for a garbage disposal or dishwasher. Turn off the power at the breaker panel and then disconnect the wires from the terminals. Label each wire to ensure proper reconnection later.
Step 6: Remove Cabinet
With all the plumbing, sink, and electrical components disconnected, you can now remove the cabinet. Carefully lift the cabinet up and out of the space, taking care not to damage the floor or walls. Dispose of the cabinet responsibly.
Conclusion
Removing a kitchen sink cabinet requires careful planning and execution. By following these essential steps, you can safely remove the cabinet without causing damage to your kitchen or plumbing. Remember to prioritize safety by wearing gloves and safety glasses throughout the process. With a bit of patience and attention to detail, you can successfully remove your kitchen sink cabinet and prepare for your remodeling project.

Kitchen Removing Base Cabinet Countertops Backsplash

Removing The Scalloped Wood Valance Over Kitchen Sink In My Own Style

How To Replace A Kitchen Sink Base Cabinet Vevano

Kitchen Removing Base Cabinet Countertops Backsplash

How To Remove An Old Kitchen Sink And Base Cabinet Ehow

Removing Some Kitchen Cabinets Rehanging One Young House Love

How To Remove Kitchen Cabinets Budget Dumpster

Removing Some Kitchen Cabinets Rehanging One Young House Love

How To Remove A Kitchen Sink 14 Steps With Pictures Wikihow

How To Remove Kitchen Cabinets Budget Dumpster
Related Posts