How To Remove Old Lower Kitchen Cabinets: A Step-by-Step Guide
Removing old lower kitchen cabinets can be a necessary step in a kitchen renovation project, whether you are replacing them with new cabinets, updating the flooring, or simply reconfiguring the layout. While the task might seem daunting, it can be accomplished by a homeowner with some basic tools, patience, and a systematic approach. This article provides a comprehensive guide to safely and effectively removing old lower kitchen cabinets.
Before commencing any demolition work, it is crucial to prioritize safety. Wear safety glasses to protect your eyes from debris. Protective gloves should be worn to prevent cuts and scrapes. A dust mask or respirator is highly recommended, especially if the cabinets are old and may contain lead paint or mold. Assess the overall condition of the cabinets and the surrounding area. Identify any potential hazards, such as exposed wiring or plumbing.
Preparation is paramount to a smooth removal process. Clear the area surrounding the cabinets, removing any appliances, furniture, or other items that could obstruct your work. Cover the floor with drop cloths or protective sheeting to prevent damage from falling debris. Locate and turn off the water supply to the kitchen sink, if applicable. If there are any electrical outlets or appliances within the cabinet area, disconnect them from the power supply at the breaker box. Properly labeling the breakers before switching them off is vital to avoid confusion later.
Gathering the Necessary Tools
Having the right tools readily available significantly simplifies the process of removing lower kitchen cabinets. The following tools are commonly required:
- Screwdriver Set: A variety of Phillips head and flathead screwdrivers are essential for removing screws securing the cabinets to the walls and floor.
- Pry Bar: A pry bar will be needed to gently separate the cabinets from the walls and floor.
- Utility Knife: This tool is useful for scoring along caulk lines and separating the cabinets from the countertop or backsplash.
- Hammer: A hammer may be needed to tap the pry bar into tight spaces.
- Stud Finder: A stud finder helps locate the wall studs to which the cabinets are attached.
- Level: A level will be used to ensure that the cabinets are removed evenly and without damaging the surrounding walls.
- Reciprocating Saw (Optional): If the cabinets are difficult to remove or are heavily adhered to the wall, a reciprocating saw may be needed to cut through stubborn fasteners or adhesives.
- Drill/Driver (Optional): A drill/driver can be used to quickly remove screws and pre-drill pilot holes if necessary.
- Putty Knife or Scraper: Used for removing old caulk or adhesive residue.
- Trash Bags or Containers: For disposing of debris generated during the removal process.
Disconnecting Utilities and Removing the Countertop
Prior to detaching the cabinets themselves, disconnecting the utilities and removing the countertop, if applicable, are crucial steps. This minimizes the risk of damage to plumbing, electrical wiring, and the surrounding areas.
Begin by disconnecting the plumbing to the kitchen sink. Turn off the water supply valves located under the sink. Disconnect the water supply lines from the faucet. Place a bucket underneath to catch any residual water. Disconnect the drain lines from the sink. If there is a garbage disposal, disconnect it from the sink drain and electrical supply, ensuring the power is off at the breaker. Carefully remove the sink from the countertop.
Next, address any electrical wiring within the cabinet area. As mentioned earlier, disconnect the power at the breaker box. Verify that the power is off using a non-contact voltage tester. Disconnect any electrical outlets or appliances within the cabinets. Carefully remove the wiring from the cabinets, ensuring that all connections are properly capped off with wire connectors.
The countertop removal process depends on the type of countertop and how it is attached to the cabinets. Solid surface countertops, such as granite or quartz, are typically secured with adhesive. Use a utility knife to score along the edges of the countertop where it meets the backsplash and the cabinets. Carefully pry the countertop up from the cabinets using a pry bar and shims. Use caution to avoid damaging the countertop if you plan to reuse it. Laminate countertops are often screwed to the cabinets from below. Locate and remove these screws. Gently pry the countertop up from the cabinets. Tile countertops are more complex to remove. Consider hiring a professional to remove tile countertops without damaging the cabinets if you intend to reuse them.
Removing the Cabinets
With the utilities disconnected and the countertop removed, the next step is to detach and remove the cabinets themselves. The process generally involves the following steps:
First, locate the screws that secure the cabinets to the wall studs. These screws are typically located along the top and bottom of the cabinets, behind the face frame. Use a stud finder to locate the studs and identify the screw locations. Remove these screws using a screwdriver or drill/driver. If the screws are stripped or difficult to remove, try using a screw extractor or lubricating the screws with penetrating oil.
Next, use a utility knife to score along the caulk lines where the cabinets meet the wall and floor. This will help to prevent damage to the walls and floors during removal. Insert a pry bar between the cabinet and the wall or floor. Gently pry the cabinet away from the wall or floor. Work your way around the cabinet, loosening it gradually. If the cabinet is heavily adhered to the wall or floor, use a reciprocating saw to cut through the adhesive. Be careful not to damage the wall studs or flooring.
Once the cabinet is loosened, carefully lift it away from the wall and floor. If the cabinet is heavy, ask for assistance. Inspect the wall and floor for any damage. Repair any holes or cracks with patching compound. Remove any remaining caulk or adhesive residue with a putty knife or scraper. Clean the area thoroughly to prepare it for the installation of new cabinets or other renovations.
Dealing With Difficult Cabinets
Occasionally, you may encounter cabinets that are particularly difficult to remove. This could be due to factors such as old or stubborn adhesives, damaged screws, or tight spaces. Here are some strategies for overcoming these challenges:
If screws are stripped or broken, try using a screw extractor. A screw extractor is a specialized tool that grips the head of the damaged screw and allows you to remove it. Alternatively, you can try using a pair of locking pliers to grip the head of the screw. If the screw is deeply embedded, you may need to drill it out using a drill bit slightly smaller than the diameter of the screw.
For cabinets that are heavily adhered to the wall or floor, use a reciprocating saw to cut through the adhesive. Insert the saw blade between the cabinet and the wall or floor and carefully cut along the adhesive line. Use caution to avoid damaging the wall studs or flooring. You can also try using a heat gun to soften the adhesive before prying the cabinet away from the wall.
If cabinets are located in tight spaces, such as corners or under overhangs, you may need to disassemble them to remove them. Remove the doors and drawers from the cabinets. Disassemble the cabinet boxes by removing the screws or fasteners that hold them together. This will make the cabinets lighter and easier to maneuver. You may also need to cut the cabinets into smaller pieces using a saw to remove them from the space.
After removing the cabinets, the area may have debris, nails, and other remnants of the old installation. This cleanup is essential for preparing the space for whatever follows, whether it be new cabinets, updated flooring, or another phase of renovation.
Remove any remaining nails, screws, staples, or metal fasteners from the floor and wall studs. A pair of pliers and a hammer can be used for this. If any fasteners are deeply embedded, use a nail punch to drive them below the surface. Sweep and vacuum the entire area, paying attention to corners and hard-to-reach places. A shop vacuum works best for collecting dust and debris. Wipe down the walls with a damp cloth to remove any remaining dust or residue. Check for mold or mildew, especially in areas near plumbing. Treat any affected areas with a mold-killing solution. Dispose of all debris according to local regulations. This might involve separating recyclable materials from general waste.

Kitchen Removing Base Cabinet Countertops Backsplash

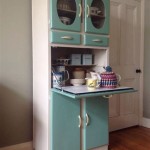
How To Remove Old Kitchen Cabinets

Kitchen Removing Base Cabinet Countertops Backsplash

How To Remove Kitchen Cabinets Budget Dumpster

How To Remove Kitchen Cabinets Budget Dumpster

Removing Some Kitchen Cabinets Rehanging One Young House Love

How To Remove Kitchen Cabinets Budget Dumpster

How Do I Remove My Kitchen Cabinets Rta Wood

Removing Some Kitchen Cabinets Rehanging One Young House Love
.jpg?strip=all "How To Remove Decorative Cabinet Scrollwork Dream Green Diy")
How To Remove Decorative Cabinet Scrollwork Dream Green Diy
Related Posts