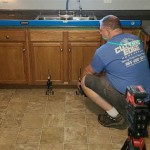
How To Remove a Sink Cabinet Bottom Plate
Removing the bottom plate of a sink cabinet, also known as the floor or base, may be necessary for various plumbing repairs, accessibility improvements, or to address water damage. This process requires careful planning and execution to avoid damaging the surrounding cabinet structure and plumbing. Understanding the construction of the cabinet and the techniques for safe removal are essential before beginning any work.
The sink cabinet bottom plate serves a critical structural function, providing support for the base of the cabinet and preventing the sides from racking. It also creates a barrier against moisture and debris that can accumulate beneath the sink. Before proceeding with removal, an assessment of the structural integrity of the cabinet is crucial. If the cabinet appears unstable or has significant water damage, reinforcing measures may be necessary before removing the bottom plate. Replacement with a new plate or modified plate may be required to ensure continued structural integrity.
Safety is paramount when undertaking any DIY project involving tools and potential structural alterations. Wearing appropriate safety gear, such as safety glasses and gloves, is crucial to protect against splinters, dust, and accidental injuries. Disconnecting the water supply and electrical connections, if applicable (for garbage disposals), is essential to prevent water damage or electrical shock.
Preparing for Bottom Plate Removal
Before commencing the removal process, thorough preparation is key to a smooth and efficient operation. This involves gathering the necessary tools, assessing the cabinet construction, and taking precautions to protect the surrounding area. The specific tools required will depend on the construction of the cabinet and the method used to attach the bottom plate. Common tools include a utility knife, a pry bar (or putty knife), a screwdriver (both Phillips and flathead), a hammer, a drill with various bits, and potentially a reciprocating saw or oscillating multi-tool.
A detailed inspection of the cabinet construction is critical. Identify how the bottom plate is attached. Common methods include nails, screws, adhesive, or a combination of these. Note the locations of plumbing and electrical components within the cabinet to avoid damaging them during the removal process. Take measurements of the existing bottom plate if a replacement is planned. This will ensure that the new plate fits correctly and provides adequate support.
Protecting the surrounding area is essential to prevent damage and facilitate cleanup. Cover the floor around the cabinet with drop cloths or plastic sheeting to catch debris and protect the flooring from scratches. Empty the cabinet completely, removing all items stored inside. Clear the area around the cabinet to provide ample workspace. Good lighting is crucial for visibility and accuracy during the removal process. Use a work light to illuminate the inside of the cabinet and the surrounding area. Proper ventilation is also important, especially if using solvents or adhesives during the project. Open windows or use a fan to ensure adequate airflow.
Methods for Removing the Sink Cabinet Bottom Plate
There are several methods for removing a sink cabinet bottom plate, each suited to different cabinet constructions and attachment methods. The choice of method will depend on factors such as the type of fasteners used, the condition of the cabinet, and the desired outcome (e.g., whether the bottom plate needs to be removed intact or can be cut apart).
Removal using Screws: If the bottom plate is attached with screws, the removal process is relatively straightforward. Locate all screws securing the bottom plate to the cabinet frame. Use a screwdriver (either manual or power) to remove the screws. If the screws are stripped or difficult to remove, try using a screw extractor or applying penetrating oil to loosen them. Once all screws are removed, the bottom plate should be free to lift out. If the plate is still stuck, gently pry it loose with a pry bar or putty knife.
Removal using Nails: If the bottom plate is attached with nails, the removal process requires more care to avoid damaging the surrounding cabinet structure. Use a pry bar or putty knife to gently pry the bottom plate away from the cabinet frame. Work slowly and carefully, applying even pressure to avoid splintering the wood. If the nails are deeply embedded, use a nail punch to drive them further through the wood before prying. Alternatively, use a reciprocating saw or oscillating multi-tool to cut through the nails. Position the blade close to the cabinet frame to minimize damage.
Removal using Adhesive: If the bottom plate is attached with adhesive, the removal process can be challenging. Use a utility knife to score along the edges of the bottom plate where it meets the cabinet frame. This will help to break the adhesive bond. Use a pry bar or putty knife to gently pry the bottom plate away from the cabinet frame. Apply heat from a heat gun or hair dryer to soften the adhesive. Be careful not to overheat the wood, as this can cause it to warp or crack. If the adhesive is particularly stubborn, use a solvent-based adhesive remover. Apply the remover according to the manufacturer's instructions and allow it to soak for the recommended time before attempting to pry the bottom plate loose.
Sectional Removal: In some cases, it may be necessary to remove the bottom plate in sections, particularly if it is large or heavily damaged. Use a reciprocating saw or oscillating multi-tool to cut the bottom plate into smaller, manageable pieces. Be careful not to cut into the cabinet frame or any plumbing or electrical components. Once the bottom plate is cut into sections, pry each section loose using a pry bar or putty knife.
Addressing Potential Problems and Repairs
During the removal process, several potential problems may arise. These include damaged wood, stubborn fasteners, and hidden plumbing or electrical components. Knowing how to address these issues is crucial for a successful outcome. Damaged wood should be repaired before reinstalling a new bottom plate. Small cracks and splits can be filled with wood filler or epoxy. Larger areas of damage may require patching or replacement of the affected section of the cabinet frame.
Stubborn fasteners, such as stripped screws or rusted nails, can be challenging to remove. Screw extractors can be used to remove stripped screws. Penetrating oil can be applied to rusted nails to loosen them before attempting to pry them out. If all else fails, the fasteners can be cut off using a reciprocating saw or oscillating multi-tool. Hidden plumbing or electrical components should be carefully avoided during the removal process. If a component is in the way, consult with a qualified plumber or electrician before proceeding.
After the bottom plate has been removed, it is important to clean and prepare the area for replacement. Remove any remaining debris, such as nails, screws, or adhesive residue. Sand the interior surfaces of the cabinet to create a smooth and even surface. Apply a sealant or primer to protect the wood from moisture. This is particularly important in areas prone to water damage.
If replacing the bottom plate, measure the dimensions of the old plate carefully and cut a new plate to size. Use the same type of material as the original plate or a more durable alternative, such as plywood or marine-grade lumber. Attach the new bottom plate using screws, nails, or adhesive, ensuring that it is securely fastened to the cabinet frame. Consider adding additional support, such as corner braces or cleats, to reinforce the bottom plate.
Once the new bottom plate is installed, inspect the surrounding area for any signs of damage or leaks. Repair any damage and address any leaks promptly to prevent further problems. Finally, clean up the work area thoroughly, removing all debris and tools.

How To Replace Under The Sink Cabinet Base

How To Remove Kitchen Sink Base Cabinet

Diy Replace Bottom Of Sink Cabinet Without Cutting Pipes Or Face

How To Replace A Rotten Cabinet Bottom

How To Remove A Bathroom Vanity Remodel

How To Build Under Cabinet Drawers Increase Kitchen Storage Family Handyman

Repairing A Water Damaged Sink Base Cabinet Floor

Retrofitting A Cabinet For Farm House Sink Bower Power

How To Install Tip Out Tray Under Your Sink The Art Of Doing Stuff

Retrofitting A Cabinet For Farm House Sink Bower Power
Related Posts