How To Remove Sink Cabinet Bottom Plates In Singapore
Sink cabinet bottom plates, often overlooked, play a crucial role in protecting the cabinet's integrity and the flooring beneath. These plates, typically made of wood or composite materials, act as a barrier against water damage, spills, and general wear and tear from items stored within the cabinet. In Singapore, where humidity levels are consistently high, these protective plates are especially important in preventing moisture-related issues such as mold growth and wood rot. This article provides a comprehensive guide on how to safely and effectively remove sink cabinet bottom plates in Singapore, considering the common materials and construction techniques encountered in local homes.
The removal of a sink cabinet bottom plate is often necessary for various reasons. These include replacing a damaged or water-logged plate, accessing plumbing for repairs or modifications, upgrading the sink cabinet, or simply cleaning beneath the plate to eliminate accumulated debris and prevent pest infestations. Understanding the proper techniques and tools is essential to prevent damage to the surrounding cabinet structure, plumbing, and flooring.
Before commencing the removal process, it is crucial to prioritize safety. This involves disconnecting the water supply to the sink, ensuring the work area is well-ventilated, and wearing appropriate personal protective equipment (PPE) such as gloves and safety glasses. Protecting the surrounding area with drop cloths is also recommended to minimize mess and prevent damage to flooring or nearby surfaces.
Key Point 1: Identifying the Attachment Method
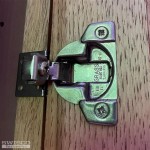
The first step in removing a sink cabinet bottom plate is to identify how it is attached to the cabinet. Common attachment methods found in Singaporean homes include: screws, nails, adhesive, or a combination thereof. Visual inspection is usually sufficient to determine the primary fastening method. Look for visible screw heads or nail heads along the perimeter of the plate, where it meets the cabinet walls. In some cases, the plate may be secured with construction adhesive or silicone caulk, which will require a different approach for removal.
If screws are present, carefully examine the type of screw head. Phillips head screws are the most common, but flat head or Robertson (square) head screws may also be encountered. Ensure that the appropriate screwdriver bit is used to prevent stripping the screw head, which can make removal significantly more difficult. For nails, note their type – brad nails are smaller and easier to remove than larger finishing nails.
Adhesive attachments often present the biggest challenge. The type of adhesive used can vary, from relatively weak construction adhesives to more robust epoxy-based products. Visual cues can sometimes indicate the presence of adhesive, such as a visible bead of caulk or dried adhesive residue along the edges of the plate. In these cases, a cautious approach is required to avoid damaging the cabinet walls when attempting to separate the plate.
In some instances, the bottom plate may be integrated into the overall cabinet structure, forming part of the supporting frame. In such cases, removal may not be possible without compromising the structural integrity of the cabinet. Careful assessment is required to determine whether removal is feasible and, if so, what modifications are necessary to maintain the cabinet's strength and stability.
Key Point 2: Utilizing the Appropriate Tools and Techniques
Once the attachment method has been identified, the appropriate tools and techniques can be employed for removal. For screws, use a screwdriver with the correct bit size and type. Apply firm, consistent pressure while turning the screwdriver to prevent slippage and stripping of the screw head. If the screws are rusted or corroded, applying a penetrating oil such as WD-40 or similar product may help loosen them and facilitate removal. Allow the penetrating oil to soak for several minutes before attempting to unscrew. If a screw head is stripped, a screw extractor may be necessary to remove it. Screw extractors are designed to grip the damaged screw head and allow it to be turned with reverse-threading.
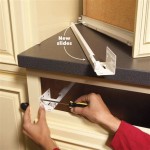
For nails, a nail punch and hammer can be used to drive the nails through the plate from the top. Position the nail punch on the nail head and strike it firmly with the hammer. This will push the nail further into the plate, allowing it to be removed from the other side. Alternatively, a pry bar can be used to gently lift the plate, pulling the nails out as it is lifted. Exercise caution when using a pry bar to avoid damaging the surrounding cabinet walls or splintering the plate. A thin piece of wood can be placed between the pry bar and the cabinet wall to protect the surface.
For adhesive attachments, a combination of techniques may be required. A putty knife or scraper can be used to gently separate the plate from the cabinet walls. Insert the putty knife between the plate and the wall and carefully work it around the perimeter, breaking the adhesive bond. If the adhesive is particularly strong, a heat gun can be used to soften it. Direct the heat gun at the adhesive joint, keeping the gun moving to avoid overheating or scorching the wood. Once the adhesive has softened, the putty knife can be used to more easily separate the plate.
In some cases, a combination of these techniques may be necessary. For example, the plate may be secured with both screws and adhesive. In this scenario, the screws should be removed first, followed by the adhesive. If the plate is integrated into the cabinet structure, consider consulting a professional carpenter or cabinet maker for advice on how to proceed without compromising the cabinet's integrity. They can assess the situation and recommend the most appropriate approach.
Key Point 3: Addressing Potential Problems and Complications
During the removal process, several potential problems and complications may arise. One common issue is water damage or wood rot, which can weaken the plate and make it more difficult to remove. If the plate is severely damaged, it may crumble or break apart during removal, making it necessary to use smaller tools and work more carefully. In cases of significant rot, take precautions to prevent the spread of mold spores. Wear a respirator and thoroughly clean the area after removing the plate.
Another potential problem is the presence of plumbing lines or electrical wiring running beneath the plate. Before removing the plate, carefully inspect the area for any such obstructions. If plumbing lines are present, ensure that the water supply is completely shut off and that the lines are properly supported to prevent them from being damaged or stressed during the removal process. If electrical wiring is present, disconnect the power supply to the circuit and take precautions to avoid damaging the wires. Consider consulting a qualified electrician if you are unsure about how to safely handle electrical wiring.
Damaged or stripped screw heads can also present a challenge. As mentioned earlier, screw extractors can be used to remove stripped screws. However, if the screw head is severely damaged, it may be necessary to drill out the screw. Use a drill bit that is slightly smaller than the diameter of the screw shaft and carefully drill into the screw head. Once the head has been drilled off, the remaining screw shaft can be removed with pliers or a screw extractor.
Finally, it is important to be aware of the potential for asbestos-containing materials. Older homes in Singapore may contain asbestos-containing materials in various building components, including some types of adhesives and caulking. If you suspect that the bottom plate or surrounding materials may contain asbestos, do not disturb them. Contact a qualified asbestos abatement professional for advice on how to safely remove and dispose of the materials.
Once the sink cabinet bottom plate has been successfully removed, thoroughly clean the area beneath the cabinet. Remove any debris, dirt, or mold that may have accumulated. Inspect the cabinet walls and floor for any signs of damage or water leaks. Repair any damage before installing a new bottom plate or replacing the existing one. Consider applying a sealant or waterproofing material to protect the new plate from moisture damage.
Proper preparation, the use of appropriate tools, and a cautious approach are essential for the successful removal of sink cabinet bottom plates in Singapore. By following the guidelines outlined in this article, homeowners can safely and effectively remove these plates without damaging the surrounding cabinet structure or encountering unforeseen complications.

Kitchen Sink Surround Grouting Sealant And Cabinet Bottom Add Timber Support Back Panel Broken Need Overlay Plywood Tth Handyman

Kitchen Sink Surround Grouting Sealant And Cabinet Bottom Add Timber Support Back Panel Broken Need Overlay Plywood Tth Handyman

Kitchen Sink Surround Grouting Sealant And Cabinet Bottom Add Timber Support Back Panel Broken Need Overlay Plywood Tth Handyman

How To Fix Kitchen Cabinet Sink Base Cabinetrepair Kitchencabinets Cabinets Tiktok

Kitchen Sink Surround Grouting Sealant And Cabinet Bottom Add Timber Support Back Panel Broken Need Overlay Plywood Tth Handyman

Slide Dinnerware Cabinet Organizer Kitchen Storage

How To Remove Replace A Vanity Top Easy Bathroom Sink Remodel

Kitchen Sink Surround Grouting Sealant And Cabinet Bottom Add Timber Support Back Panel Broken Need Overlay Plywood Tth Handyman

Kitchen Sink Cabinet 7 Steps To Replace Damage

How To Install Undermount Sink In Bathroom
Related Posts