How to Remove Upper Kitchen Cabinets Without Damage
Removing upper kitchen cabinets may seem daunting, but it is actually a manageable task with the right tools and technique. By following these steps, you can safely remove your upper cabinets without causing damage to the walls, backsplash, or the cabinets themselves.
1. Preparation
Before you begin, gather the necessary tools: a drill or screwdriver, a pry bar, a hammer, and a level. Turn off the power to the kitchen at the breaker panel to prevent accidental electrical shocks. Remove all items from the cabinets and drawers.
2. Remove Doors and Shelves
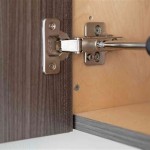
Start by removing the cabinet doors. Locate the hinges and unscrew them using a drill or screwdriver. Remove the doors and set them aside in a safe place. Next, take out the shelves by carefully lifting them up and out of the cabinet.
3. Disconnect Electrical Wires
If there are any electrical appliances or lights installed in the cabinets, disconnect them by unplugging them or turning off their switches. Carefully feed the wires through the back of the cabinet to avoid damaging them.
4. Locate and Remove Mounting Screws
Find the screws that secure the cabinets to the wall and unscrew them using a drill or screwdriver. There will typically be several screws along the top, bottom, and sides of the cabinet. If the cabinets are attached to each other, remove the screws that connect them as well.
5. Carefully Lift Away the Cabinet
Use a pry bar to gently pry the cabinet away from the wall, being careful not to overexert force. Have a helper support the cabinet as you lift it up. As you lift, check for any wires or plumbing that may be attached and disconnect them if necessary.
6. Patch and Repair
Once the cabinet is removed, inspect the wall and backsplash for any holes or damage. Fill in any holes with spackling paste or wood filler. If the backsplash needs to be repaired, use a matching tile or sheet of backsplash material. Touch up any paint or finish on the walls if needed.
7. Reinstall Cabinets
When reinstalling the cabinets, use a level to ensure they are straight and secure. Screw the cabinets back into place using the same screws or new ones if necessary. Reattach the doors and shelves, and reconnect any electrical wires or appliances.
Tips for Avoiding Damage
* Use a pry bar with a flat, wide tip to minimize pressure and prevent gouging. * Lift the cabinet straight up, avoiding any twisting or bending motions. * If the cabinet is particularly heavy, have a helper assist you. * Protect the countertops and floor with drop cloths or cardboard. * If you encounter any stubborn screws or bolts, use penetrating oil or a heat gun to loosen them. * If you are unsure about the wiring or plumbing, consult with a professional electrician or plumber for assistance.
Kitchen Removing Base Cabinet Countertops Backsplash

3 Ways To Remove Kitchen Cabinets Wikihow

How To Remove Kitchen Cabinets Budget Dumpster

How To Remove Kitchen Cabinets Budget Dumpster

How To Remove Kitchen Cabinets A Diy Guide Dumpsters Com

How To Remove Kitchen Cabinets Budget Dumpster

How To Remove Kitchen Cabinets Budget Dumpster

How To Remove Kitchen Cabinets Budget Dumpster
.jpg?strip=all)
Orc Week Three Retro Cabinet Removal Dream Green Diy

Kitchen Removing Base Cabinet Countertops Backsplash
Related Posts


