How To Remove Vinyl Wrap From Kitchen Cabinets
Removing vinyl wrap from kitchen cabinets can seem daunting, but with the right tools and techniques, it can be a manageable DIY project. This article outlines a step-by-step process for effectively and safely removing vinyl wrap, preserving the integrity of the underlying cabinetry.
Essential Tools and Materials
Gathering the necessary tools and materials beforehand streamlines the removal process. The following items are recommended:
- Heat gun or hairdryer
- Plastic scraper or putty knife
- Adhesive remover
- Clean microfiber cloths
- Mineral spirits (optional)
- Gloves
- Safety glasses
Preparing the Work Area
Proper preparation ensures a smooth and efficient removal process while protecting the surrounding kitchen environment.
- Clear the countertops and surrounding areas of any obstacles.
- Protect countertops with drop cloths or cardboard.
- Ensure adequate ventilation by opening windows and doors.
Applying Heat to the Vinyl
Heat is key to loosening the adhesive bond of the vinyl wrap. Applying heat strategically minimizes the risk of damage to the underlying cabinet surface.
- Start with a small, inconspicuous area to test the heat's effect.
- Hold the heat gun or hairdryer a few inches away from the vinyl.
- Use a low heat setting initially and gradually increase as needed.
- Keep the heat gun moving constantly to avoid scorching the vinyl or cabinet.
- Heat a manageable section at a time (approximately 1 square foot).
Lifting and Peeling the Vinyl
Once the adhesive is softened, the vinyl can be carefully peeled away. Patience and the right technique are crucial in this step.
- Use a plastic scraper or putty knife to gently lift a corner of the heated vinyl.
- Slowly and steadily peel the vinyl back at a low angle, keeping the heated area warm.
- If the vinyl resists peeling, reapply heat to the area.
- Avoid pulling the vinyl forcefully, as this could damage the cabinet surface.
Removing Residual Adhesive
After removing the vinyl, adhesive residue often remains on the cabinet surface. This requires a separate removal process.
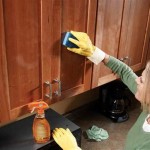
- Apply a small amount of adhesive remover to a clean microfiber cloth.
- Gently rub the adhesive residue in a circular motion until it dissolves.
- For stubborn adhesive, allow the remover to dwell for a few minutes before wiping.
- Test the adhesive remover on an inconspicuous area first to ensure compatibility with the cabinet finish.
Cleaning the Cabinets
Once the adhesive is removed, the cabinets need a thorough cleaning to restore their original appearance.
- Wipe down the cabinets with a clean, damp microfiber cloth.
- For grease or grime buildup, use a mild dish soap solution.
- Dry the cabinets thoroughly with a clean, dry cloth.
Addressing Stubborn Adhesive (Optional)
In some cases, particularly with older or more stubborn adhesive, additional measures may be necessary.
- Mineral spirits can be used to dissolve stubborn adhesive, but test in an inconspicuous area first.
- Apply mineral spirits to a clean cloth and gently rub the affected area.
- Ensure adequate ventilation when using mineral spirits.
Safety Precautions
Safety should always be a priority when undertaking any DIY project. The following precautions are recommended:
- Wear gloves to protect your hands from adhesive and cleaning agents.
- Wear safety glasses to protect your eyes from debris and chemicals.
- Avoid prolonged exposure to heat and chemicals.
- Dispose of used materials properly according to local regulations.
Alternative Removal Methods
While heat is the most common and effective method, alternative methods can be employed, especially for delicate surfaces.
- Steaming: A handheld garment steamer can be used to soften the adhesive, but proceed with caution to avoid water damage.
- Commercial vinyl wrap removers: These specialized products are designed to dissolve vinyl adhesive, but always test in an inconspicuous area first.
Repairing Minor Damage
Minor damage to the cabinet surface can sometimes occur during the removal process. These can often be addressed with simple repairs.
- Small scratches or chips can be touched up with wood filler or furniture markers.
- Deeper damage may require professional repair.

Home Dzine Kitchen Remove Foil Vinyl Wrap From Cabinet Doors

Home Dzine Kitchen Remove Foil Vinyl Wrap From Cabinet Doors

How To Remove Vinyl Wrap From Kitchen Doors Checkatrade

Home Dzine Kitchen Remove Foil Vinyl Wrap From Cabinet Doors

How To Remove Vinyl Wrap From Kitchen Cabinets Hometalk Makeover Bathroom Wrapped

Ling Vinyl Wrap Doors Can You Fix Them Dianella Polishing

Home Dzine Kitchen Remove Foil Vinyl Wrap From Cabinet Doors

Remove Vinyl Wrap Melbourne Procoat

First Aid For Ling Vinyl Doors Dianella Polishing

Painting Kitchen Cupboards Vs Vinyl Wrapping Wrap Upvc Spray Services
Related Posts

