How to Repaint Oak Kitchen Cabinets Like a Pro
Oak kitchen cabinets exude warmth and character, but if their finish is looking dull, dated, or damaged, it's time for a refresh. With careful preparation and attention to detail, you can master the art of repainting oak kitchen cabinets, transforming them from tired to resplendent.
Materials You'll Need:
- Sandpaper (150- and 220-grit)
- Wood filler
- Tack cloth
- Wood primer
- Paint (choose a high-quality enamel or latex paint)
- Paintbrushes and rollers (choose high-quality brushes for a smoother finish)
- Protective gear (gloves, safety glasses, mask)
Step 1: Preparation
Remove all cabinet doors and hardware. Thoroughly clean the cabinets with a degreasing cleaner to remove any grease or dirt.
Step 2: Sanding
Using 150-grit sandpaper, lightly sand the surfaces of the cabinets, removing the existing finish but not digging into the wood. Wipe away dust with a tack cloth.
Step 3: Repair and Fill
Inspect the cabinets for any dings, dents, or gouges. Apply wood filler to imperfections and sand smooth once dry. Wipe away sanding dust.
Step 4: Priming
Apply a generous coat of wood primer to the cabinets. This creates a barrier between the wood and the paint, preventing tannins from bleeding through and ensuring a smooth, even finish.
Step 5: Painting - First Coat
Choose a paintbrush or roller for your preferred application method. Apply the first coat of paint in thin, even strokes. Allow the paint to dry completely before proceeding.
Step 6: Painting - Second Coat
Once the first coat is dry, apply a second coat. Pay attention to edges and areas that may require additional coverage. Allow the second coat to dry thoroughly.
Step 7: Sanding Lightly
After the second coat has dried, lightly sand the surfaces with 220-grit sandpaper to smooth any imperfections and create a uniform finish.
Step 8: Final Touches
Reapply a third coat of paint if necessary, especially if the grain of the oak is still visible. Once the final coat has dried, reattach the cabinet doors and hardware. Protect your newly painted cabinets with a clear sealer for added durability.
Tips:
- Test the paint on an inconspicuous area first to ensure color and finish satisfaction.
- Use a high-quality brush or roller to avoid brush strokes.
- Allow ample drying time between coats to ensure proper adhesion.
- Protect the surrounding area from paint drips with drop cloths or plastic sheeting.
- If the oak grain is particularly pronounced, using a paint with a glaze can help fill in the grain and create a smoother finish.
Repainting oak kitchen cabinets requires patience, precision, and a touch of artistry. By following these steps and using high-quality materials, you can transform your kitchen with a stunning new look that will endure for years to come.

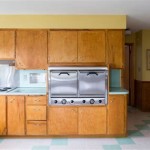
Diy Painted Oak Kitchen Cabinets Makeover

Tips Tricks To Paint Honey Oak Kitchen Cabinets Cottage Living And Style

Tips Tricks To Paint Honey Oak Kitchen Cabinets Cottage Living And Style

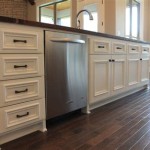
How To Paint Oak Cabinets White Best Diy Guide 2024

How To Make Oak Kitchen Cabinets Look Modern Celeste Jackson Interiors

From To Great A Tale Of Painting Oak Cabinets

How To Paint Oak Cabinets And Hide The Grain Tutorial

Diy Painted Oak Kitchen Cabinets Makeover

Cabinet Refinishing Guide

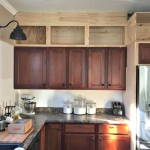
How To Paint Stained Oak Cabinet Doors Honey Built Home
Related Posts