How to Repaint Old Wood Kitchen Cabinets
Repainting old wood kitchen cabinets is a cost-effective method to revitalize a kitchen space. This process, while requiring time and effort, can result in a significant aesthetic improvement without the expense of a complete cabinet replacement. The key to a successful repaint lies in thorough preparation, careful execution, and the selection of appropriate materials. This article will outline the necessary steps and considerations for effectively repainting old wood kitchen cabinets.
Preparation: The Foundation for a Successful Paint Job
The initial stage of repainting wood cabinets involves meticulous preparation. This phase is crucial because it directly impacts the final appearance and longevity of the paint finish. Neglecting proper preparation can lead to adhesion problems, uneven surfaces, and a less durable result.
Cabinet Removal and Hardware Detachment: The first step is to remove all cabinet doors and drawers from their frames. This allows for easier access to all surfaces and ensures a more uniform paint application. All hardware, including knobs, pulls, hinges, and drawer slides, should be detached and stored in a secure location. Labeling the hardware according to its original location is highly recommended to facilitate reassembly.
Cleaning and Degreasing: Kitchen cabinets are typically exposed to grease, food splatters, and dust. These contaminants can interfere with paint adhesion. A thorough cleaning is therefore essential. A solution of warm water and a degreasing cleaner, such as trisodium phosphate (TSP) or a TSP substitute, should be used to scrub all surfaces. It is crucial to wear gloves and eye protection when working with these chemicals. After cleaning, rinse the cabinets thoroughly with clean water and allow them to dry completely.
Sanding: Sanding is critical for creating a surface that will properly accept the new paint. The purpose of sanding is not necessarily to remove all existing finish, but to create a slightly roughened surface that promotes adhesion. A medium-grit sandpaper (120-150 grit) is typically sufficient for this purpose. Sand all surfaces lightly, paying particular attention to edges and corners. For areas with stubborn finishes or imperfections, a coarser grit sandpaper (80-100 grit) may be necessary, followed by a finer grit to smooth the surface. After sanding, remove all sanding dust with a tack cloth or a damp cloth. Ensure the cabinets are completely dry before proceeding.
Repairing Imperfections: Before priming, address any imperfections in the wood, such as dents, scratches, or cracks. Wood filler can be used to fill these imperfections. Apply the filler according to the manufacturer's instructions, allowing it to dry completely. Once dry, sand the filled areas smooth to blend seamlessly with the surrounding wood. Again, remove all sanding dust after completing this step.
Masking: Protect surfaces that are not to be painted, such as the inside of cabinets and surrounding walls. Use painter's tape and plastic sheeting to mask off these areas. Ensure the tape is properly adhered to the surface to prevent paint bleed-through.
Priming: Ensuring Proper Adhesion and Coverage
Priming is an essential step in repainting wood cabinets. Primer serves several important functions: it seals the wood surface, provides a uniform base for the paint, and improves adhesion. Selecting the correct primer is crucial for achieving a durable and long-lasting finish.
Primer Selection: For wood cabinets, an oil-based or a high-quality acrylic-latex primer is generally recommended. Oil-based primers offer excellent adhesion and stain-blocking properties, making them suitable for cabinets with stubborn stains or existing oil-based finishes. However, they require mineral spirits for cleanup and can have a strong odor. Acrylic-latex primers are water-based, making them easier to clean up and less odorous. They are also more flexible than oil-based primers, which can reduce the risk of cracking over time. A stain-blocking primer is recommended if the existing finish is dark or prone to bleeding through.
Primer Application: Apply the primer in thin, even coats using a brush, roller, or sprayer. A brush is suitable for smaller areas and intricate details, while a roller is more efficient for larger, flat surfaces. A sprayer can provide the smoothest finish, but requires more skill and equipment. Regardless of the application method, avoid applying the primer too thickly, as this can lead to drips and runs. Allow the primer to dry completely according to the manufacturer's instructions. This is critical, as insufficient drying time can compromise the adhesion of the topcoat.
Sanding Between Coats: After the primer has dried completely, lightly sand the surface with a fine-grit sandpaper (220-grit or higher) to remove any imperfections and create a smooth base for the paint. This step is important for achieving a professional-looking finish. Remove all sanding dust with a tack cloth before proceeding to the next step.
Painting: Achieving a Flawless Finish
The final step in repainting wood cabinets is the application of the paint. The choice of paint, application technique, and number of coats will determine the final appearance and durability of the finish.
Paint Selection: For kitchen cabinets, a durable and washable paint is essential. Semi-gloss or gloss paints are commonly used because they are easy to clean and resistant to moisture and stains. However, they also tend to highlight imperfections more than matte or eggshell finishes. A high-quality acrylic-latex paint is generally recommended for its durability, ease of cleaning, and low odor. Consider using a paint specifically formulated for cabinets and trim for enhanced durability and a smoother finish.
Paint Application: Apply the paint in thin, even coats using a brush, roller, or sprayer. Similar to primer application, a brush is suitable for smaller areas and details, while a roller is more efficient for larger surfaces. A sprayer can provide the smoothest finish, but requires practice and proper equipment. When using a brush or roller, work in the direction of the wood grain to achieve a more uniform appearance. Avoid applying the paint too thickly, as this can lead to drips and runs. Two coats of paint are typically required to achieve full coverage and a durable finish. Allow each coat of paint to dry completely according to the manufacturer's instructions before applying the next coat.
Sanding Between Coats: After each coat of paint has dried completely, lightly sand the surface with a fine-grit sandpaper (220-grit or higher) to remove any imperfections and create a smooth surface for the next coat. This step is crucial for achieving a professional-looking finish. Remove all sanding dust with a tack cloth before applying the next coat of paint.
Topcoat (Optional): For added durability and protection, consider applying a clear topcoat over the painted cabinets. A polyurethane topcoat can provide excellent resistance to scratches, stains, and moisture. Apply the topcoat in thin, even coats, following the manufacturer's instructions. Allow the topcoat to dry completely before reassembling the cabinets.
Reassembly and Final Touches
After the paint is completely dry and cured, the cabinets can be reassembled. This process involves reattaching the hardware and re-hanging the doors and drawers.
Hardware Reattachment: Reattach the hardware to the cabinet doors and drawers using the original screws. If the screws are damaged or worn, replace them with new ones of the same size and type. Ensure the hardware is securely fastened. If desired, replace the old hardware with new hardware to further update the look of the cabinets.
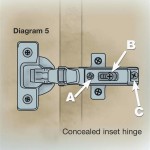
Door and Drawer Reinstallation: Reinstall the cabinet doors and drawers onto the cabinet frames, ensuring they are properly aligned and level. Adjust the hinges as necessary to achieve a smooth and even closure. If the doors or drawers rub against the frames, lightly sand the affected areas and touch up the paint.
Cleaning and Inspection: Once the cabinets are reassembled, clean the surfaces with a mild detergent and water to remove any dust or fingerprints. Inspect the cabinets for any imperfections or flaws and touch up the paint as needed. Ensure all hardware is functioning properly and make any necessary adjustments.

Avoid These Mistakes How To Paint Cabinets That Are Already Painted Grace In My Space

How To Update Old Wood Kitchen Cabinets

Diy Painted Oak Kitchen Cabinets Makeover

How To Paint Kitchen Cabinets A Step By Guide Confessions Of Serial Do It Yourselfer

How To Clean Prep Wood Kitchen Cabinets Before Painting Do Dodson Designs

How To Paint Kitchen Cabinets In 7 Simple Steps

How To Achieve A Super Smooth Finish When Painting Old Kitchen Cabinets The Happy Housie

My Painted Cabinets Two Years Later The Good Bad Ugly

How To Paint Kitchen Cabinets Budget Friendly Makeover

How To Paint Kitchen Cabinets Forbes Home
Related Posts