How to Repair Chipped Gloss Kitchen Cabinets
Chipped gloss kitchen cabinets, while aesthetically displeasing, are a common occurrence. Everyday wear and tear, accidental impacts from cookware, or even settling structural movement can lead to these imperfections. Fortunately, repairing these chips is a manageable task for a diligent individual, often requiring only basic tools and readily available materials. The key to a successful repair lies in meticulous preparation, careful application of the repair compound, and patient finishing techniques to seamlessly blend the repaired area with the surrounding gloss surface.
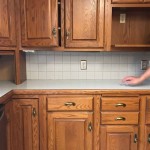
Before embarking on the repair process, it's crucial to assess the extent of the damage. Minor chips, affecting only a small area of the gloss finish, require a relatively simple approach. Larger chips, or those that penetrate through to the underlying substrate (particleboard, MDF, or wood), necessitate a more involved procedure to ensure structural integrity and a durable, lasting repair. The type of material the cabinet is constructed from also influences the choice of repair products and techniques.
Safety should always be prioritized. When sanding, wear a dust mask to prevent inhalation of fine particles. When using solvents or chemical cleaners, ensure adequate ventilation and wear appropriate gloves to protect your skin. Keep children and pets away from the work area to prevent accidental exposure to potentially harmful substances.
Key Point 1: Preparation is Paramount
Proper preparation is the cornerstone of any successful repair. This stage involves cleaning, masking, and sanding, all of which contribute to creating a suitable surface for the repair compound to adhere to and blend seamlessly with the existing finish. A thorough preparation prevents the repair from failing prematurely and ensures a professional-looking outcome.
Begin by thoroughly cleaning the chipped area and the surrounding surface with a mild detergent and water. This removes any dirt, grease, or grime that could interfere with the adhesion of the repair compound. Rinse the area with clean water and allow it to dry completely. For stubborn residues, consider using a degreasing cleaner specifically designed for kitchen surfaces. Ensure the cleaner is compatible with the cabinet's finish to avoid causing further damage.
Next, carefully mask off the area surrounding the chip using painter's tape. This protects the undamaged areas from accidental sanding or overspray during the repair process. Use a high-quality painter's tape that provides a clean, crisp line and prevents paint bleed-through. Apply the tape firmly, pressing it down along the edges to create a secure seal. For intricate areas, consider using a flexible masking tape that conforms to curves and contours.
Sanding is essential for creating a smooth, uniform surface for the repair compound to adhere to. Use a fine-grit sandpaper (e.g., 320-grit or 400-grit) to gently sand the chipped area and the surrounding surface. The goal is to feather the edges of the chip, blending them smoothly with the surrounding finish. Avoid applying excessive pressure, as this could damage the underlying substrate or create unintended scratches. Sand in a circular motion, working outwards from the center of the chip. Regularly check the surface for smoothness and uniformity. After sanding, thoroughly remove any sanding dust with a tack cloth or a clean, damp cloth.
Key Point 2: Application of Repair Compound
Selecting the appropriate repair compound is crucial for achieving a durable and aesthetically pleasing repair. Several options are available, including epoxy fillers, wood fillers, and specialized repair kits designed specifically for glossy surfaces. The choice depends on the size and depth of the chip, the type of material the cabinet is made from, and the desired level of gloss. Epoxies are generally more durable and water-resistant, making them suitable for high-traffic areas or cabinets exposed to moisture. Wood fillers are better suited for repairing wood cabinets, while specialized repair kits often include tinted fillers designed to match common cabinet colors.
Before applying the repair compound, carefully read and follow the manufacturer's instructions. Mix the compound according to the specified ratios, ensuring a thorough and uniform consistency. Use a clean mixing container and a disposable applicator to avoid contamination. Some repair compounds require a curing agent, while others are ready to use straight from the container. Ensure the working time of the compound is sufficient to allow for careful application and shaping.
Apply the repair compound to the chipped area using a small spatula or putty knife. Overfill the chip slightly, allowing for sanding and shaping later. Avoid trapping air bubbles within the compound, as these can weaken the repair and create imperfections in the finished surface. Apply the compound in thin layers, allowing each layer to dry completely before applying the next. This prevents shrinkage and cracking, ensuring a more durable and aesthetically pleasing repair.
Once the repair compound has fully cured, carefully sand it down to be flush with the surrounding surface. Use a fine-grit sandpaper (e.g., 400-grit or 600-grit) and a sanding block to ensure a flat, even surface. Sand in a circular motion, working outwards from the center of the repair. Regularly check the surface for smoothness and uniformity. Feather the edges of the repair compound, blending them seamlessly with the surrounding finish. Remove any sanding dust with a tack cloth or a clean, damp cloth.
Key Point 3: Achieving a High-Gloss Finish
Replicating the original high-gloss finish is the most challenging aspect of repairing chipped gloss kitchen cabinets. This requires careful color matching, the application of multiple coats of gloss paint or lacquer, and meticulous buffing and polishing. Patience and attention to detail are essential for achieving a seamless and professional-looking repair.
Color matching is critical for ensuring the repaired area blends seamlessly with the surrounding finish. Ideally, obtain a color sample from the manufacturer of the cabinets. If this is not possible, take a small piece of the cabinet (e.g., a drawer front) to a paint store and have it color-matched using a spectrophotometer. This device analyzes the color and provides a precise formula for mixing a matching paint or lacquer. Alternatively, consider using a universal tinting kit and carefully mix the paint or lacquer until it matches the surrounding color. Remember to test the color match in an inconspicuous area before applying it to the repaired surface.
Apply several thin coats of gloss paint or lacquer to the repaired area using a fine-bristle brush, a foam brush, or a spray gun. Follow the manufacturer's instructions regarding drying times and application techniques. Avoid applying thick coats, as this can lead to runs, drips, and an uneven finish. Lightly sand between coats with a very fine-grit sandpaper (e.g., 800-grit or 1000-grit) to remove any imperfections and create a smooth, uniform surface for the next coat. Ensure the repaired area is completely dry and free of dust before applying each coat.
Once the final coat of gloss paint or lacquer has fully cured, carefully buff and polish the repaired area to achieve a high-gloss finish. Use a polishing compound specifically designed for glossy surfaces and a soft, lint-free cloth or a polishing pad attached to a power buffer. Apply the polishing compound sparingly and work it into the surface in a circular motion. Avoid applying excessive pressure, as this could damage the finish. Regularly check the surface for smoothness and gloss level. Once the desired level of gloss is achieved, remove any remaining polishing compound with a clean, dry cloth. Consider applying a coat of wax polish to protect the repaired area and enhance the gloss.
Inspect the repaired area under different lighting conditions to ensure a seamless blend with the surrounding finish. If necessary, repeat the buffing and polishing process to achieve the desired level of gloss. With careful preparation, meticulous application, and patient finishing techniques, it is possible to effectively repair chipped gloss kitchen cabinets and restore their original beauty.
While every effort has been made to provide comprehensive advice, individual results may vary depending on the specific materials used and the skill level of the individual performing the repair. It is always recommended to consult with a professional if you are unsure about any aspect of the repair process.

Scratched And Chipped Kitchen Cabinet Doors Refinishing Touch

How To Touch Up Chipped Cabinets With A Paint Pen Exquisitely Unremarkable

Repair Glossy Kitchen Cabinet Door Diynot Forums

How To Touch Up Chipped Cabinet Paint

How To Touch Up Chipped Cabinet Paint

How To Touch Up Chipped Cabinet Paint

My Laminate Drawers And Doors Are Ling Ing Help Hometalk

How To Repair Ling Veneer On Particle Board Cabinets Handhills

How Do I Fix These Cabinet Doors Hometalk

Scratched And Chipped Kitchen Cabinet Doors Refinishing Touch
Related Posts