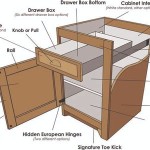
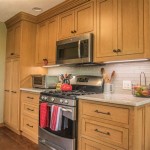
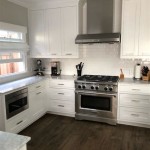
How to Repair a Chipped Kitchen Counter: A Comprehensive Guide
A chipped kitchen counter is a common occurrence that can be frustrating and visually unappealing. Whether it's a small nick or a larger chip, these imperfections can detract from the overall aesthetic of your kitchen. Fortunately, repairing a chipped kitchen counter is a relatively simple task that can be completed in a few easy steps with the right tools and materials.
Step 1: Gather the Necessary Tools and Materials
Before you begin, ensure you have the necessary tools and materials on hand. You will need the following:
- Clean cloth or sponge
- Rubbing alcohol or degreaser
- Epoxy resin specifically designed for kitchen counters
- Mixing sticks or spoon
- Plastic or rubber spatula
- Sandpaper (120 and 400 grit)
- Microfiber cloth
Step 2: Clean the Affected Area
Use a clean cloth or sponge dampened with rubbing alcohol or degreaser to thoroughly clean the chipped area. This will remove any dirt or debris that could interfere with the adhesion of the epoxy.
Step 3: Prepare the Epoxy Resin
Follow the instructions on the epoxy resin package to accurately mix the two components. Ensure the mixture is thoroughly combined, as improper mixing can affect its strength and durability.
Step 4: Fill the Chip
Using a plastic or rubber spatula, carefully fill the chipped area with the epoxy resin. Press the resin firmly into the chip to ensure it fills all gaps and contours. Be sure to slightly overfill the chip, as it will shrink slightly during the curing process.
Step 5: Smooth the Surface
Using your finger or a moistened toothpick, smooth the epoxy surface to remove any excess. You may need to repeat this step as the epoxy starts to cure to achieve a flush finish.
Step 6: Sand the Repaired Area
Once the epoxy has cured completely (refer to the product instructions for specific curing times), sand the repaired area using 120-grit sandpaper. This will level the epoxy with the surrounding counter surface. Continue sanding with 400-grit sandpaper to smooth out any imperfections.
Step 7: Clean and Polish
Wipe down the repaired area with a damp microfiber cloth to remove any sanding dust. If desired, you can apply a countertop cleaner or polish to restore the shine and protect the surface.
Tips for Success
- For larger chips, you may need to reinforce the repair with a small piece of fiberglass mesh before applying the epoxy.
- If the chipped area extends to the back or edge of the counter, use masking tape to protect the surrounding areas from the epoxy.
- Allow the epoxy to cure completely before sanding or applying any cleaning products.
- For a more seamless finish, use an epoxy resin that is specifically color-matched to your counter.

How To Repair Fissures S And Chips In Countertops Countertop Guides

The Easiest Way To Repair Laminate Countertop Chips Exquisitely Unremarkable

How To Touch Up Chipped Cabinets With A Paint Pen Exquisitely Unremarkable

Granite Countertop Repair How To Fix Chipped Countertops Homeserve Usa

Chip Repair For Natural Stone Restoration Works Blog

What To Do If You Get A Chip In Your Granite Countertop Repair Guide

Techniques For Mending S In Kitchen Countertops Royal Stone Care

Don T Panic Here S How To Repair Chipped Granite Hometalk

How To Touch Up Chipped Cabinets With A Paint Pen Exquisitely Unremarkable

How To Fix A Chipped Edge In Granite Countertop Repair Edges Replacing Kitchen Countertops