How To Repair Melamine Kitchen Cabinets
Melamine kitchen cabinets, prized for their affordability and durability, are a popular choice in modern homes. However, despite their resilience, these cabinets are not immune to damage. Scratches, chips, and edge banding issues can occur over time, detracting from the overall aesthetic of the kitchen. Understanding the common causes of damage and the appropriate repair techniques is crucial for maintaining the beauty and longevity of melamine kitchen cabinets.
This article provides a comprehensive guide to repairing melamine kitchen cabinets, covering the types of damage that are frequently encountered. Furthermore, it outlines the necessary tools and materials, and details the step-by-step procedures involved in addressing each type of repair. By following these guidelines, homeowners and professionals can effectively restore their melamine cabinets to their original condition, saving money on replacements and extending the lifespan of their kitchen.
Identifying Common Types of Damage
Before attempting any repairs, it is essential to accurately identify the type of damage present on the melamine cabinets. This assessment will dictate the appropriate repair methods and materials needed. Common types of damage include scratches, chips, dents, water damage, and loose or damaged edge banding. Each type requires a specific approach for effective restoration.
Scratches are perhaps the most common type of damage. These can range from superficial surface marks to deeper gouges that penetrate the melamine layer. Superficial scratches often result from everyday use, such as sliding dishes or utensils across the cabinet surfaces. Deeper scratches may be caused by accidental impacts with sharp objects. The depth and extent of the scratch will determine the best course of action, ranging from simple touch-up techniques to more involved filling and refinishing procedures.
Chips, unlike scratches, involve the removal of a portion of the melamine surface. These are typically caused by impacts with hard objects or by the wear and tear on edges and corners. The size of the chip is a crucial factor in determining the repair method. Small chips can often be filled with color-matched putty or filler, while larger chips may require more extensive patching and refinishing. Ignoring chips can lead to further damage to the underlying substrate, such as particleboard or MDF, especially if exposed to moisture.
Dents, while less common on melamine than on solid wood, can still occur, particularly if the underlying substrate is soft, like particleboard. A dent represents an indentation in the surface, often without the complete removal of material, unlike a chip. Repairing dents in melamine is generally more complex than repairing scratches or chips because the goal is to restore the original surface level without compromising the integrity of the melamine layer. Often, specialized filling and leveling techniques are required.
Water damage is a significant concern for melamine cabinets, especially in areas prone to moisture, such as around the sink and dishwasher. Melamine itself is relatively water-resistant, but if water penetrates through cracks, chips, or loose edge banding, it can cause the underlying particleboard or MDF to swell and deteriorate. This swelling can lead to irreversible damage, including warping and delamination of the melamine. Repairing water damage typically involves removing the affected material, allowing the area to thoroughly dry, and then patching or replacing the damaged sections. Prevention, through proper sealing and maintenance, is crucial to avoiding water damage.
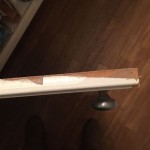
Edge banding, which covers the exposed edges of the particleboard or MDF, is particularly susceptible to damage. It can peel away due to age, wear, or moisture. Loose or damaged edge banding not only looks unsightly but also exposes the core material to moisture, potentially leading to further damage. Repairing edge banding involves re-gluing loose sections or replacing damaged sections with new edge banding that matches the existing cabinet finish.
Tools and Materials Required for Melamine Repair
Having the right tools and materials readily available is critical for a successful melamine repair project. The specific items needed will vary depending on the type and extent of the damage being addressed, but some essential tools and materials include:
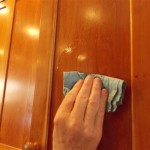
First, cleaning supplies are vital. These include a mild detergent or degreaser, clean cloths, and a soft brush. Thoroughly cleaning the area to be repaired removes dirt, grease, and other contaminants, ensuring proper adhesion of patching compounds and finishes. Avoid using abrasive cleaners, as they can further damage the melamine surface.
Next, you will need sandpaper in various grits, ranging from fine (220 grit or higher) for smoothing surfaces to coarser grits (120 grit or lower) for removing irregularities and preparing the surface for patching. A sanding block or orbital sander can be helpful for achieving a smooth and even finish, especially on larger areas.
For filling scratches, chips, and dents, a color-matched melamine repair filler or wood putty is necessary. These fillers are available in a variety of colors to match common melamine finishes. Choose a product that is specifically designed for melamine or laminate surfaces to ensure proper adhesion and durability. A putty knife or spackle knife is used to apply and smooth the filler.
An epoxy repair kit is essential for larger chips or damaged areas, especially those affected by water. Epoxy provides a strong and durable bond, making it suitable for rebuilding damaged sections of the cabinet. Follow the manufacturer's instructions for mixing and applying the epoxy.
For edge banding repairs, you'll need replacement edge banding that matches the existing cabinet finish. This can be purchased from hardware stores or online retailers. A heat gun or iron is used to activate the adhesive on the edge banding, while a utility knife or edge trimmer is used to trim the excess material. Contact cement can also be used for adhesion, especially for repairing small sections of loose edge banding.
When refinishing or touching up the repaired areas, color-matched paint or touch-up markers are needed. These products are designed to blend seamlessly with the existing melamine finish. Apply the paint or marker in thin, even coats, allowing each coat to dry completely before applying the next.
Finally, protective equipment is crucial. Safety glasses protect your eyes from dust and debris, while gloves protect your hands from chemicals and sharp edges. A dust mask or respirator is recommended when sanding or working with epoxy to avoid inhaling harmful particles or fumes.
Step-by-Step Repair Procedures
The repair procedure will depend on the type of damage encountered. The following sections outline the steps involved in addressing common types of damage to melamine kitchen cabinets.
Repairing Scratches: For superficial scratches, begin by cleaning the affected area with a mild detergent and water. Once the area is dry, use a touch-up marker or paint that matches the cabinet finish. Apply the marker or paint in thin, even strokes, following the direction of the scratch. Allow the paint to dry completely, and then lightly buff the area with a soft cloth to blend it in with the surrounding finish. For deeper scratches, apply a small amount of color-matched melamine repair filler to the scratch. Use a putty knife to smooth the filler and remove any excess. Allow the filler to dry completely, and then sand the area with fine-grit sandpaper to create a smooth, even surface. Finally, apply a touch-up marker or paint to the repaired area to match the cabinet finish.
Repairing Chips: Clean the affected area thoroughly. For small chips, apply a small amount of color-matched melamine repair filler to the chip. Use a putty knife to smooth the filler and remove any excess. Allow the filler to dry completely, and then sand the area with fine-grit sandpaper to create a smooth, even surface. Apply a touch-up marker or paint to the repaired area to match the cabinet finish. For larger chips, an epoxy repair kit may be required. Follow the manufacturer's instructions for mixing and applying the epoxy. Apply the epoxy to the chipped area, slightly overfilling the void. Allow the epoxy to cure completely, and then sand the area with progressively finer grits of sandpaper until it is flush with the surrounding surface. Apply a primer and then a color-matched paint to the repaired area to blend it in with the existing finish.
Repairing Dents: Repairing dents in melamine is challenging due to the rigidity of the material. Often, the most effective approach is to fill the dent with a color-matched melamine repair filler. Clean the dented area thoroughly. Apply the filler to the dent, slightly overfilling the indentation. Use a putty knife to smooth the filler and remove any excess. Allow the filler to dry completely, and then sand the area with fine-grit sandpaper to create a smooth, even surface. Apply a touch-up marker or paint to the repaired area to match the cabinet finish. In some cases, a heat gun can be used to gently warm the area, making the melamine slightly more pliable and easier to work with. However, extreme caution is necessary to avoid damaging the surrounding finish.
Repairing Water Damage: Water damage requires a more extensive repair process. First, remove any loose or damaged melamine and allow the underlying substrate to dry completely. Using a fan or dehumidifier will accelerate the drying process. Once the area is completely dry, assess the extent of the damage. If the particleboard or MDF is severely swollen or deteriorated, it may need to be replaced. Cut a new piece of particleboard or MDF to the appropriate size and shape, and attach it to the cabinet frame using wood glue and screws. Apply a color-matched melamine veneer to the new section, using contact cement or heat-activated adhesive. Trim the edges of the veneer to create a seamless finish. If the water damage is limited to the surface of the melamine, clean the area thoroughly and apply a color-matched melamine repair filler to any cracks or chips. Sand the area smooth and apply a waterproof sealant to prevent further water damage.
Repairing Edge Banding: For loose edge banding, clean the back of the banding and the edge of the cabinet with a solvent like denatured alcohol to remove any old adhesive residue. Apply a thin layer of contact cement to both surfaces and allow it to become tacky. Carefully align the edge banding with the edge of the cabinet and press it firmly into place. Use a roller or clamp to ensure a strong bond. For damaged edge banding, remove the old banding completely. Clean the edge of the cabinet and apply new edge banding using a heat gun or iron to activate the adhesive. Trim the excess banding with a utility knife or edge trimmer to create a flush finish. Alternatively, self-adhesive edge banding can be used, providing a simpler application process.

Learn How To Use Melamine Cabinets Repair Mdf Cabinet Doors

How Do I Fix Laminate Cabinets Hometalk

24b How To Repair Laminate Chips In Vinyl Foil Parts By Mohawk Finishing S Mpg

How To Touch Up Chipped Cabinets With A Paint Pen Exquisitely Unremarkable

My Laminate Drawers And Doors Are Ling Ing Help Hometalk

How To Repair Melamine Cabinets That Have Chipped Ehow

What Is The Best Way To Prep Painting Over Melamine Cabinets Hometalk

5 Tips For Painting Melamine Cabinets Real Milk Paint Co

Ling Melamine Cabinets Here S What To Do About It Today Homeowner Painting Bathroom Kitchen

How To Touch Up Chipped Cabinets With A Paint Pen Exquisitely Unremarkable
Related Posts

