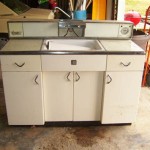
How To Repair Plastic Laminate Kitchen Cabinets
Plastic laminate kitchen cabinets offer a durable and cost-effective option for many homeowners. However, despite their resilience, these cabinets are still susceptible to damage from everyday wear and tear. Nicks, scratches, chips, and even peeling laminate can detract from the overall appearance of the kitchen. Understanding how to properly repair these common issues can significantly extend the life and aesthetic appeal of plastic laminate cabinets.
Before embarking on any repair, it's crucial to accurately identify the type and extent of the damage. This assessment will dictate the necessary tools, materials, and repair techniques required for a successful outcome. Minor surface scratches may only require a simple color-matched filler, whereas more significant damage, such as peeling laminate, will necessitate a more involved bonding and clamping process.
Assessing the Damage and Gathering Materials
The initial step in repairing plastic laminate cabinets is a thorough inspection. Examine all surfaces of the affected cabinet, noting the types of damage present. Common issues include surface scratches, chips, dents, peeling laminate, and water damage. Photographing the damage can be helpful for referencing the original state, especially if the repair process takes multiple stages. This assessment will also inform the materials needed. Depending on the damage, the following items might be required:
*Cleaning Supplies:
Mild detergent, warm water, and a soft cloth are essential for cleaning the area before any repairs are attempted. This ensures proper adhesion of fillers or adhesives. *Sandpaper:
A variety of grits, ranging from fine (220 grit) to medium (120 grit), are necessary for smoothing rough edges and preparing the surface for bonding or filling. *Wood Filler or Laminate Repair Paste:
Choose a filler that matches the color of the laminate as closely as possible. Some fillers are paintable if an exact match cannot be found. *Laminate Adhesive:
Contact cement or a specialized laminate adhesive is needed for re-attaching peeling laminate. Ensure the adhesive is compatible with the laminate material. *Clamps:
Various types of clamps, such as bar clamps or spring clamps, are necessary to apply pressure while the adhesive dries. This ensures a strong and lasting bond. *Putty Knife or Spreader:
Used for applying and smoothing fillers and adhesives. *Color-Matching Pens or Paint:
For minor scratches or to touch up filled areas where a perfect color match is not achievable with filler alone. *Safety Glasses and Gloves:
To protect eyes and hands during the repair process. *Heat Gun (Optional):
Can be used to soften stubborn laminate for easier removal or repositioning. Use with caution to avoid overheating and damaging the laminate. *Seam Roller (Optional):
A small roller designed to apply even pressure to newly bonded laminate edges.Selecting the correct materials and tools from the outset is critical for a successful repair. Compromising on quality or using inappropriate materials may lead to further damage or a less-than-satisfactory result.
Repairing Minor Scratches and Chips
Minor scratches and chips are among the most common types of damage found on plastic laminate kitchen cabinets. These imperfections can often be addressed with relatively simple techniques.
For Surface Scratches:
Begin by cleaning the affected area with a mild detergent and warm water. Dry the surface thoroughly. Use a color-matching pen or laminate repair paste to fill the scratch. Apply the pen or paste sparingly, following the manufacturer's instructions. Allow the filler to dry completely. If necessary, lightly sand the filled area with fine-grit sandpaper (220 grit or higher) to blend it seamlessly with the surrounding laminate. Wipe away any sanding dust with a clean, damp cloth. Apply a thin coat of laminate sealant or polish to protect the repaired area.For Small Chips:
Clean the chipped area thoroughly. Apply a small amount of laminate repair paste or wood filler to the chip, ensuring it fills the void completely. Use a putty knife or spreader to smooth the filler and remove any excess. Allow the filler to dry according to the manufacturer's instructions. Once dry, sand the filled area smooth with fine-grit sandpaper, blending it with the surrounding laminate. If necessary, use a color-matching pen or paint to achieve a perfect color match. Apply a sealant or polish to protect the repaired area.The key to a successful repair of scratches and chips is to work in thin layers and allow sufficient drying time between applications. Rushing the process can result in uneven filling or a poorly bonded repair.
Reattaching Peeling Laminate
Peeling laminate is a more significant problem that requires a more involved repair process. The goal is to re-bond the laminate to the underlying substrate, creating a strong and lasting connection.
Preparation:
Gently lift the loose laminate, being careful not to tear or damage it further. Clean both the underside of the laminate and the exposed substrate with a mild detergent and warm water. Allow both surfaces to dry completely. Remove any debris or loose particles from the substrate with a scraper or sandpaper.Applying Adhesive:
Apply a thin, even coat of laminate adhesive (contact cement or a specialized laminate adhesive) to both the underside of the laminate and the exposed substrate. Follow the manufacturer's instructions regarding application methods and drying times. Some adhesives require a "tack" time before the surfaces are brought together. Ensure adequate ventilation during the adhesive application process.Bonding and Clamping:
Carefully align the laminate with the substrate. Press the laminate firmly into place, starting from one edge and working your way across the entire surface. Use a seam roller (if available) to apply even pressure to the bonded area. Position clamps strategically across the repaired area to ensure consistent pressure while the adhesive dries. Use a protective barrier, such as a piece of wood or cardboard, between the clamps and the laminate to prevent damage. Allow the adhesive to dry completely, following the manufacturer's recommended drying time, typically 24-48 hours.Finishing:
Once the adhesive is fully cured, remove the clamps. Inspect the repaired area for any gaps or imperfections. If necessary, apply a small amount of filler to any gaps and sand smooth. Clean the repaired area with a damp cloth and apply a sealant or polish to protect the surface.In cases where the laminate is severely warped or damaged, it may not be possible to reattach it successfully. In such instances, replacement of the laminate panel or even the entire cabinet door may be necessary. Consider consulting a professional cabinet repair specialist for more complex or extensive damage.
Preventative measures, such as using placemats and coasters, promptly cleaning spills, and avoiding harsh cleaning chemicals, can help prolong the life and appearance of plastic laminate kitchen cabinets and minimize the need for repairs.

How Do I Fix Laminate Cabinets Hometalk

My Laminate Drawers And Doors Are Ling Ing Help Hometalk

How Do You Paint Laminate Kitchen Cupboards When They Re Ling Hometalk

Painting Laminate Kitchen Cabinets Cuckoo4design

Painting Laminate Kitchen Cabinets Cuckoo4design

The Easiest Way To Repair Laminate Countertop Chips Exquisitely Unremarkable

We Solve Vinyl Wrap Issues Kitchen Resurfacing Adelaide

How Do I Fix Laminate Cabinets Hometalk

How Do I Fix Laminate Cabinets Hometalk

Repair Loose Vinyl Cabinet Door Edges
Related Posts

