How to Replace Kitchen Kickboards
Kickboards, the horizontal panels that cover the space between the bottom of your kitchen cabinets and the floor, are often overlooked but play a crucial role in the functionality and aesthetic appeal of your kitchen. Over time, these boards can become damaged, stained, or simply outdated. Replacing them can refresh your kitchen's appearance and provide a clean, finished look.
This guide will provide a step-by-step process to replace kitchen kickboards, covering everything from preparation to installation. With the right tools and a little patience, you can successfully replace your kickboards and enhance your kitchen's style and appeal.
Step 1: Preparation and Tool Gathering
Before beginning the replacement process, it's essential to gather the necessary tools and materials. This will ensure a smooth and efficient operation.
- New kickboards: Measure the existing kickboards to determine the size and quantity needed. Consider the material, color, and finish to complement your kitchen's style.
- Measuring tape: Accurately measure the length and width of the new kickboards.
- Level: Ensure the new kickboards are installed straight and level.
- Saw: A circular saw or jigsaw will be necessary to cut the kickboards to size.
- Screwdriver: Use a Phillips-head screwdriver to secure the kickboards to the cabinets.
- Hammer: Drive nails into the kickboards for added security.
- Safety glasses: Protect your eyes from sawdust and debris.
- Work gloves: Protect your hands from splinters and rough surfaces.
- Pencil: Mark the cutting lines on the kickboards.
- Caulk gun: Apply sealant to the edges of the kickboards to prevent water damage.
- Silicone sealant: Create a watertight seal between the kickboards and the floor.
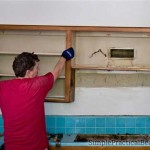
Step 2: Removing Existing Kickboards
Once you have gathered the necessary tools, it's time to remove the old kickboards. This process may vary depending on how the kickboards were originally installed.
- Identify the attachment method: Check if the kickboards are nailed, screwed, or glued to the cabinets.
- Remove fasteners carefully: Pry off any nails or screws with a hammer and pry bar, taking care not to damage the cabinets.
- Loosen glued kickboards: If glued, use a utility knife to cut the glue bond and carefully pry the kickboards off.
- Remove remaining debris: Clean the area thoroughly to remove any leftover glue, nails, or screws.
Step 3: Measuring and Cutting New Kickboards
Now that the old kickboards are removed, you can proceed to measure and cut the new ones to fit perfectly.
- Measure each section: Carefully measure the length and width of each kickboard section, ensuring accurate measurements are taken.
- Transfer measurements to kickboards: Mark the cutting lines on the new kickboards using a pencil and a straight edge.
- Cut the kickboards: Use a circular saw or jigsaw to cut the kickboards along the marked lines. Make sure to make precise cuts for a smooth and neat fit.
- Test fit the kickboards: Before attaching, dry fit the new kickboards to ensure they fit correctly and are level.
Step 4: Installing New Kickboards
With the kickboards measured and cut, it's time to install them securely in your kitchen.
- Attach kickboards to cabinets: Depending on your preference and the material of the cabinet, you can use screws, nails, or a construction adhesive to secure the kickboards. Ensure the boards are level and flush against the cabinets.
- Apply sealant: Use silicone sealant along the edges of the kickboards to create a watertight seal between the boards and the floor. This will prevent water from seeping in and causing damage.
- Clean up: Wipe away any excess sealant with a damp cloth to maintain a clean finish.
Replacing kitchen kickboards can be a relatively straightforward process. By following these steps and paying attention to detail, you can successfully update the look of your kitchen and improve its functionality.

Kitchen Kickboards Taken Fron The Renovation Series

How To Diy Your New Kitchen Kickboards The Door Company

How To Go About Replacing Damaged Kickbo Bunnings Work Community

Solved How To Replace Kitchen Cabinet Kickboard Bunnings Work Community

Easiest Way To Remove A Kitchen Plinth Without Damaging It

How To Install Kickboard Diy At Bunnings

How To Install Kickboard Diy At Bunnings

Solved How To Replace Kitchen Cabinet Kickboard Bunnings Work Community

How To Fit Kitchen Plinths Halman Thompson

How To Install Toe Kick Boards For Kitchen Cabinets Hunker