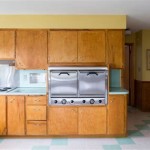
Restaining Old Oak Kitchen Cabinets: A Step-by-Step Guide
Reviving the charm of old oak kitchen cabinets can be a transformative project, adding warmth and character to your kitchen. Restoring them through restaining is a cost-effective way to achieve a refreshed look without replacing them. Here's a comprehensive guide to guide you through the process.
Materials Required
* Sandpaper (120 and 220 grit) * Sanding block or orbital sander * Tack cloth * Wood cleaner or denatured alcohol * Sponge or rag * Stain of your choice * Foam brush or rag * Polyurethane (optional, for added protection) * Mineral spirits (for brush cleaning)Step 1: Preparation
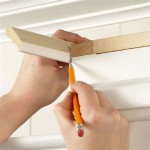
* Empty the cabinets and remove all hardware. * Lightly sand the surfaces with 120-grit sandpaper to remove dirt and old finish. * Vacuum or wipe away the sanding dust using a tack cloth. * Clean the cabinets with wood cleaner or denatured alcohol to remove any oils or grime. Allow them to dry completely.Step 2: Staining
* Stir the stain thoroughly to ensure even color distribution. * Apply a thin, even coat of stain using a foam brush or rag. Allow the first coat to soak in and dry for the recommended time stated on the stain container. * If desired, apply additional coats of stain until you achieve the desired color intensity. Always allow each coat to dry before applying the next.Step 3: Smoothing and Finishing
* Sand the stained surfaces with 220-grit sandpaper to remove any raised grain or imperfections. Wipe away the sanding dust with a tack cloth. * Apply a thin coat of polyurethane to seal and protect the stain. Use a foam brush or rag and follow the manufacturer's instructions for application. * Allow the polyurethane to dry completely, which usually takes several hours.Step 4: Reassembly
* Once the polyurethane has dried, reattach the hardware and put the doors and drawers back into the cabinets. * Wipe down the cabinets with a damp cloth to remove any sanding dust or residue.Tips for Success
* Test the stain on an inconspicuous area first to ensure desired color and compatibility. * Apply stain in the direction of the wood grain for a more natural look. * Use a light touch when sanding to avoid gouging the wood. * Allow ample drying time between each step to prevent smudging or blistering. * Use a high-quality brush or rag for even stain application. * Protect your work area with drop cloths or plastic sheeting to minimize mess.
How I Updated My Oak Cabinets Without Paint By Using Briwax Easy Budget Kitchen Makeover Only 24

Diy Staining Oak Cabinets Eclectic Spark

How To Refinish Wood Cabinets The Easy Way Love Remodeled

Refinishing Kitchen Cabinets Modern Refacing Made Easy Wisewood

How To Refinish Wood Cabinets The Easy Way Love Remodeled

Staining Your Wood Cabinets Darker Young House Love

How To Stain Oak Cabinetry Tutorial The Kim Six Fix

How To Make Rustic Kitchen Cabinets By Refinishing Them The Best Stain Color Amanda Katherine

Diy Staining Oak Cabinets Eclectic Spark

Cabinet Refinishing Guide
Related Posts