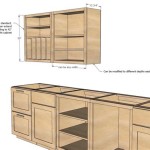
Resurfacing Kitchen Cabinets DIY: A Step-by-Step Guide
Transforming the look of your kitchen doesn't always require a complete remodel. Resurfacing your kitchen cabinets is a cost-effective solution that can revitalize their appearance and give your kitchen a fresh new look.
Follow these essential steps to achieve a professional-looking cabinet resurfacing project:
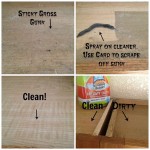
Step 1: Preparation and Cleaning
Begin by thoroughly cleaning the cabinets to remove dirt and grease. Use a degreaser or a mixture of dish soap and warm water. Dismantle any cabinet doors and hardware for easier handling.
Step 2: Repair and Fill Imperfections
Inspect the cabinets for any damage or imperfections. Fill any holes, dents, or gouges with wood filler. Apply the filler according to the manufacturer's instructions, allowing it to dry and sanding to smooth the surface.
Step 3: Sanding and Priming
Sand the cabinets using a medium-grit sandpaper to create a rough surface that will allow the primer to adhere well. Wipe off the sanding dust and apply a thin layer of primer designed for kitchen cabinets. Let the primer dry thoroughly before proceeding.
Step 4: Paint Application
Choose a cabinet paint specific for kitchen environments. Stir the paint thoroughly and apply a thin, even coat using a brush or a foam roller. Allow the first coat to dry completely before applying additional coats for full coverage.
Step 5: Protect with Polyurethane
Once the paint has dried, seal the cabinets with a polyurethane varnish. Polyurethane provides protection against wear and tear, moisture, and heat. Apply a thin, even coat and allow it to dry for several hours or overnight.
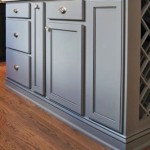
Step 6: Reinstall Hardware and Doors
After the polyurethane has fully cured, reattach the cabinet doors and hardware. Clean the hardware if necessary to remove any paint residue. Adjust the hinges and knobs for proper alignment and functionality.
Tips for a Successful Resurfacing Project:
- Use high-quality materials and tools.
- Clean the cabinets thoroughly to ensure good adhesion.
- Apply thin, even coats of paint and polyurethane.
- Allow sufficient drying time between coats.
- Protect the surrounding area from paint spills.
Resurfacing kitchen cabinets is a rewarding project that can transform the look of your kitchen. By following these steps and tips, you can achieve a professional-looking finish and enjoy your newly revitalized cabinets.

Diy Cabinet Refacing Budget Friendly Made Easy Wisewood

How To Reface Kitchen Cabinets Affordable Cabinet Update On A Budget Anika S Diy Life

Painted Furniture Ideas Diy Refacing Kitchen Cabinets

Kitchen Cabinet Refacing The Happy Housewife Home Management

Cabinet Refacing Ideas Diy Projects Craft How To S For Home Decor With

How To Reface Your Kitchen Cabinets Diy Family Handyman

Diy Cabinet Refacing Budget Friendly Made Easy Wisewood

Cabinet Refacing Ideas Diy Projects Craft How To S For Home Decor With Kitchen Remodel Small Remodeling Cabinets

Diy Kitchen Cabinets Makeover How To Install New Cabinet Glass Inserts

Cabinet Refacing How To Make Shaker Doors Love Remodeled
Related Posts