Resurfacing Wood Kitchen Cabinets: A Comprehensive Guide to Upgrading Your Kitchen
Resurfacing wood kitchen cabinets is a cost-effective and visually appealing option to revamp your kitchen without replacing them entirely. With proper planning and execution, you can achieve a stunning transformation that will enhance the functionality and aesthetics of your space.
1. Preparation: Assessing Your Cabinets
Before embarking on the resurfacing process, assess the condition of your cabinets. Determine the extent of damage, if any, and whether they are structurally sound. If there are significant repairs or water damage, it may be more practical to consider replacing the cabinets.
2. Cleaning and Degreasing
Thoroughly clean and degrease the cabinets to ensure proper adhesion of the new surface. Use a cleaner specifically designed for wood cabinets and a degreasing agent to remove grease and dirt. Allow the cabinets to dry completely before proceeding.
3. Sanding and Filling
Sand the cabinet surfaces to remove any existing finish and prepare them for the new one. Use fine-grit sandpaper and a sanding block to achieve a smooth finish. Fill any holes or imperfections with wood filler and allow it to dry.
4. Applying a Primer
Apply a coat of primer to the sanded cabinets. Primer helps to create a strong bond between the new surface and the wood and prevents stains or bleed-through from the old finish. Choose a primer compatible with the new surface you plan to apply.
5. Applying Laminate or Veneer
For a seamless look, laminate or veneer can be applied over the existing cabinet surfaces. Laminate is a thin, durable material available in various colors and patterns. Veneer is a thin layer of real wood that provides a natural wood grain look.
6. Applying Paint or Stain
If you prefer a painted or stained finish, choose high-quality paint or stain and apply it according to the manufacturer's instructions. Paint provides a solid color, while stain allows the wood grain to show through.
7. Adding New Hardware
Update the look of your cabinets by replacing the existing hardware. Choose handles and knobs that complement the new finish and enhance the overall design of your kitchen.
Tips for a Successful Resurfacing Project
- Use high-quality materials and adhesives to ensure durability.
- Follow the manufacturer's instructions carefully for each step.
- Ventilate the area well during the sanding and finishing processes.
- Allow ample drying time between each step.
- Consider hiring a professional if you lack experience in woodworking.

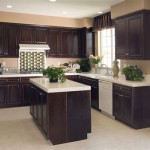
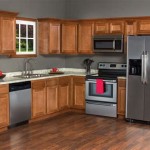
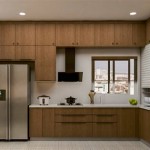
Cabinet Refinishing An 8 Step Guide For Pro Painters Ppc

Cabinet Refinishing Guide

How To Refinish Kitchen Cabinets Diy

Refinishing Kitchen Cabinets Modern Refacing Made Easy Wisewood

Refinish Kitchen Cabinets Without Stripping

The Fast Affordable Way To Upgrade Your Kitchen Cabinet Refinishing

How To Refinish Cabinets Like A Pro

Refinishing Kitchen Cabinets A Beautiful Mess

Should I Paint Or Refinish My Kitchen Cabinets

Staining Your Wood Cabinets Darker Young House Love
Related Posts