How To Spruce Up Old Oak Kitchen Cabinets
Old oak kitchen cabinets, while often durable and possessing inherent character, can sometimes appear dated or simply worn after years of use. Refreshing these cabinets can dramatically alter the overall aesthetic of a kitchen, breathing new life into the space without the significant expense of a complete renovation. Several options are available for sprucing up old oak cabinets, ranging from simple cleaning and hardware updates to more involved projects such as refinishing or painting. The chosen method depends on the desired outcome, the condition of the cabinets, and the homeowner's comfort level with DIY projects.
Before embarking on any project, a thorough assessment of the cabinet's condition is crucial. Examine the wood for signs of damage, such as scratches, dents, water stains, or warping. Check the hardware, including hinges, knobs, and pulls, for functionality and aesthetic appeal. Consider the existing kitchen décor and the desired style to ensure that the chosen upgrade complements the overall design. This initial evaluation will inform the selection of appropriate materials and techniques for the refurbishment process.
Cleaning and Surface Preparation
Regardless of the chosen upgrade method, cleaning and surface preparation are essential steps in any cabinet revitalization project. Over time, kitchen cabinets accumulate grease, grime, and dust, which can interfere with the adhesion of paint, stain, or other finishes. Effective cleaning removes these contaminants and provides a clean surface for subsequent treatments.
Begin by removing all hardware, including knobs, pulls, hinges, and door handles. This allows for thorough cleaning of the cabinet surfaces and prevents damage to the hardware during the cleaning process. Label each piece of hardware and its corresponding location to ensure proper reinstallation later.
Using a mild solution of soap and water, thoroughly wash all cabinet surfaces, both inside and out. A degreasing dish soap is particularly effective for removing stubborn grease buildup. Use a soft cloth or sponge to avoid scratching the wood. Pay close attention to areas around handles and hinges, where grime tends to accumulate. Rinse the cabinets thoroughly with clean water to remove any soap residue.
For particularly stubborn stains or grime, a stronger cleaning solution may be necessary. Mineral spirits or denatured alcohol can be effective for removing grease and wax buildup. However, it is crucial to test these solutions in an inconspicuous area first to ensure they do not damage the existing finish. Always wear gloves and eye protection when working with these types of cleaners, and ensure adequate ventilation.
Once the cabinets are clean and dry, lightly sand the surfaces with fine-grit sandpaper (e.g., 220-grit). This process, known as scuff sanding, creates a slightly roughened surface that promotes better adhesion of paint or stain. Sand in the direction of the wood grain to avoid scratching. After sanding, thoroughly remove all dust with a tack cloth or a vacuum cleaner with a brush attachment. A clean, dust-free surface is essential for achieving a professional-looking finish.
Updating Hardware and Minor Repairs
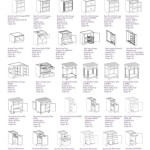
One of the simplest and most impactful ways to update old oak kitchen cabinets is to replace the hardware. New knobs, pulls, and hinges can dramatically change the overall look and feel of the cabinets, transforming them from dated to modern or classic depending on the chosen style. This is a relatively inexpensive and easy DIY project that can yield significant results.
When selecting new hardware, consider the existing kitchen décor and the desired style. Modern kitchens may benefit from sleek, minimalist hardware, while traditional kitchens may be better suited to more ornate designs. Consider the finish as well. Brushed nickel, stainless steel, and oil-rubbed bronze are popular choices that complement a variety of styles.
Before purchasing new hardware, measure the existing hole spacing to ensure compatibility. If the new hardware has a different hole spacing, it may be necessary to drill new holes. Use a template or measuring tool to ensure accurate placement of the new holes. Fill any existing holes with wood filler, sand smooth, and then drill the new holes.
In addition to updating hardware, addressing minor repairs can significantly improve the appearance of the cabinets. Fill any dents, scratches, or chips with wood filler. Allow the filler to dry completely according to the manufacturer's instructions, and then sand smooth with fine-grit sandpaper. For deeper gouges, multiple applications of wood filler may be necessary.
Loose hinges can be tightened by replacing stripped screw holes with wood glue and toothpicks or small wood dowels. Insert the toothpicks or dowels into the hole, break them off flush with the surface, and then re-drill the screw hole. This provides a solid base for the screws and prevents them from stripping out again. Doors that are misaligned can be adjusted by loosening the hinge screws and repositioning the door. Shim the hinges as needed to achieve proper alignment.
Refinishing or Painting Oak Cabinets
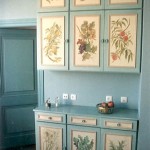
For a more dramatic transformation, refinishing or painting the oak cabinets are viable options. Refinishing involves stripping the existing finish and applying a new stain or clear coat, while painting involves priming and painting the cabinets with a new color. Both methods require more time and effort than simply updating hardware, but they can completely transform the look of the kitchen.
Refinishing is a good option for those who appreciate the natural beauty of oak wood but want to update the stain color or repair damage to the existing finish. The process involves removing the existing finish with a chemical stripper or by sanding. Chemical strippers are effective for removing multiple layers of finish, but they require careful handling and adequate ventilation. Sanding is a less hazardous option, but it can be time-consuming and requires the use of power tools like a sander. When sanding, start with a coarse-grit sandpaper and gradually work your way up to a finer grit to achieve a smooth surface.
Once the existing finish is removed, the wood can be stained with a new color. Choose a stain that complements the existing kitchen décor and enhances the natural grain of the oak. Apply the stain evenly with a brush or cloth, and then wipe off any excess. Allow the stain to dry completely according to the manufacturer's instructions. After the stain is dry, apply a clear coat to protect the wood and provide a durable finish. Polyurethane is a popular choice for clear coats because it is durable and resistant to water and scratches. Apply several thin coats of polyurethane, allowing each coat to dry completely before applying the next. Lightly sand between coats to remove any imperfections.
Painting oak cabinets is another effective way to update their appearance. Painting allows for a wider range of color choices and can completely conceal the wood grain. However, it is important to properly prepare the cabinets before painting to ensure a smooth, durable finish. Start by cleaning and sanding the cabinets as described earlier. Then, apply a primer specifically designed for kitchen cabinets. Primer helps to seal the wood and provides a good surface for the paint to adhere to. Choose a high-quality paint that is durable and easy to clean. Acrylic latex paint is a popular choice for kitchen cabinets because it is water-based, low-VOC, and resistant to mildew. Apply several thin coats of paint, allowing each coat to dry completely before applying the next. Lightly sand between coats to remove any imperfections. Consider using a paint sprayer for a smoother, more professional-looking finish.
Regardless of whether refinishing or painting, careful preparation and the use of high-quality materials are essential for achieving a professional-looking result. Patience and attention to detail are also crucial. Take your time, follow the instructions carefully, and don't be afraid to seek help if needed. With a little effort, old oak kitchen cabinets can be transformed into beautiful, updated features that enhance the overall aesthetic of the kitchen.

What To Do With Oak Cabinets Designed Kitchen Remodel Renovation Decor

How To Re Wood Cabinets Trends Finishing

How To Clean Kitchen Cabinets Everyday Skate

5 Ideas To Repaint Rebecca S Faded Wood Kitchen Cabinets Retro Renovation

15 Diy Kitchen Cabinet Makeovers Before After Photos Of Cabinets

Updating A 90s Kitchen Without Painting Cabinets

Old Oak Cabinets Painted White And Distressed Hometalk

How To Update Oak Or Wood Cabinets Without A Drop Of Paint Part 2 Kylie M Interiors

A Simple Kitchen Makeover Without Paint Remodel Oak Cabinets Old

For Those Who Kept Their Old Kitchen Cabinets Pics
Related Posts