How To Stain A Kitchen Cabinet: A Comprehensive Guide
Staining kitchen cabinets represents a cost-effective and aesthetically pleasing method for updating the appearance of a kitchen without the extensive labor and expense associated with replacing them. The process, while requiring patience and attention to detail, is achievable by homeowners with a basic understanding of woodworking and finishing techniques. This article provides a detailed guide on how to successfully stain kitchen cabinets, encompassing preparation, staining, and sealing.
Assessment and Preparation
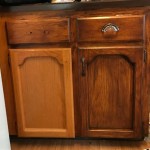
Before embarking on the staining process, a thorough assessment of the existing cabinets is crucial. The cabinet material significantly impacts the staining process. Solid wood cabinets, such as oak, maple, or cherry, are ideal for staining, as they readily absorb the stain and display the wood grain beautifully. Veneer cabinets, consisting of a thin layer of wood adhered to a substrate, can be stained, but require careful sanding to avoid damaging the veneer layer. Laminate or melamine cabinets, being non-porous, are generally not suitable for staining and are better addressed with painting techniques.
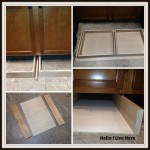
Once the cabinet material is determined, the next step involves meticulous cleaning. Remove all hardware, including knobs, pulls, hinges, and drawer slides. Thoroughly clean the cabinet surfaces with a degreasing cleaner to remove any grease, grime, or existing coatings. A solution of trisodium phosphate (TSP) diluted in water is effective for this purpose. Rinse the cabinets thoroughly with clean water and allow them to dry completely. It is also advisable to label each drawer and door, along with its corresponding cabinet location, to ensure proper reassembly after the staining process.
Sanding is a critical step in preparing the cabinets for staining. The purpose of sanding is to create a smooth, uniform surface that will readily accept the stain. For existing painted or varnished cabinets, begin with a coarser grit sandpaper, such as 120-grit, to remove the old finish. Progress to finer grits, such as 180-grit and 220-grit, to refine the surface. For raw wood cabinets, start with 180-grit sandpaper. Sand with the grain of the wood to avoid creating scratches that will be visible after staining. After sanding, remove all sanding dust with a tack cloth or a vacuum cleaner with a brush attachment. Any remaining dust will interfere with the stain's adhesion and result in an uneven finish.
After meticulous sanding and cleaning, the workspace needs proper attention to prevent a messy and unsafe environment. Cover all surrounding surfaces with drop cloths to protect them from stain splatters and spills. Ensure adequate ventilation by opening windows and doors or using a fan to circulate the air. This is crucial for reducing exposure to potentially harmful fumes from the stain and sealant. Wear appropriate personal protective equipment (PPE), including gloves, a respirator or dust mask, and eye protection, to safeguard against chemicals and dust particles.
Staining Application Techniques
Selecting the appropriate stain is paramount to achieving the desired aesthetic outcome. Wood stains are available in various formulations, including oil-based, water-based, and gel stains. Oil-based stains penetrate deeply into the wood pores, providing rich color and enhancing the wood grain. They typically offer longer working times but require mineral spirits for cleanup. Water-based stains are low in VOCs (volatile organic compounds), making them a more environmentally friendly option. They dry quickly and clean up with water, but may not penetrate as deeply as oil-based stains. Gel stains are ideal for non-porous surfaces or vertical applications, as they have a thick consistency that prevents drips and runs.
Before applying the stain to the cabinets, it is imperative to test the stain color on a hidden area or a scrap piece of wood that matches the cabinet material. This allows one to assess the color intensity and ensure it aligns with the desired aesthetic. Apply the stain according to the manufacturer's instructions. Generally, this involves using a brush, a foam applicator, or a clean rag to apply a thin, even coat of stain to the wood surface. Work with the grain of the wood to ensure consistent application. Avoid applying too much stain at once, as this can lead to blotching or uneven color.
After applying the stain, allow it to penetrate the wood for the recommended time specified by the manufacturer. This dwell time determines the intensity of the color. The longer the stain remains on the wood, the darker the color will be. However, exceeding the recommended dwell time can result in a muddy or opaque appearance. After the dwell time has elapsed, use a clean rag to wipe off any excess stain. Wipe in the direction of the wood grain to avoid streaking. Ensure that all excess stain is removed, as any leftover stain will dry on the surface and create a tacky or uneven finish.
For a richer, deeper color, multiple coats of stain may be applied. Allow each coat to dry completely before applying the next. Lightly sand the surface between coats with fine-grit sandpaper (320-grit or higher) to ensure proper adhesion. Remove all sanding dust before applying the subsequent coat of stain. It is essential to note that each additional coat will darken the color, so it is advisable to proceed with caution and avoid applying too many coats.
Sealing and Finishing
Once the stain has dried completely, sealing the cabinets is necessary to protect the stained surface and enhance its durability. A clear topcoat will prevent scratches, moisture damage, and fading. The choice of sealant depends on the desired level of protection and sheen. Polyurethane is a durable and water-resistant option that is available in oil-based and water-based formulations. Oil-based polyurethane provides a warmer, amber hue, while water-based polyurethane is clear and non-yellowing. Varnish is another option that offers good protection and is available in various sheens, including gloss, semi-gloss, and satin. Lacquer provides a smooth, durable finish but requires specialized equipment for application and is best left to professionals.
Before applying the sealant, ensure the stained surface is clean and free of any dust or debris. Lightly sand the surface with fine-grit sandpaper (320-grit or higher) to create a smooth, even surface for the sealant to adhere to. Remove all sanding dust with a tack cloth or a vacuum cleaner with a brush attachment. Apply the sealant in thin, even coats, following the manufacturer's instructions. Use a high-quality brush, a foam applicator, or a spray gun to apply the sealant. Work with the grain of the wood to ensure consistent application. Avoid applying too much sealant at once, as this can lead to runs or drips.
Allow each coat of sealant to dry completely before applying the next. Lightly sand the surface between coats with fine-grit sandpaper (400-grit or higher) to remove any imperfections and ensure proper adhesion. Remove all sanding dust before applying the subsequent coat of sealant. Applying multiple coats of sealant provides greater protection and enhances the durability of the finish. Typically, two to three coats of sealant are sufficient for kitchen cabinets.
After the final coat of sealant has dried completely, allow the cabinets to cure for the recommended time specified by the manufacturer. Curing allows the sealant to fully harden and reach its maximum durability. During the curing process, avoid exposing the cabinets to excessive moisture or extreme temperatures. Once the cabinets have cured, reassemble the hardware and reinstall the doors and drawers. Ensure that all screws are tightened securely but not over-tightened.
Maintaining stained kitchen cabinets is crucial for preserving their appearance and extending their lifespan. Regularly clean the cabinets with a mild soap and water solution. Avoid using abrasive cleaners or harsh chemicals, as these can damage the finish. Wipe up spills immediately to prevent staining or water damage. Periodically apply a furniture polish or wood conditioner to keep the wood moisturized and prevent it from drying out. With proper care and maintenance, stained kitchen cabinets can provide years of beauty and functionality.

Staining Kitchen Cabinets Pictures Ideas Tips From

How To Stain Wood Cabinets True Value

How To Stain Oak Cabinetry Tutorial The Kim Six Fix

Staining Your Wood Cabinets Darker Young House Love

Gel Stain Kitchen Cabinets Without Sanding Fast Easy Diy

The New Cabinet Stain Colour For Kitchens Trends Wood

15 Stained Wood Kitchen Cabinets To Warm The Heart Of Your Home

How To Stain Cabinets Step By Guide Whole Cabinet Supply

How To Stain Dark Or Yellow Kitchen Cabinets Lighter

Cabinet Refinishing Guide
Related Posts