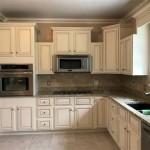
Essential Aspects of How To Strip And Refinish Kitchen Cabinets
Kitchen cabinets are a significant element of your kitchen's design, but they can become worn or outdated over time. Stripping and refinishing kitchen cabinets is a great way to update your kitchen's look without the expense of replacing them. This can be a challenging task, but it is manageable with the proper preparation and materials.
Materials You'll Need
Before you begin stripping and refinishing your kitchen cabinets, ensure you have all the necessary materials. This includes:
- Paint stripper
- Paint brushes
- Sandpaper (various grits)
- Tack cloths
- Angled paintbrush
- Primer
- Paint
- Polyurethane (optional)
Preparing the Cabinets
Once you have gathered your materials, you can begin preparing your cabinets for stripping. The initial step is to remove all the doors and hardware. Clean the cabinets thoroughly with a degreaser to remove all dirt and grease. This will help the paint stripper adhere better.
Stripping the Cabinets
Put on gloves and a mask for protection. Apply the paint stripper to a small area of the cabinet with a paintbrush. Let it sit for the recommended time, typically 15-20 minutes, then test a small area to see if the paint is loose. If it is, use a paint scraper to remove the loose paint. Continue this process until all the paint has been removed.
Sanding the Cabinets
Once the paint has been stripped, it's time to sand the cabinets. Start with coarse-grit sandpaper (80-120 grit) to remove any remaining paint or imperfections. Gradually move to finer-grit sandpaper (220-400 grit) to smooth out the surface. Use a tack cloth to remove any dust after each sanding.
Priming and Painting
Before painting your cabinets, apply a coat of primer. Primer helps the paint adhere better and provides a smooth finish. Allow the primer to dry completely, then apply two coats of paint. Use an angled paintbrush to get into the corners and crevices. Allow each coat of paint to dry thoroughly before applying the next.
Applying Polyurethane (optional)
If you want to add extra protection to your cabinets, apply a coat of polyurethane after the paint has dried. Polyurethane is a clear finish that will protect the cabinets from scratches and wear. Allow the polyurethane to dry completely before using your cabinets.
Conclusion
Stripping and refinishing kitchen cabinets is a rewarding project that can update your kitchen's look without breaking the bank. By following these steps and using the proper materials, you can achieve a professional-looking finish that will last for years to come.

Refinishing Kitchen Cabinets Modern Refacing Made Easy Wisewood

How To Refinish Wood Cabinets The Easy Way Love Remodeled

How To Refinish Kitchen Cabinets N Hance

How To Strip And Re Stain Kitchen Cabinets Clinton Township Mi Eason Painting

Refinishing Kitchen Cabinets A Beautiful Mess

How To Refinish Wood Cabinets The Easy Way Love Remodeled

How To Refinish Kitchen Cabinets Diy

Refinish Kitchen Cabinets With Kilz Restoration Primer

How To Strip Cabinets Best Cabinet Refinishing Method

How To Strip Paint Off Kitchen Cabinets And Furniture
Related Posts