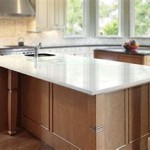
How To Update Kitchen Cabinets With Paint
Updating kitchen cabinets with paint is a cost-effective and transformative home improvement project. A fresh coat of paint can revitalize an outdated kitchen, breathing new life into the space without the expense and disruption of a full cabinet replacement. This process, while seemingly simple, requires careful planning, preparation, and execution to achieve a professional and durable finish. The selection of the appropriate paint type, proper surface preparation, and the application technique all contribute to the final outcome. This article details the steps involved in updating kitchen cabinets with paint, offering guidance to ensure a successful and visually appealing result.
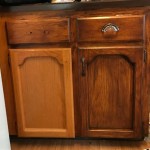
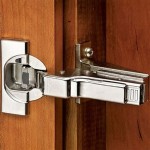
Before commencing the painting process, a thorough assessment of the existing cabinets is crucial. Consider the material of the cabinets—whether they are wood, laminate, or metal—as this will influence the type of primer and paint required. Examine the cabinets for any existing damage, such as scratches, dents, or peeling paint. These imperfections will need to be addressed during the preparation phase to ensure a smooth and even surface for painting. Furthermore, evaluate the hardware, including knobs, pulls, and hinges. Determine whether you intend to reuse the existing hardware or replace it with new options. Replacing hardware can significantly enhance the updated look of the cabinets.
Key Point 1: Preparing the Cabinets for Painting
The success of any paint project hinges on the quality of the preparation. This stage is arguably more important than the painting itself, as it directly impacts the adhesion and longevity of the finish. The initial step is to remove all cabinet doors and drawers. This allows for easier access to all surfaces and ensures a more uniform application of paint. Label each door and drawer with a corresponding number or letter and mark the location on the cabinet frame. This prevents confusion during reassembly and ensures that each component is returned to its original position.
Once the doors and drawers are removed, thoroughly clean all surfaces. Use a degreasing cleaner specifically designed for kitchen cabinets to remove grease, grime, and food residue. These contaminants can prevent the paint from adhering properly, leading to peeling or chipping. After cleaning, rinse the surfaces with clean water and allow them to dry completely. This step is often overlooked but is vital for optimal paint adhesion.
After cleaning, inspect the surfaces for imperfections. Fill any holes, dents, or scratches with wood filler or spackle. Allow the filler to dry completely according to the manufacturer's instructions, and then sand it smooth with fine-grit sandpaper (220-grit is generally recommended). Sanding creates a smooth, even surface and helps the primer to adhere properly. For cabinets with a glossy or varnished finish, sanding the entire surface is necessary to create a "tooth" for the primer to grip. Use medium-grit sandpaper (120-grit) for this purpose, and then follow up with fine-grit sandpaper to smooth out any rough edges.
Once sanding is complete, remove all sanding dust with a tack cloth or damp cloth. Dust can interfere with the paint adhesion and create a rough finish. Ensure all surfaces are completely clean and dry before proceeding to the priming stage. Finally, protect the surrounding areas with drop cloths or painter's tape. Cover countertops, floors, and appliances to prevent paint splatters and drips.
Key Point 2: Selecting the Right Paint and Primer
Choosing the appropriate primer and paint is critical for achieving a durable and aesthetically pleasing finish. The primer serves as a foundation for the paint, promoting adhesion, blocking stains, and creating a uniform surface. For kitchen cabinets, an oil-based or shellac-based primer is often recommended. These primers offer excellent adhesion and stain-blocking properties, making them suitable for cabinets that have been previously painted or stained.
Water-based primers are also an option, particularly for cabinets that have not been previously painted or stained. They are easier to clean up and have lower VOC (volatile organic compound) emissions. However, they may not provide the same level of stain-blocking as oil-based or shellac-based primers. Regardless of the type chosen, apply a thin, even coat of primer to all surfaces, following the manufacturer's instructions. Allow the primer to dry completely before proceeding to the painting stage.
Selecting the right paint is equally important. For kitchen cabinets, alkyd or acrylic enamel paints are generally recommended. These paints are durable, easy to clean, and resistant to moisture and grease. Alkyd paints offer a harder, more durable finish than acrylic paints, but they have higher VOC emissions and require mineral spirits for cleanup. Acrylic enamel paints are water-based, making them easier to clean up and having lower VOC emissions. They are also more flexible than alkyd paints, making them less likely to crack or chip.
The sheen of the paint is another important consideration. A semi-gloss or gloss finish is typically recommended for kitchen cabinets. These finishes are more durable and easier to clean than matte or satin finishes. However, they also tend to highlight imperfections in the surface, so proper preparation is essential. A satin finish can provide a good compromise between durability and aesthetics. It is easier to clean than a matte finish but less reflective than a semi-gloss or gloss finish.
Consider using paint specifically formulated for cabinets and furniture. These paints are designed to withstand the wear and tear of daily use and provide a durable, long-lasting finish. Always test the paint and primer in an inconspicuous area before applying it to the entire surface. This allows you to assess the color, adhesion, and finish of the product.
Key Point 3: Applying the Paint and Reassembling the Cabinets
Once the primer has dried completely, it is time to apply the paint. For best results, use a combination of paintbrush and roller. Use a high-quality paintbrush for cutting in around edges and corners, and a small foam roller for applying paint to the flat surfaces. A foam roller will provide a smooth, even finish with minimal brushstrokes. Apply the paint in thin, even coats, avoiding drips and runs. Allow each coat to dry completely before applying the next.
Two coats of paint are typically required for optimal coverage and durability. Lightly sand the surface between coats with fine-grit sandpaper (320-grit or higher) to remove any imperfections and create a smooth surface for the next coat. Remove all sanding dust with a tack cloth or damp cloth before applying the second coat of paint. Pay close attention to detail, ensuring that all surfaces are evenly coated and that there are no drips or runs. Allow the second coat of paint to dry completely according to the manufacturer's instructions.
For a truly professional finish, consider using a paint sprayer. Paint sprayers provide a smooth, even finish with minimal effort. However, they require more setup and cleanup than brushes and rollers. If using a paint sprayer, be sure to follow the manufacturer's instructions carefully. Thin the paint as needed and use proper ventilation. Practice on a scrap piece of wood or cardboard before painting the cabinets to get a feel for the sprayer and adjust the settings as needed.
Once the paint has dried completely, carefully remove the painter's tape and drop cloths. Inspect the cabinets for any imperfections or missed spots. Touch up any areas as needed with a small paintbrush. Allow the touch-up paint to dry completely before reassembling the cabinets. If new hardware was purchased, install it at this time. Ensure that all screws are tight and that the hardware is properly aligned.
Finally, reattach the cabinet doors and drawers to the cabinet frames. Use the labels to ensure that each component is returned to its original position. Adjust the hinges as needed to ensure that the doors and drawers are properly aligned and that they open and close smoothly. Clean the cabinets with a mild soap and water solution to remove any fingerprints or smudges. The updated kitchen cabinets are now ready to be enjoyed.
How To Paint Your Kitchen Cabinets Houzz
How To Paint Kitchen Cabinets A Step By Guide Confessions Of Serial Do It Yourselfer
How To Paint Kitchen Cabinets The Love Notes Blog
Avoid These Mistakes How To Paint Cabinets That Are Already Painted Grace In My Space
25 Easy Ways To Update Kitchen Cabinets
15 Diy Kitchen Cabinet Makeovers Before After Photos Of Cabinets
Painted Kitchen Cabinets One Year Later The Palette Muse
25 Easy Ways To Update Kitchen Cabinets
Diy Painted Oak Kitchen Cabinets Makeover
Step By How To Paint Kitchen Cabinets Like A Pro And On Budget The American Patriette
Related Posts