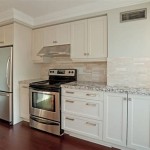
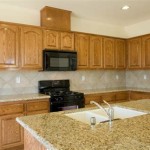
How to Update Old Kitchen Cabinet Doors
Kitchen cabinets significantly influence the aesthetic and functionality of a kitchen space. Over time, cabinet doors can become worn, outdated, or simply lose their appeal. Rather than undertaking a complete kitchen renovation, updating the cabinet doors provides a cost-effective and less disruptive method to refresh the room's appearance. This article details several practical methods for updating old kitchen cabinet doors, encompassing preparation, various techniques, and considerations for achieving a refreshed and updated kitchen.
Before commencing any updates, a thorough assessment of the existing cabinet structure is crucial. Evaluate the condition of the cabinet boxes themselves. If the boxes are structurally unsound or show signs of significant damage (rot, warping, or severe wear), replacing the entire cabinet may be more beneficial in the long run. If the boxes remain in good condition, updating the doors presents a viable option. Examine the door hinges and hardware. Determine if they are in good working order or need replacement. Replacing old or corroded hardware will contribute significantly to the overall updated look.
Cleaning the cabinet doors thoroughly before any work begins is paramount. Remove all hardware, including knobs, pulls, and hinges. Wash the doors with a degreasing cleaner to remove grease, grime, and any residue buildup. Rinse thoroughly with clean water and allow the doors to dry completely. This step ensures proper adhesion of any paint, stain, or other finishes applied later.
1. Painting Kitchen Cabinet Doors
Painting is one of the most common and effective methods for updating kitchen cabinet doors. It allows for a complete color transformation and provides a fresh, new look. Proper preparation is key to achieving a professional-looking finish.
Sanding the cabinet doors creates a slightly rough surface that allows the paint to adhere better. Use a medium-grit sandpaper (around 120-150 grit) to lightly sand the doors, paying particular attention to any glossy surfaces or areas with existing finish. If the doors have a very thick or uneven existing finish, starting with a coarser grit (80-100 grit) may be necessary, followed by a medium grit to smooth the surface. After sanding, wipe the doors thoroughly with a tack cloth to remove all sanding dust. Dust particles will interfere with the paint finish, creating a bumpy or uneven surface.
Applying a primer is an essential step, especially if the cabinet doors are made of wood or have a dark existing finish. Primer seals the wood and prevents the existing finish from bleeding through the new paint. It also provides a uniform surface for the paint to adhere to, resulting in better coverage and a more durable finish. Choose a primer that is specifically designed for the type of material the cabinet doors are made of (e.g., wood primer, laminate primer). Apply the primer in thin, even coats, following the manufacturer's instructions. Allow the primer to dry completely before proceeding to the next step.
Selecting the right paint is crucial for achieving a long-lasting and attractive finish. For kitchen cabinets, a high-quality acrylic latex paint is generally recommended. Acrylic latex paints are durable, easy to clean, and resistant to moisture and grease. Choose a paint with a sheen that is appropriate for kitchen cabinets. Semi-gloss or gloss finishes are popular choices because they are easy to wipe clean. Matte finishes, while more modern, can be more difficult to clean and may show fingerprints and smudges more easily. Apply the paint in thin, even coats, using a high-quality brush, roller, or paint sprayer. Multiple thin coats are better than one thick coat, as they will result in a smoother, more even finish. Allow each coat to dry completely before applying the next.
Once the paint is completely dry, consider applying a clear topcoat for added protection and durability. A clear topcoat will protect the paint from scratches, chips, and stains, and will also make the cabinets easier to clean. Choose a clear topcoat that is compatible with the type of paint used. Apply the topcoat in thin, even coats, following the manufacturer's instructions. Allow the topcoat to dry completely before re-installing the hardware and hanging the cabinet doors.
2. Refacing Kitchen Cabinet Doors
Refacing involves replacing the existing cabinet doors and drawer fronts with new ones, while keeping the existing cabinet boxes in place. This method offers a more dramatic transformation than painting, as it allows for a complete change in style and material.
Measuring the existing cabinet doors precisely is critical for ordering new doors that fit perfectly. Measure the height, width, and thickness of each door. Note the location of the hinges on the existing doors, as this will need to be replicated on the new doors. Taking accurate measurements will ensure that the new doors fit properly and that the hinges align correctly. It is advisable to double-check all measurements before placing an order.
Choosing the right style and material for the new cabinet doors depends on the desired aesthetic and budget. Common materials include solid wood, wood veneer, MDF (medium-density fiberboard), and laminate. Solid wood doors are the most durable and offer a classic look, but they are also the most expensive. Wood veneer doors consist of a thin layer of real wood adhered to a core of MDF or particleboard. They offer a similar look to solid wood at a lower price point. MDF doors are less expensive than wood doors and are a good option for painted cabinets, as they are smooth and easy to paint. Laminate doors are the most affordable option and are available in a wide range of colors and patterns. The style of the doors should complement the overall design of the kitchen. Shaker-style doors are a popular choice for their clean lines and versatility. Raised-panel doors offer a more traditional look, while flat-panel doors are ideal for modern kitchens.
Installing the new cabinet doors requires careful attention to detail. Begin by attaching the hinges to the new doors. Use the measurements taken from the existing doors to ensure that the hinges are positioned correctly. Align the new doors with the cabinet boxes and attach them using screws. Ensure that the doors are level and plumb before tightening the screws completely. Adjust the hinges as needed to ensure that the doors open and close smoothly. Re-install the hardware, such as knobs and pulls, to complete the installation.
3. Adding Decorative Elements to Kitchen Cabinet Doors
Sometimes, a simple update is all that is needed to refresh the look of kitchen cabinet doors. Adding decorative elements can significantly enhance their appearance without requiring a complete overhaul.
Replacing the cabinet hardware is a quick and easy way to update the look of the doors. New knobs, pulls, and hinges can transform the appearance of the cabinets without requiring any painting or refacing. Choose hardware that complements the style of the kitchen. Modern kitchens often feature sleek, stainless steel hardware, while traditional kitchens may use more ornate, antique-style hardware. Consider the finish of the hardware, such as brushed nickel, oil-rubbed bronze, or polished chrome, to match the existing fixtures in the kitchen. Ensure the new hardware is compatible in size and screw hole placement with the old hardware, or be prepared to drill new holes.
Applying decorative molding to the cabinet doors can add visual interest and dimension. Molding can be applied to the inside of the door panels to create a raised-panel effect, or it can be applied around the edges of the doors to add a more decorative touch. Choose molding that complements the style of the kitchen. Simple, minimalist molding is ideal for modern kitchens, while more ornate molding is suitable for traditional kitchens. Attach the molding using wood glue and finishing nails. Fill any nail holes with wood filler and sand smooth before painting or staining the molding to match the cabinet doors.
Adding glass panels to some of the cabinet doors can create a more open and airy feel in the kitchen. Glass panels allow you to display dishes and other items, adding visual interest and personality to the space. Replace the existing door panels with glass panels, or have a professional cut openings in the doors and install glass inserts. Choose glass that complements the style of the kitchen. Clear glass is a classic choice, while frosted glass provides a more subtle and understated look. Patterned glass can add a touch of elegance and sophistication. Beveled glass and leaded glass can add a touch of elegance and sophistication.
Using stencils and paint to add decorative designs to the cabinet doors is a creative way to personalize the kitchen. Choose stencils with patterns that complement the style of the kitchen. Apply the stencils to the cabinet doors using a stencil brush or sponge. Use a light touch to prevent the paint from bleeding under the edges of the stencil. Remove the stencil carefully and allow the paint to dry completely. Seal the design with a clear topcoat for added protection and durability.
Updating old kitchen cabinet doors is a viable way to refresh the kitchen without incurring the expense and disruption of a full renovation. By carefully assessing the existing cabinets, properly preparing the surfaces, and selecting appropriate techniques like painting, refacing, or adding decorative elements, a homeowner can significantly enhance the aesthetic appeal and functionality of their kitchen space. Thorough planning and attention to detail are crucial for achieving professional-looking results and a long-lasting, updated kitchen.

How To Update Kitchen Cabinet Doors On A Dime My Blessed Life

25 Easy Ways To Update Kitchen Cabinets

Diy Inexpensive Cabinet Updates Kitchen Cabinets Makeover Renovation

25 Easy Ways To Update Kitchen Cabinets

15 Diy Kitchen Cabinet Makeovers Before After Photos Of Cabinets

How To Update Kitchen Cabinet Doors On A Dime My Blessed Life

15 Diy Kitchen Cabinet Makeovers Before After Photos Of Cabinets

Diy Inexpensive Cabinet Updates Update Cabinets Flat Front Kitchen

25 Easy Ways To Update Kitchen Cabinets

How To Update Your Kitchen Cabinets Without Replacing Them Real Estate U S News
Related Posts