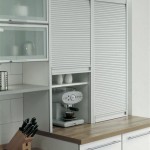
How to Vinyl Wrap Cabinet Doors
Revitalizing cabinet doors with vinyl wraps is a budget-friendly and visually transformative DIY project. This process offers a quick and easy way to refresh outdated cabinets, adding a modern touch or bold accent to your kitchen, bathroom, or any other space. Whether you're seeking a subtle update or a dramatic makeover, vinyl wraps provide a versatile solution for achieving your desired aesthetic.
1. Preparation: Setting the Stage for Success
Before embarking on the wrapping process, meticulous preparation is paramount. This step ensures a smooth and successful application, resulting in a professional-looking finish.
Clean and Degrease: Begin by thoroughly cleaning the cabinet doors with a mild dish soap and water solution. This removes any dirt, grease, or residue that might interfere with the adhesive. Following the cleaning, wipe the doors down with rubbing alcohol to ensure they are completely degreased. Allow the surfaces to dry completely before proceeding.
Sanding and Primer: If the cabinet doors have a textured finish, sanding them with fine-grit sandpaper will create a smoother surface for the vinyl to adhere to. This step is particularly crucial for high-gloss surfaces. Once sanded, lightly dust the doors to remove any sanding residue. Primer is optional but recommended for smoother, more durable results, particularly on porous surfaces like wood. Apply a primer specifically designed for vinyl wraps and allow it to dry completely.
Measure and Cut: Carefully measure the dimensions of each cabinet door and add an extra inch or two on all sides to allow for trimming and adjustment. Using a sharp utility knife, cut the vinyl wrap to the required size. It's advisable to cut a few inches larger and trim the excess after application to ensure a flawless fit.
2. Application: A Step-by-Step Guide
The application process requires precision and care to achieve a professional look. Proper technique can prevent air bubbles and wrinkles, ensuring a smooth and seamless finish.
Start from the Center: Begin by peeling back a few inches of the vinyl backing paper and aligning the wrap with the top edge of the cabinet door. Peel back a small portion of the backing paper, gradually aligning and pressing the vinyl to the surface. Avoid pulling the backing paper too far, as it can cause the vinyl to wrinkle.
Smooth and Squeegee: Use a squeegee or credit card to smooth the vinyl from the center outward, working towards the edges. Apply moderate pressure, ensuring the vinyl is firmly adhered to the surface. Avoid pressing too hard as it might distort the vinyl.
Trim and Finish: Once the entire surface is covered, use a sharp utility knife to trim any excess vinyl along the edges. Ensure the cuts are precise and flush. For a clean and professional look, consider using a heat gun or hairdryer on a low setting to gently smooth out any minor wrinkles or air bubbles.
3. Additional Tips and Considerations
To enhance the outcome of your vinyl wrap project, consider additional tips and techniques.
Heat Gun and Squeegee: Utilizing a heat gun or hairdryer on a low setting can help to activate the adhesive and ensure a tighter bond. Apply gentle heat while smoothing the vinyl with a squeegee, working from the center towards the edges.
Pattern Alignment: When working with patterned vinyl, pay close attention to the alignment. Ensure the pattern seamlessly transitions between panels. If the project involves multiple doors, consider using a pencil to mark the pattern alignment on the first door as a reference for the remaining doors.
Patience and Precision: Vinyl wrapping requires patience and precision. Take your time, and don't hesitate to reposition or re-apply sections if necessary. With careful planning and meticulous application, you can achieve professional-looking results.

How To Reface Cabinet Doors With Vinyl Wrap

Using D C Fix To Wrap Shaker Kitchen Doors

A Step By Guide On How To Wrap Your Kitchen Doors And Worktop Using Self Adhesive Vinyl

How To Vinyl Wrap Kitchen Cabinet Doors Budget Makeover

How To Vinyl Wrap Kitchen Doors Checkatrade

Are Vinyl Wrap Kitchens Any Good Wespray

Refinishing Theril Cabinet Doors

How To Vinyl Wrap Cupboard Doors A Step By Guide

Pvc Vinyl Wrap Kitchen Cabinet Door China Made In Com

Re Bubbling Or Ling Vinyl Wrap Kitchens With Spray Painting Wespray
Related Posts