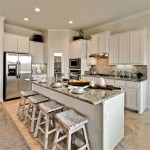
How To Whitewash Kitchen Cabinets
Whitewashing kitchen cabinets offers a cost-effective way to brighten and update a kitchen without the expense of full replacement or repainting. This technique allows the natural wood grain to show through while adding a touch of rustic charm. This article provides a comprehensive guide to achieving professional-looking results when whitewashing kitchen cabinets.
Preparation is Key: Before beginning the whitewashing process, thorough preparation is essential. This ensures proper adhesion and a smooth, even finish. Begin by removing all hardware, including knobs, pulls, hinges, and any decorative elements. Label and store hardware carefully for easy reattachment later.
Cleaning the Cabinets: Grease and grime can interfere with the whitewash adhering properly. Clean the cabinet surfaces thoroughly with a degreasing cleaner. A solution of warm water and mild dish soap is often sufficient. For stubborn grease buildup, a dedicated kitchen degreaser may be necessary. Rinse the cabinets thoroughly with clean water and allow them to dry completely.
Protecting the Surroundings: Whitewash can splatter and drip, so protecting surrounding surfaces is crucial. Cover countertops, floors, and appliances with drop cloths or plastic sheeting. Use painter's tape to mask off areas that border the cabinets, such as walls and backsplashes.
Sanding for Smoothness: While not always mandatory, lightly sanding the cabinet surfaces can improve the adhesion of the whitewash, especially for cabinets with a glossy finish. Use fine-grit sandpaper (around 220-grit) and sand lightly in the direction of the wood grain. After sanding, wipe away any dust with a tack cloth or a damp cloth.
Choosing the Right Whitewash Mixture: Several options exist for creating a whitewash mixture. The simplest method involves combining equal parts water and white latex paint. For a thinner, more translucent wash, use a higher ratio of water to paint. Conversely, for more opaque coverage, use a higher ratio of paint to water. Test the mixture on a small, inconspicuous area of the cabinet to ensure the desired opacity is achieved before proceeding.
Applying the Whitewash: A variety of tools can be used to apply the whitewash, including brushes, rags, or sponges. Brushes offer more control and are ideal for cabinets with intricate details. Rags or sponges create a more textured, rustic look. Apply the whitewash in thin, even coats, working in the direction of the wood grain. Avoid applying too much whitewash at once, as this can lead to drips and uneven coverage.
Distressing for a Rustic Look (Optional): For a more aged, rustic appearance, consider distressing the cabinets after the whitewash has dried. This can be achieved by lightly sanding the edges and corners to reveal the wood beneath. A wire brush can also be used to create a more textured, worn look.
Sealing the Whitewash: Once the whitewash has dried completely and any distressing is finished, sealing the cabinets is crucial for protecting the finish and enhancing durability. A clear water-based polyurethane sealer is recommended. Apply the sealer in thin, even coats, following the manufacturer's instructions. Allow the sealer to dry completely between coats.
Reinstalling Hardware: After the sealer has cured, reinstall the cabinet hardware. Ensure all screws and hinges are tightened securely. Take care not to scratch the newly finished surfaces.
Maintaining Whitewashed Cabinets: Proper maintenance will help preserve the beauty and longevity of whitewashed cabinets. Clean the cabinets regularly with a soft, damp cloth and a mild cleaning solution. Avoid using abrasive cleaners or scouring pads, as these can damage the finish. For tougher stains or spills, a solution of baking soda and water can be effective.
Troubleshooting Common Issues: Uneven coverage can occur if the whitewash is applied too thickly or unevenly. If this happens, lightly sand the affected area and apply a thin, even coat of whitewash. Drips can be avoided by applying thin coats and working in the direction of the wood grain. If drips occur, wipe them away immediately with a damp cloth. Yellowing of the whitewash can occur over time, especially in areas exposed to direct sunlight. To prevent this, use a high-quality sealer and avoid placing whitewashed cabinets in direct sunlight.
Variations in Techniques: The specific techniques and materials used for whitewashing kitchen cabinets can be adapted to achieve various looks. Experimenting with different paint-to-water ratios, application methods, and distressing techniques can create unique and personalized finishes. Researching different styles and techniques can provide inspiration and guidance for achieving specific aesthetic goals.

Whitewashed Cabinet Makeover Confessions Of A Serial Do It Yourselfer

Whitewashed Kitchen Cabinets Finishes Ashley Spencer

Whitewashed Cabinet Makeover Confessions Of A Serial Do It Yourselfer

White Kitchen Cabinets Are They Still In Style Packard Cabinetry

25 Best Collection Whitewash Oak Cabinets Home Decor And Garden Ideas Stained Kitchen New

Whitewashed Kitchen Cabinets Finishes Ashley Spencer

How To Make A Pickled Or White Wash Finish Ron Hazelton

50 Best Kitchen Ideas For A Beautiful Space That Looks As Good It Cooks Grey Cabinets Whitewash Shabby Chic

Distressed Kitchen Cabinets How To Distress Your

White Washed Kitchen Cabinets French Phoebe Howard

