How To Wrap Kitchen Sides
Transforming your kitchen from dull to dazzling can be as simple as wrapping your sides. This cost-effective and versatile technique provides an instant upgrade and allows for a personalized touch. Whether you are looking to cover up outdated cabinets, create a cohesive look, or add a pop of color, wrapping your kitchen sides is a worthwhile project.
Choosing the Right Material
The first step is selecting the perfect material for your sides. Various options exist, each with its own benefits and considerations:
- Vinyl Wrap: This is a popular choice due to its affordability, ease of application, and wide range of finishes. Vinyl wraps come in a vast array of colors, patterns, and textures, allowing for significant customization.
- Contact Paper: Similar to vinyl wrap, contact paper provides a budget-friendly and easy-to-apply solution. While it lacks the durability of vinyl, it is ideal for temporary projects or areas with less wear and tear.
- Fabric: For a unique and textured look, consider wrapping with fabric. This option requires a bit more effort, but the results are undeniably stunning. Fabric can be secured with adhesive spray or a staple gun.
- Wood Veneer: If you are aiming for a more luxurious aesthetic, wood veneer is a great option. It provides the warmth and elegance of real wood without the hefty price tag. Note that wood veneer requires skilled application.
Consider the area you are wrapping, the desired aesthetic, and your budget when making your selection.
Preparing Your Sides
Before applying any material, proper preparation is crucial. This ensures a smooth and lasting finish:
- Clean the surface: Thoroughly clean your kitchen sides with a mild detergent and water. Remove any dirt, grease, or residue to ensure the material adheres properly.
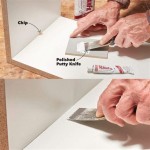
- Sand down imperfections: If there are any bumps or imperfections, sand them down with fine-grit sandpaper. This helps to create a smooth surface for the wrapping.
- Tape off edges: Using painter's tape, tape off the areas around the sides to prevent any accidental spills or smudges.
By taking these preparatory steps, you are setting the stage for a flawless wrapping experience.
Applying the Material
The application process varies depending on the chosen material, but some general guidelines apply:
- Measure and cut: Measure the area to be wrapped and cut the material accordingly. Leave an extra inch or two on all sides for easy handling and trimming.
- Start at the edge: Position the material at one edge and carefully smooth it down. Use a squeegee or a soft cloth to work out any air bubbles and ensure a smooth finish.
- Overlap material: If a single piece is not enough to cover the entire area, slightly overlap the next piece. Cut the material to fit the remaining space and continue smoothing.
- Trim excess: Once the material is completely applied, trim any excess with a sharp utility knife. Use a ruler to ensure clean and precise lines.
Take your time and work in a clean, well-lit area for the best results. Remember, practice makes perfect, so don't be afraid to try again if needed.
Adding Finishing Touches
Once the wrapping is complete, consider adding some finishing touches for a more polished look:
- Caulk edges: To create clean edges and prevent the material from lifting, use caulk along the edges. This creates a seamless and professional finish.
- Apply molding: For a more decorative touch, consider adding molding around the sides. Molding comes in a variety of styles and materials, allowing for a customized look.
These finishing touches will complete your kitchen transformation and bring a touch of elegance to your space.

How To Spice Up Your Kitchen Island

How To Wrap Kitchen Worktops Effectively Scouts Panama

Self Adhesive Vinyl Wrap For Kitchen Worktops Dc Fix Marble White

Self Adhesive Vinyl Wrap For Kitchen Worktops Dc Fix Marble Grey

D C Fix Marble Grey Self Adhesive Vinyl Wrap For Kitchen Worktops And Furniture 10m L 67 5cm W Diy At B Q

D C Fix Terrazzo Self Adhesive Vinyl Wrap For Kitchen Worktops And Furniture 5m L 67 5cm W Diy At B Q

Self Adhesive Vinyl Wrap For Kitchen Worktops Dc Fix Marble Cortes Brown

D C Fix Marble Cortes Blue Self Adhesive Vinyl Wrap For Kitchen Worktops And Furniture 2m L 67 5cm W Diy At B Q

D C Fix Marble White Self Adhesive Vinyl Wrap For Kitchen Worktops And Furniture 1m L 90cm W Diy At B Q

Self Adhesive Vinyl Wrap For Kitchen Worktops Dc Fix Marble Carrara Grey
Related Posts


