Installing Kitchen Cabinets: A Comprehensive Guide
Embarking on a kitchen renovation project often involves replacing or installing new cabinets. While professional installation is an option, a considerable amount of cost savings can be realized by undertaking the project as a do-it-yourself endeavor. This article provides a detailed guide to installing kitchen cabinets, equipping individuals with the necessary knowledge to complete the task successfully.
Before commencing the installation process, meticulous planning and preparation are crucial. This stage involves accurately measuring the kitchen space, selecting the appropriate cabinets, and ensuring all necessary tools and materials are readily available. Neglecting this preliminary phase can lead to complications and potentially compromise the quality of the final installation.
I. Pre-Installation Preparation: Laying the Groundwork for Success
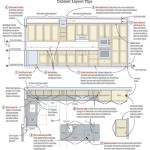
The first step in preparing for kitchen cabinet installation is to accurately measure the kitchen. This involves measuring the wall lengths where cabinets will be installed, noting the locations of windows, doors, plumbing, and electrical outlets. It is highly recommended to create a detailed floor plan, marking all relevant measurements and obstacles. This plan serves as a visual guide and helps in determining the optimal cabinet layout.
Once the measurements are finalized, the process of selecting the cabinets begins. Cabinets are available in a variety of styles, materials, and finishes. Consider the overall design aesthetic of the kitchen and choose cabinets that complement the existing décor. Stock cabinets are readily available at most home improvement stores, while semi-custom and custom cabinets offer more design flexibility but often come with a higher price tag and extended lead times.
After selecting the cabinets, it is essential to verify that the order is accurate and complete. Upon delivery, carefully inspect each cabinet for any damage incurred during shipping. Ensure all necessary hardware, such as screws, hinges, and drawer slides, are included. Any discrepancies or damages should be reported to the supplier immediately.
With the cabinets secured and inspected, the next step involves preparing the kitchen space. This includes removing existing cabinets, appliances, and any other obstructions that might hinder the installation process. It is crucial to shut off the electricity and water supply before disconnecting any appliances or plumbing fixtures.
Following the removal of existing fixtures, thoroughly clean the walls and floor. Repair any damage to the walls, such as holes or cracks, and ensure the surfaces are smooth and level. This is critical for proper cabinet alignment and stability. Use a level to check the walls for plumbness. If the walls are significantly out of plumb, shims may be required during installation to compensate for the irregularities.
Finally, locate the wall studs using a stud finder and mark their positions. Cabinets must be securely attached to the studs for optimal support and safety. Accurately marking the stud locations is essential for ensuring proper cabinet mounting.
II. Installation Process: Step-by-Step Cabinet Mounting
The installation process typically begins with the upper cabinets. Locate the highest point on the floor. Apply the level to the wall and mark a horizontal reference line. This line will serve as a guide for installing the upper cabinets level. Using a laser level can also assist in creating this critical reference point.
Determine the height of the upper cabinets based on the desired clearance above the countertop, typically 18 inches. Mark the location of the top of the cabinets on the wall, ensuring the line is level. Using a ledger board attached to the wall at this mark will provide temporary support for the upper cabinets during installation. This is particularly helpful when working alone.
Starting with a corner cabinet, lift the cabinet into position and align it with the marked lines. Secure the cabinet to the wall studs using screws. Predrilling pilot holes is recommended to prevent the wood from splitting. Use a level to ensure the cabinet is plumb and level before tightening the screws completely. Repeat the process for the remaining upper cabinets, ensuring each cabinet is aligned with its neighbors and securely fastened to the wall studs.
Once all the upper cabinets are installed, proceed with the installation of the lower cabinets. Start by identifying the highest point on the floor. Leveling the floor cabinets is essential for creating a level countertop surface. Shim the lower cabinets as needed to compensate for any unevenness in the floor. Shims are small pieces of wood or plastic that can be inserted under the cabinet to adjust its height.
Similar to the upper cabinets, begin with a corner cabinet and align it with the marked lines. Secure the cabinet to the wall studs using screws. Again, predrilling pilot holes is recommended. Use a level to ensure the cabinet is plumb and level before tightening the screws completely. Repeat the process for the remaining lower cabinets, ensuring each cabinet is aligned with its neighbors and securely fastened to the wall studs.
After all the cabinets are installed, check for any gaps between the cabinets and the walls or floor. Caulk can be used to fill these gaps, creating a seamless and professional finish. Apply a bead of caulk along the edges of the cabinets where they meet the walls and floor.
III. Post-Installation Refinement and Finishing Touches
With the cabinets securely mounted, the final stage involves installing the hardware, such as knobs and pulls. Use a template to precisely position the hardware and drill the necessary holes. This ensures consistent placement and a professional appearance.
Install the shelves inside the cabinets, ensuring they are securely in place. Adjust the shelf heights as needed to accommodate different items. Consider using shelf liners to protect the cabinet surfaces and prevent items from sliding.
Pay close attention to the alignment of the cabinet doors and drawers. Adjust the hinges and drawer slides as needed to ensure they operate smoothly and align properly. Minor adjustments can significantly improve the overall functionality and aesthetics of the cabinets.
Connect any plumbing or electrical fixtures that were disconnected during the removal process. Ensure all connections are secure and leak-free. Carefully test all appliances and fixtures to verify proper functionality.
Finally, clean the cabinets thoroughly, removing any dust or debris accumulated during the installation process. A mild detergent and a soft cloth are recommended for cleaning cabinet surfaces. Avoid using abrasive cleaners, as they can damage the finish.
Installing kitchen cabinets is a project that requires careful planning, meticulous execution, and attention to detail. By following these guidelines and exercising patience, individuals can successfully install their own kitchen cabinets and achieve a professional-looking result. The cost savings associated with DIY installation can be substantial, making it a worthwhile endeavor for homeowners looking to renovate their kitchens on a budget.
Remember to consult local building codes and regulations before commencing any kitchen renovation project. Obtaining the necessary permits and adhering to code requirements is essential for ensuring the safety and legality of the installation.

How To Install Kitchen Cabinets Diy Family Handyman

How To Install Kitchen Cabinets All By Yourself Re

How To Build Cabinets The Complete Guide Houseful Of Handmade

Design Install Your Dream Kitchen An Ultimate Guide A Piece Of Rainbow

How To Install Kitchen Cabinets Yourself Cherished Bliss

Kitchen Cabinet Designs For Contemporary Cooking Spaces

Installing Kitchen Cabinets Momplex Vanilla Ana White

How To Prepare For A Kitchen Cabinet Installation

Diy Kitchen Cabinets Made From Only Plywood

How To Easily Add Drawers Kitchen Cabinets Small Stuff Counts
Related Posts


