Installing Beadboard on Kitchen Cabinets: A Guide for Homeowners
Beadboard is a versatile and charming material that can add character and style to any kitchen. Its wainscoting-like appearance, with its distinctive vertical grooves, can bring a touch of farmhouse or coastal charm to your space. Installing beadboard on kitchen cabinets is a relatively straightforward project that can be completed in a weekend or two. With a little planning and preparation, you can achieve professional-looking results that will enhance the look of your kitchen for years to come.
Materials and Tools Required:
- Beadboard panels
- 1x2 furring strips
- 1/4-inch beadboard nails
- Brad nailer
- Miter saw
- Level
- Measuring tape
- Wood filler
- Painter's tape
- Paint or primer
Step 1: Prepare the Cabinets
Before installing the beadboard, it's essential to prepare the cabinet surfaces. Remove any cabinet doors or hardware. Clean the surfaces with a degreaser to ensure a good bond between the beadboard and the cabinets.
Step 2: Install Furring Strips
Furring strips provide a support structure for the beadboard and help create a more secure and durable installation. Cut the furring strips to length and nail them to the cabinet frames. Space the strips evenly, approximately 16 inches apart.
Step 3: Cut and Fit the Beadboard
Measure each cabinet section and cut the beadboard panels to size using a miter saw. Mitered joints at the corners will create a seamless and professional-looking finish. Dry-fit the beadboard panels on the cabinet frames to ensure a proper fit.
Step 4: Nail the Beadboard
Apply a bead of construction adhesive to the back of the beadboard and press it into place on the cabinet frames. Use a brad nailer to secure the beadboard to the furring strips, sinking the nails slightly below the surface. Space the nails evenly, approximately 6 inches apart.
Step 5: Fill in the Gaps
Once all the beadboard is installed, use wood filler to fill in any gaps or nail holes. Allow the wood filler to dry according to the manufacturer's instructions.
Step 6: Paint or Prime
If desired, you can paint or prime the beadboard to match your existing kitchen décor. Use painter's tape to protect the surrounding areas. Allow the paint or primer to dry thoroughly before reinstalling any cabinet doors or hardware.
Tips for Success:
- Measure twice, cut once.
- Use a level to ensure the beadboard is installed straight.
- Consider using a beadboard runner for a more authentic look.
- Don't over-nail the beadboard, as it can split the wood.
- Allow ample drying time for wood filler and paint.
Installing beadboard on kitchen cabinets is a rewarding project that can transform the look of your space. By following these steps and tips, you can achieve professional-looking results that will enhance the beauty and functionality of your kitchen for years to come.

Diy Beadboard On Our White Painted Kitchen Cabinets Project Goble

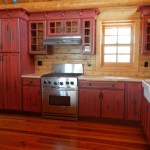
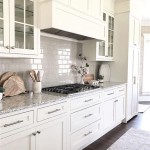
Beadboard Kitchen Cabinets Everything To Know

Adding Beadboard To The Bar Southern Hospitality

Beadboard Kitchen Cabinets Everything To Know

Beadboard Cabinet Doors For Your Kitchen Cabinetdoors Com

Diy Beadboard Kitchen Cabinets Project The House On Silverado

Adding Beadboard To The Bar Southern Hospitality

Beadboard Kitchen Cabinets Everything To Know

Add Beadboard Paneling To Cabinet Sides Sawdust Girl

How To Install Beadboard
Related Posts