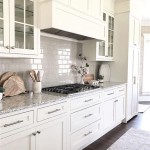
Installing Crown Molding on Kraftmaid Kitchen Cabinets
Installing crown molding on Kraftmaid kitchen cabinets can significantly enhance the aesthetic appeal of a kitchen, providing a finished and sophisticated look. Kraftmaid cabinets, known for their quality and diverse styles, offer a solid foundation for adding this decorative element. This article provides a comprehensive guide to successfully installing crown molding on Kraftmaid kitchen cabinets, covering preparation, cutting techniques, installation methods, and finishing touches.
Before beginning the installation process, it is crucial to understand the specific type of crown molding to be used and its compatibility with the existing cabinet design. Kraftmaid offers a variety of cabinet styles, and the chosen crown molding should complement the cabinet's overall aesthetic. Consider factors such as the molding's profile, material (wood or composite), and finish. Also, it's important to get acclimated with the Kraftmaid brand.
Proper preparation is essential for a successful crown molding installation. This includes accurately measuring the cabinet runs, gathering necessary tools, and preparing the work area. Neglecting these preparatory steps can lead to inaccuracies and complications during the installation process. This can lead to an unsightly and unprofessional outcome.
Key Point 1: Accurate Measurement and Material Acquisition
The first critical step is to thoroughly measure the length of each cabinet run where the crown molding will be installed. It is advisable to measure twice and cut once, ensuring precision and minimizing material waste. Measurements should account for inside and outside corners, as well as any variations in cabinet height or depth. When measuring the cuts, it is a good idea to measure the distance on each of those planes for an ideal fit.
It is imperative to purchase sufficient crown molding material, anticipating potential errors or waste. A general rule of thumb is to add at least 10% to the total measured length to account for mistakes or complex cuts. Consider buying an entire extra piece if the budget allows. It is also helpful to purchase extra material to practice cutting techniques, especially for more intricate corner joints.
In addition to the crown molding itself, gather all necessary materials, including: wood glue, finishing nails, a nail gun (or hammer), sandpaper, wood filler, paint or stain (matching the cabinet finish), paintbrushes, and caulk. Select a high-quality wood glue designed for bonding wood and composite materials. Choose finishing nails that are appropriately sized for the crown molding thickness and the cabinet material.
Tools are just as important as materials in the preparation phase. A miter saw with a sharp blade is essential for making accurate angled cuts. A coping saw is helpful for fine-tuning inside corners. A measuring tape, level, stud finder, and pencil are indispensable for marking and aligning the crown molding. Safety glasses and ear protection should always be worn when using power tools. Consider the use of featherboards when making the cuts, as they will help provide a more uniform cut. Use a dust mask to avoid inhaling debris.
Key Point 2: Mastering Cutting Techniques
Cutting crown molding accurately is arguably the most challenging aspect of the installation process. Crown molding cuts are typically made using a miter saw, and understanding how the saw angles correlate to the molding's orientation is crucial. There are two primary types of cuts: miter cuts for outside corners and cope cuts for inside corners. Cope cuts are generally preferred for inside corners as they allow for a more forgiving fit, especially in situations where walls are not perfectly square.
For miter cuts, the crown molding must be positioned in the miter saw in the same orientation it will be installed on the cabinet. Typically, the molding rests against the saw fence and the saw table, with the decorative edge facing upwards. Refer to the miter saw's instructions for setting the correct angles for left and right outside corners. It is highly recommended to create test cuts on scrap pieces of crown molding to verify the accuracy of the saw settings before cutting the actual pieces.
Cope cuts require a different approach. After making a miter cut on the first piece of crown molding for an inside corner, the second piece is "coped." This involves using a coping saw to remove the waste material behind the miter cut, following the profile of the molding. The goal is to create a precise fit against the mitered edge of the first piece. This allows the second piece to match the contour of the first piece. Precision is key here, as the cut must follow the profile of what has already been cut.
Mastering the art of using a coping saw takes practice. Hold the saw at a slight angle and follow the profile line meticulously. Avoid cutting too deeply, as this can weaken the joint. After completing the cope cut, use sandpaper to smooth any rough edges and fine-tune the fit. A tight and seamless fit is the ultimate objective in this procedure.
For complex corners or angles, it may be necessary to use a combination of miter and cope cuts. In such cases, careful planning and precise measurements are essential. Consider using a protractor or angle finder to determine the exact angle of the corner. Avoid using excessive amounts of caulk to conceal gaps, as it can detract from the overall appearance. A well-executed cut should minimize the need for extensive filling or caulking.
Key Point 3: Installation and Finishing
With the crown molding cut to the correct lengths and angles, the next step is to install it onto the Kraftmaid kitchen cabinets. Begin by applying a thin bead of wood glue to the back of the crown molding where it will contact the cabinet surface. This will provide a strong and permanent bond.
Position the crown molding carefully, ensuring it is aligned correctly with the top edge of the cabinets. Use a nail gun to secure the molding in place with finishing nails. The nails should be driven into the cabinet framing, providing a secure hold. Space the nails evenly along the length of the molding, typically every 6 to 8 inches. For longer runs of crown molding, consider using temporary support brackets to hold the molding in place while the glue dries. These brackets can be removed after the adhesive has set.
After the crown molding is securely attached, inspect the joints for any gaps or imperfections. Use wood filler to fill any nail holes or small gaps in the joints. Allow the wood filler to dry completely before sanding it smooth. Sanding should be done carefully to avoid damaging the surrounding cabinet finish.
Once the wood filler has been sanded, the crown molding is ready for painting or staining. Choose a paint or stain that matches the existing cabinet finish. Apply multiple thin coats, allowing each coat to dry completely before applying the next. This will result in a smooth and even finish. Avoid using thick coats of paint or stain, as this can lead to drips or runs.
Finally, apply a bead of caulk along the top edge of the crown molding where it meets the ceiling or wall. This will seal any gaps and provide a clean and professional finish. Use a paintable caulk that matches the cabinet color. Smooth the caulk with a damp sponge or cloth to create a seamless transition. After the caulk has dried, touch up any areas with paint or stain as needed. A sharp razor blade can be used to remove any excess caulk. Consider sanding the caulk when it is dry to make it flush with the adjacent material.
Installing crown molding on Kraftmaid kitchen cabinets requires patience, precision, and a commitment to detail. By following these guidelines and taking the time to master the necessary skills, homeowners can achieve a professional-looking result that enhances the beauty and value of their kitchen.

How To Install Kraftmaid Crown Molding Hunker

Crown Molding Installation Instruction

Diy Design Fanatic How To Install Crown Molding On Full Overlay Cabinets

Kraftmaid 056 Molding Roberts Company Inc

How To Install Crown Molding On Full Overlay Cabinets Kitchen Cabinet

How To Install Kitchen Cabinets And Remove Them Remodel Pt 1 Crafted Work

Customize Your Cabinetry Creating Kitchen With Kraftmaid

10 Types Of Kitchen Cabinet Molding For Your Home

Installing Kraftmaid Crown Molding Deveron Maple
Related Posts

