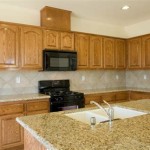
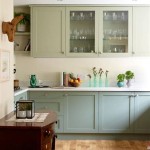
Installing Crown Moulding On Top Of Cabinets
Adding crown moulding atop kitchen cabinets elevates the space, creating a polished and finished look. This seemingly complex task is achievable for the DIY enthusiast with careful planning and execution. This article provides a comprehensive guide to installing crown moulding on top of cabinets, covering necessary tools, materials, and step-by-step instructions.
Tools and Materials:
Before commencing the project, gathering the necessary tools and materials is crucial for a smooth installation process. These include:
- Crown moulding: Select a profile that complements the cabinet style and room proportions.
- Measuring tape: Accurate measurements are essential for proper cuts and fitting.
- Pencil: For marking cut lines and angles on the moulding.
- Miter saw: A crucial tool for accurate angle cuts. A compound miter saw offers greater versatility for complex angles.
- Coping saw: Used for creating intricate inside corner joints.
- Nail gun or hammer and finishing nails: For securing the moulding to the cabinets.
- Wood glue: Adds extra strength and stability to the joints.
- Caulk: Fills gaps and creates a seamless finish.
- Safety glasses: Essential eye protection when working with power tools.
- Stud finder: Locates wall studs for secure fastening.
- Painter's tape: Useful for marking angles and protecting surfaces.
- Ladder or step stool: Provides safe access to the top of the cabinets.
Preparing the Cabinets and Moulding:
Thorough preparation ensures a professional outcome. Start by cleaning the top of the cabinets to remove any dust or debris that could interfere with adhesion. Measure the length of the cabinet runs where the moulding will be installed. Transfer these measurements to the moulding, marking cut lines with a pencil.
Making the Cuts:
Cutting crown moulding accurately is crucial for achieving tight, professional-looking joints. The most common joint types are miter joints and coped joints. Miter joints involve cutting both pieces of moulding at an angle, typically 45 degrees for inside corners and outside corners. Coped joints, often used for inside corners, involve shaping one piece of moulding to fit precisely against the profile of the other.
When using a miter saw, ensure the moulding is positioned correctly against the fence and the blade. Double-check all angles before making the cut. For coped joints, use a coping saw to carefully cut along the profile line of the moulding.
Installing the Moulding:
Begin installation by applying a bead of wood glue to the back edge of the moulding. This adds strength and helps prevent the moulding from shifting over time. Align the first piece of moulding with the cabinet edge, ensuring it's flush against both the cabinet top and the wall or ceiling. Secure the moulding using finishing nails, spaced appropriately to avoid splitting the wood.
For inside corners, fit the coped piece of moulding against the already installed piece. If using mitered inside corners, ensure the two pieces fit together tightly. Secure the second piece with finishing nails. Continue installing the moulding along the cabinet run, using the same techniques for each piece.
Finishing Touches:
Once the moulding is installed, apply caulk to any gaps or seams. This creates a seamless look and prevents dust from accumulating. Smooth the caulk with a damp finger or caulk tool for a clean finish. Once the caulk is dry according to the manufacturer's instructions, the moulding can be painted or stained to match the cabinets or other trim in the room.
Dealing with Complex Angles:
In some cases, cabinets may not meet at perfect 90-degree angles. This requires adjusting the miter angles accordingly. Use a protractor or angle finder to determine the exact angle. Divide this angle by two to determine the miter angle for each piece of moulding. For particularly complex angles, creating a template from cardboard can be helpful for ensuring an accurate fit.
Working with Uneven Surfaces:
Older homes or uneven walls can present challenges when installing crown moulding. Shims can be used to fill gaps and create a level surface for the moulding. These thin wedges of wood can be placed behind the moulding to adjust its position. Alternatively, scribe the moulding to fit the irregularities of the wall or ceiling. Scribing involves marking the profile of the uneven surface onto the moulding and then carefully cutting along the line with a coping saw.
Safety Considerations:
Always prioritize safety when working with power tools and at heights. Wear safety glasses to protect your eyes from debris. Use a stable ladder or step stool when working on top of cabinets. Ensure the work area is well-lit and free of obstacles. Follow all manufacturer's instructions for the tools and materials being used.
Careful planning, accurate measurements, and precise cuts are fundamental to a successful installation. Taking the time to master these techniques will result in a beautiful and professional-looking finish that enhances the overall aesthetic of the kitchen.

Adding Crown Molding To Kitchen Cabinets Young House Love

How To Attach Crown Mouldings Frameless Cabinets Stonehaven Life

Diy Kitchen Cabinet Upgrade With Paint And Crown Molding

How To Add Crown Molding Kitchen Cabinets Abby Organizes

How To Install Crown Molding On Kitchen Cabinets

How To Attach Crown Mouldings Frameless Cabinets Stonehaven Life

How To Attach Crown Mouldings Frameless Cabinets Stonehaven Life

10 Steps To Install Crown Molding On Cabinets Fine Homebuilding

How To Install Crown Molding On Kitchen Cabinets Sawdust Girl

How To Install Kitchen Cabinet Crown Molding Family Handyman
Related Posts