Installing Hardwood Floors Around Kitchen Cabinets
Installing hardwood flooring presents unique challenges in kitchens, particularly around cabinets. This process requires precision and careful planning to achieve a professional, seamless look. This article details the methods and considerations involved in successfully installing hardwood floors around kitchen cabinets.
Two primary approaches exist for installing hardwood floors around existing kitchen cabinets: weaving the flooring under the cabinets or scribing and cutting the flooring around them. The choice often depends on the specific situation, including the cabinet design, floor height, and homeowner preference. Both methods offer advantages and disadvantages.
Weaving the hardwood flooring underneath cabinets can provide a more aesthetically pleasing and structurally sound result. This method eliminates the need for visible expansion gaps and creates a continuous flow of flooring. However, it's considerably more labor-intensive and may require removing or significantly adjusting the toe kicks. Additionally, if future cabinet replacement is anticipated, access for removal may become complicated.
Scribing involves meticulously measuring and marking the flooring boards to match the contours of the cabinet base. This allows for precise cutting and fitting of the flooring around the cabinets without the need to disturb them. While less labor-intensive than weaving, scribing demands accurate measurements and careful cutting to prevent gaps or overlaps. It's a skilled task requiring patience and precision.
Before commencing any installation, thoroughly prepare the subfloor. Ensure it's level, clean, and free of debris. Any imperfections in the subfloor can affect the finished floor's stability and appearance. Unevenness may require leveling compound, while existing flooring materials might need removal.
Choosing the appropriate tools is crucial for a successful installation. Essential tools include a measuring tape, a moisture meter for checking the subfloor and wood flooring, a circular saw or jigsaw for cutting the flooring, a miter saw for angled cuts, a tapping block and pull bar for tight fits, a nail gun or stapler for fastening the flooring, and safety glasses and hearing protection.
When weaving flooring under cabinets, the toe kicks typically need removal. Then, carefully measure the space between the subfloor and the cabinet bottom. This measurement dictates the available height for the flooring and underlayment. It's essential to factor in the expansion gap, usually around ¼ to ½ inch, to accommodate the wood's natural expansion and contraction.
After installing the underlayment, carefully maneuver the flooring boards under the cabinets. Use a tapping block and pull bar to ensure tight joints between planks. Secure the flooring using nails or staples, following the manufacturer's recommendations. Reinstall the toe kicks, adjusting them as necessary to accommodate the new flooring height.
When scribing and cutting, begin by placing a piece of flooring against the cabinet base. Use a compass or a scribing tool to trace the cabinet's profile onto the flooring board. This traced line represents the precise cut line needed for a snug fit. Cut along the scribed line using a jigsaw or circular saw, ensuring smooth and accurate cuts.
Test fit the cut piece against the cabinet. Make minor adjustments as needed to achieve a perfect fit. Once satisfied with the fit, secure the flooring using nails or staples. Repeat this process for each piece of flooring adjacent to the cabinets.
Regardless of the chosen method, leave an expansion gap between the flooring and the cabinet base. This gap allows for the wood's natural movement and prevents buckling. The gap is usually concealed by the baseboard or shoe molding.
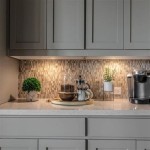
Selecting the appropriate type of wood flooring for a kitchen environment is also crucial. Solid hardwood, while aesthetically appealing, is more susceptible to moisture damage than engineered hardwood. Engineered hardwood, constructed with multiple layers of wood veneer, offers improved stability and resistance to moisture. Consider the kitchen's humidity levels and potential for spills when making this decision.
Proper acclimation of the hardwood flooring is vital before installation. Allow the unopened boxes of flooring to acclimate to the room's temperature and humidity for several days, as recommended by the manufacturer. This allows the wood to adjust to its environment, minimizing expansion and contraction issues after installation.
Careful consideration of these factors and meticulous execution will result in a professional, long-lasting hardwood floor installation in the kitchen, seamlessly integrating with the existing cabinetry.

The Great Flooring Debate Should You Put Beneath Counters And Appliances Urbanfloor Blog

Cabinets Or Hardwood Floors First Two Case Studies

Do You Install Floating Floor Under Cabinets Wood Flooring

Do You Install Floating Floor Under Cabinets Wood Flooring

Do You Install Flooring Before Cabinets Best Practices Reallyfloors America S Est Hardwood

Installing Hardwood Floor Around Kitchen Cabinets And Door Jamb Mryoucandoityourself

Do You Install Flooring Before Cabinets Best Practices Reallyfloors America S Est Hardwood

Why It S Better To Install Kitchen Floors Before Cabinets Domain

Before Or After Cabinet Installation Four Considerations To Help Finalizing Your Flooring Kraftmaid

Before Or After Cabinet Installation Four Considerations To Help Finalizing Your Flooring Kraftmaid
Related Posts