Installing Laminate Flooring Around Kitchen Cabinets: A Comprehensive Guide
Installing laminate flooring in a kitchen, especially around existing cabinets, requires careful planning and execution. Although the process is manageable for a determined DIY enthusiast, understanding the correct techniques and potential challenges is crucial for a professional-looking and long-lasting result. This article provides a detailed walkthrough of the installation process, highlighting key considerations and best practices for achieving a seamless transition between the flooring and the cabinetry.
The preparation phase is arguably the most important, influencing the overall success of the project. This stage encompasses accurate measurement, meticulous subfloor evaluation, and the selection of appropriate tools and materials. Rushing this step can lead to alignment issues, uneven surfaces, and potential damage to both the flooring and the cabinets.
Before even considering the laminate planks, it's necessary to determine whether the existing floor needs any remediation. Uneven subfloors are a common problem and can significantly impact the stability and longevity of the laminate. Self-leveling compounds can be used to address minor imperfections, while more significant issues may require professional attention.
Key Point 1: Precise Measurement and Planning
Accurate measurement is foundational to a successful laminate installation. Begin by sketching a floor plan of the kitchen, paying close attention to the layout of the cabinets, appliances, and any other fixed elements. Measure the length and width of the room at multiple points, as walls are rarely perfectly square. Use the largest measurements to calculate the total square footage of the flooring needed, adding an extra 5-10% for waste and cuts.
When planning the layout of the laminate planks, consider the direction of the light source. Generally, running the planks parallel to the longest wall or the primary light source can make the room appear larger and more visually appealing. Pay particular attention to the areas around the cabinets. The planks should ideally run continuously under the toe kicks of the cabinets, creating a clean and unified look. However, if this is not feasible due to existing flooring height or cabinet design, alternative approaches will be discussed later.
A critical aspect of planning is accounting for expansion gaps. Laminate flooring expands and contracts with changes in temperature and humidity. Leaving a ¼- to ⅜-inch gap between the flooring and all vertical surfaces, including cabinets, walls, and pipes, is essential to prevent buckling or warping. These gaps will typically be covered with baseboards or shoe molding, providing a finished appearance.
Before starting the installation, dry-lay a row of planks to visualize the layout and identify any potential problems, such as narrow cuts near the end walls or awkward transitions around doorframes. Adjusting the starting point of the first row can often resolve these issues and ensure a more aesthetically pleasing result.
Consider the thickness of the laminate flooring and the underlayment. This combined thickness can impact door clearances and the height of appliances. Trim doors as needed to prevent them from dragging on the new flooring. Check appliance clearances to ensure adequate ventilation and prevent damage to the flooring.
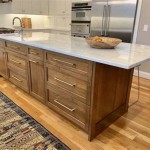
Determine the best approach for handling the flooring around the kitchen cabinets. Ideally, the laminate flooring should extend under the cabinet toe kicks for a seamless look, creating the illusion that the cabinets are sitting directly on the finished floor. This method provides a clean and professional finish, but it requires careful planning and potentially modifying the cabinet toe kicks. Alternatively, the flooring can be installed up to the edge of the cabinets, using a quarter-round molding or other trim to conceal the expansion gap. This method is simpler but may not be as visually appealing.
Finally, create a cutting list to optimize material usage and minimize waste. Carefully measure and mark each plank before cutting, using a sharp pencil and a square to ensure accurate lines. A miter saw is ideal for making precise cuts, but a circular saw or a jigsaw can also be used with the appropriate blade.
Key Point 2: Preparing the Subfloor and Installing the Underlayment
The subfloor provides the foundation for the laminate flooring, and its condition directly impacts the performance and longevity of the finished floor. The subfloor must be clean, level, and dry before installing the underlayment and laminate planks.
Begin by thoroughly cleaning the subfloor, removing any debris, dust, or adhesive residue. Sweep or vacuum the area multiple times, paying particular attention to corners and edges. Scrape away any stubborn adhesive residue with a floor scraper or a putty knife. If necessary, use a solvent-based cleaner to remove any remaining residue, following the manufacturer's instructions carefully.
Inspect the subfloor for any signs of moisture damage, such as water stains, mold, or rot. Address any moisture issues before proceeding with the installation. Moisture can damage the laminate flooring and lead to mold growth. If the subfloor is concrete, use a moisture meter to check the moisture content. The moisture content should be within the limits specified by the laminate flooring manufacturer.
Level any imperfections in the subfloor using a self-leveling compound. Follow the manufacturer's instructions carefully, ensuring that the compound is properly mixed and applied evenly. Allow the self-leveling compound to dry completely before proceeding with the installation. For minor imperfections, a floor patch compound can be used to fill cracks and holes.
Once the subfloor is clean, level, and dry, install the underlayment. The underlayment provides a cushioning layer between the subfloor and the laminate flooring, reducing noise and improving comfort underfoot. It also helps to protect the laminate flooring from moisture and minor imperfections in the subfloor.
Select an underlayment that is compatible with the laminate flooring and the subfloor. Different types of underlayment are available, including foam, cork, and rubber. Consider the noise reduction properties, moisture resistance, and thermal insulation of each type of underlayment before making a selection. Follow the manufacturer's instructions for installing the underlayment.
Roll out the underlayment across the subfloor, overlapping the seams by a few inches. Use a utility knife to trim the underlayment to fit the perimeter of the room, leaving a small gap between the underlayment and the walls. Secure the seams of the underlayment with tape to prevent them from shifting during the installation of the laminate flooring.
Pay particular attention to the areas around the kitchen cabinets. Ensure that the underlayment extends under the toe kicks of the cabinets, if possible. This will provide a uniform surface for the laminate flooring and prevent any gaps or unevenness.
Key Point 3: Installing Laminate Planks Around Cabinets
The actual installation of the laminate planks requires patience and precision, especially when working around obstacles such as kitchen cabinets. The goal is to create a seamless and professional-looking floor with minimal gaps and a smooth transition between the flooring and the cabinetry.
Begin by installing the first row of laminate planks along the longest straight wall in the kitchen. Use spacers to maintain the required expansion gap between the planks and the wall. Most laminate flooring features a tongue-and-groove locking system, which allows the planks to snap together easily. Align the tongue of the first plank with the groove of the adjacent plank and tap them together gently with a tapping block and a hammer.
As you approach the cabinets, carefully measure and cut the laminate planks to fit around the toe kicks. Use a jigsaw or a miter saw to make precise cuts, ensuring that the planks fit snugly against the cabinets while maintaining the required expansion gap. If the laminate flooring is designed to extend under the cabinet toe kicks, you may need to undercut the toe kicks with a jamb saw or a multi-tool to create a space for the flooring to slide underneath.
For complex cuts around corners or irregular shapes, create a template using cardboard or paper. Trace the shape onto the template and then transfer the template to the laminate plank. Use a jigsaw to cut the plank along the traced line. Test the fit of the plank before securing it in place.
When installing the last row of laminate planks, you may need to rip the planks lengthwise to fit the remaining space. Use a table saw or a circular saw to make these cuts, ensuring that the planks are the correct width and maintain the required expansion gap. Use a pull bar to lock the last row of planks into place, as there may not be enough room to use a tapping block.
Once all the laminate planks are installed, remove the spacers and install baseboards or shoe molding to cover the expansion gaps along the walls and cabinets. Use a miter saw to cut the molding to the correct length and angle, and attach it to the wall or cabinets with nails or adhesive. Choose a molding that complements the laminate flooring and the kitchen décor.
Inspect the finished floor for any gaps, unevenness, or other imperfections. Use a color-matched filler to fill any small gaps or cracks. Clean the floor with a damp cloth to remove any dust or debris. Allow the floor to acclimate to the room temperature for at least 24 hours before placing furniture or appliances on it.
Consider using transition strips to create a smooth transition between the laminate flooring and other types of flooring in adjacent rooms. Transition strips are available in various styles and materials, and they can be easily installed with adhesive or screws. Select a transition strip that is compatible with the thickness of the laminate flooring and the adjacent flooring.
Protect the laminate flooring from scratches and dents by using felt pads under furniture legs and appliances. Avoid dragging heavy objects across the floor. Clean the floor regularly with a damp mop and a mild detergent. Avoid using abrasive cleaners or excessive water, as these can damage the laminate flooring.

Do You Install Floating Floor Under Cabinets Wood Flooring

Do You Install Floating Floor Under Cabinets Wood Flooring

Working Around Kitchen Appliances Installing Laminate Flooring Vlog 194

How To Install Laminate Flooring Diy Tips And Tricks

Iheart Organizing Do It Yourself Floating Laminate Floor Installation

Laminate Flooring In Kitchens Do It Yourself Installation

Do You Install Floating Floor Under Cabinets Wood Flooring

Can I Use Laminate Flooring Under Cabinets

How To Install Laminate Flooring Around Doors And Cabinets

Do You Install Floating Floor Under Cabinets Wood Flooring
Related Posts