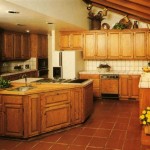
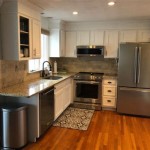
Installing Light Rail on Kitchen Cabinets
Light rail is a type of track lighting that is mounted to the underside of kitchen cabinets, providing task lighting for work surfaces below. It is a stylish and functional addition to any kitchen, and can be installed relatively easily with the right tools and materials.
Before you begin, you will need to gather the following:
- Light rail
- End caps
- Clips
- Mounting screws
- Drill
- Screwdriver
- Level
- Pencil
Instructions:
- Measure and mark the placement of the light rail. Using a level, mark a straight line along the underside of the cabinets where the light rail will be installed. The light rail should be positioned so that it is centered over the work surface below.
- Attach the clips to the cabinets. Space the clips evenly along the marked line, and secure them to the cabinets using the mounting screws. The clips should be positioned so that the top edge of the clip is flush with the bottom edge of the cabinet.
- Cut the light rail to length. Measure the length of the space to be covered by the light rail, and cut the light rail to that length using a hacksaw or miter saw. The light rail should be cut square at both ends.
- Insert the light rail into the clips. Start at one end of the cabinet, and insert the light rail into the clips. The light rail should be pushed into the clips until it clicks into place.
- Attach the end caps. Attach the end caps to the ends of the light rail using the mounting screws. The end caps will help to conceal the ends of the light rail and provide a finished look.
- Install the light bulbs. Install the light bulbs into the light rail according to the manufacturer's instructions. The light bulbs should be the correct wattage and type for the light rail.
- Test the light rail. Turn on the light rail and test it to make sure that it is working properly.
Tips:
- Use a level to make sure that the light rail is installed straight.
- Space the clips evenly along the marked line to ensure that the light rail is securely attached.
- Cut the light rail to the correct length before installing it.
- Attach the end caps to the ends of the light rail to conceal the ends and provide a finished look.
- Install the light bulbs according to the manufacturer's instructions.
- Test the light rail to make sure that it is working properly before using it.

Light Rail Molding The Ultimate Guide

Light Rail Moldings

How To Use Light Rail Moulding Osborne Wood S Blog

How To Install A Kitchen Cabinet Light Rail Molding Cabinets Makeover Under Lighting

Must Watch When Installing Kitchen Cabinets How To Add Light Rail Moulding

Dress Cabinets For Success With Light Rail Molding

Light Rail Molding Help Design Problem

Light Rail Moulding For Cabinets Homecrest Cabinetry

What Is Light Rail Molding Definition Of

Thomasville Embellishments Small Light Rail Moulding