Installing Under-Cabinet Lighting: A Comprehensive Guide
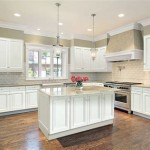
Under-cabinet lighting significantly enhances the functionality and aesthetics of kitchen spaces. By illuminating countertops, it provides task lighting for food preparation and other activities. Additionally, it can showcase backsplash tile and create a warm, inviting ambiance. This article provides a detailed guide to installing under-cabinet lighting, covering planning considerations, wiring options, and installation procedures.
Before embarking on the installation process, careful planning is essential. This involves determining the type of lighting, choosing the appropriate fixtures, and assessing the electrical infrastructure. Failure to adequately plan can result in unsatisfactory lighting, safety hazards, and costly rework.
Selecting the Right Type of Under-Cabinet Lighting
Several types of under-cabinet lighting are available, each with its own advantages and disadvantages. The most common options include:
LED (Light Emitting Diode) Lighting: LED lighting is highly energy-efficient, has a long lifespan, and produces minimal heat. It's available in a variety of color temperatures and brightness levels, making it a versatile choice for under-cabinet applications. LED strips are a popular option due to their flexibility and ease of installation. LED puck lights offer focused illumination and are suitable for highlighting specific areas.
Xenon Lighting: Xenon lights provide a bright, white light that renders colors accurately. They are more energy-efficient than halogen lights but less so than LEDs. Xenon lights produce more heat than LEDs and have a shorter lifespan.
Halogen Lighting: Halogen lights are known for their bright, warm light, but they are the least energy-efficient of the options. They also produce a significant amount of heat, which can be a concern in enclosed spaces. Their relatively short lifespan makes them a less desirable choice compared to LEDs or xenon lights.
Fluorescent Lighting: Fluorescent lights are energy-efficient and provide a diffused light source. However, they contain mercury and require proper disposal. They are less common in under-cabinet installations due to their larger size and less appealing aesthetics compared to LED, xenon, or halogen options.
When selecting the type of lighting, consider factors such as energy efficiency, lifespan, light output, color temperature, and cost. LED lighting is generally recommended due to its superior performance and energy savings.
Color temperature is measured in Kelvin (K) and refers to the warmth or coolness of the light. Warmer colors (2700K-3000K) create a cozy ambiance, while cooler colors (4000K-5000K) provide a brighter, more functional light. The best color temperature depends on personal preference and the overall design of the kitchen.
Brightness is measured in lumens. The required lumens depend on the size of the workspace and the desired level of illumination. A general guideline is to aim for 300-400 lumens per foot of countertop.
The physical characteristics of the light fixtures are also important. Consider whether you prefer strip lights, puck lights, or linear fixtures. Strip lights offer flexibility and can be easily cut to size, while puck lights provide focused illumination. Linear fixtures are typically used for larger areas and provide a more uniform light distribution. Ensure the chosen fixtures are compatible with the available space under your cabinets.
Wiring Options: Hardwired vs. Plug-In
Under-cabinet lighting can be wired in two primary ways: hardwired or plug-in. Each method has its own set of advantages and disadvantages.
Hardwired Lighting: Hardwired lighting involves connecting the fixtures directly to the electrical system. This requires running electrical wiring from a power source (typically a junction box) to the location of the under-cabinet lights. Hardwiring provides a clean, permanent installation and eliminates the need for visible cords. However, it requires more electrical knowledge and may necessitate the services of a qualified electrician.
The advantages of hardwiring include a professional appearance, concealed wiring, and the ability to control the lights with a wall switch. The disadvantages include the complexity of the installation, the potential need for professional assistance, and the difficulty of relocating the lights once installed.
When hardwiring, it's crucial to ensure all electrical work complies with local building codes. This includes using appropriate wire gauge, properly grounding the fixtures, and installing a suitable circuit breaker.
Plug-In Lighting: Plug-in lighting is a simpler option that involves plugging the fixtures into an existing electrical outlet. This is a suitable choice for homeowners who are uncomfortable working with electrical wiring or who want a more temporary solution. Plug-in lighting is easier to install and relocate, but it can result in visible cords and a less polished appearance.
The advantages of plug-in lighting include ease of installation, portability, and the absence of electrical work. The disadvantages include visible cords, limited placement options, and the potential for clutter. If using plug-in lighting, consider concealing the cords using cable management clips or raceways.
Regardless of the wiring method chosen, it's essential to disconnect the power supply before starting any electrical work. This will prevent electrical shock and ensure a safe installation.
If opting for a hardwired solution, ensure that the circuit breaker for the kitchen lights is switched off before beginning work. Use a non-contact voltage tester to confirm that the wires are de-energized. If unsure about any aspect of the electrical work, consult a qualified electrician.
Step-by-Step Installation Guide
The following steps outline the general procedure for installing under-cabinet lighting. Specific instructions may vary depending on the type of lighting and wiring method chosen. It's important to consult the manufacturer's instructions for the specific fixtures being installed.
Step 1: Preparation. Gather all necessary tools and materials, including the under-cabinet lights, wiring (if hardwiring), wire connectors, drill, screwdriver, measuring tape, level, and safety glasses. Ensure the work area is clean and well-lit.
Step 2: Mounting. Determine the desired location for the under-cabinet lights. Typically, they are mounted towards the front of the cabinet, close to the countertop edge, to provide optimal illumination. Use a pencil to mark the mounting locations. If mounting strip lights, measure and cut them to the desired length. Use a level to ensure the lights are mounted straight.
Step 3: Wiring (Hardwired). If hardwiring, turn off the circuit breaker for the kitchen lights. Run electrical wiring from the junction box to the location of the under-cabinet lights. Use appropriate wire connectors to connect the wires according to local electrical codes. Ensure all connections are secure and properly insulated. Grounding the fixtures is essential for safety; connect the ground wire to the grounding screw on the fixture and to the ground wire in the electrical box.
Step 4: Wiring (Plug-In). If using plug-in lighting, simply plug the fixtures into an existing electrical outlet. Consider using a power strip with a built-in surge protector to protect the lights from voltage fluctuations. Use cable management clips or raceways to conceal the cords and create a neat appearance.
Step 5: Testing. Once the wiring is complete, turn on the circuit breaker (if hardwired) or plug in the power strip (if plug-in). Test the under-cabinet lights to ensure they are functioning correctly. If any lights are not working, double-check the wiring connections and ensure the power supply is adequate.
Step 6: Final Adjustments. Make any necessary adjustments to the position of the lights to achieve the desired illumination. Ensure the lights are securely mounted and that all wiring is properly concealed.
Safety Precautions: Always disconnect the power before working with electrical wiring. Wear safety glasses to protect your eyes from debris. Use appropriate tools for the job. If unsure about any aspect of the installation, consult a qualified electrician. Following these safety precautions will ensure a safe and successful installation.
Consider the aesthetic impact when mounting the lights. Aligning the lights consistently across all cabinets creates a more visually appealing outcome. Use a laser level if available to ensure perfect alignment, especially over longer runs of cabinets. Minor adjustments after initial mounting can fine-tune the light distribution and minimize glare.
Proper ventilation around the light fixtures is essential to prevent overheating and prolong the lifespan of the lights. Ensure there is adequate space between the lights and any flammable materials. This is especially important for halogen and xenon lights, which produce more heat than LEDs.
Regular maintenance is essential to keep the under-cabinet lights functioning optimally. Clean the fixtures regularly to remove dust and grease. Replace bulbs or LEDs as needed. Inspect the wiring periodically to ensure there are no loose connections or damaged wires. Addressing any issues promptly will prevent more significant problems down the road.

Installing Under Cabinet Lighting

Guide To Undercabinet Lighting

How To Install Wired Under Cabinet Lighting True Value

How To Install Under Cabinet Kitchen Lighting

Installing Led Lights Under Kitchen Cabinets

Tips For Installing Under Cabinet Lighting Pro Supply

How To Install Led Under Cabinet Lighting In Kitchen Furniture Design Light Sp Z O

Led Strip Light Installation Tips Armacost Lighting

Undercabinet Lighting Rough Wiring

Install Lights Under Kitchen Cabinets Granite Transformations Blog
Related Posts

