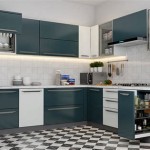
Kitchen Cabinet Crown Molding: An Essential Guide
Kitchen cabinet crown molding is a decorative element that adds a touch of elegance and sophistication to any kitchen. It is a versatile design feature that can be used to complement a wide range of kitchen styles, from traditional to contemporary. In this guide, we will explore the essential aspects of kitchen cabinet crown molding, including its benefits, types, and installation.
Benefits of Kitchen Cabinet Crown Molding
There are several benefits to installing crown molding on your kitchen cabinets, including:
- Enhance the visual appeal: Crown molding adds a decorative touch to your cabinets, making them look more polished and complete.
- Create a sense of height: Crown molding can make your cabinets appear taller and more substantial.
- Conceal gaps: Crown molding can be used to conceal any gaps between the cabinets and the ceiling.
- Protect the cabinets: Crown molding can help to protect the tops of your cabinets from dust and debris.
Types of Kitchen Cabinet Crown Molding
There are a wide variety of crown molding profiles available, each with its own unique look and feel. Some of the most popular types include:
- Ogee: This is a classic crown molding profile with a curved top and a straight bottom.
- Cove: This profile has a concave top and a convex bottom.
- Bullnose: This profile has a rounded top and a straight bottom.
- Stepped: This profile has a series of steps or tiers.
- Dentil: This profile features a series of small, evenly spaced blocks or dentils.
Installation of Kitchen Cabinet Crown Molding
Installing kitchen cabinet crown molding requires some basic woodworking skills and tools. Here is a general overview of the steps involved:
- Measure and cut the molding: Measure the length of each cabinet and cut the molding to fit.
- Apply adhesive to the molding: Apply a thin layer of construction adhesive to the back of the molding.
- Position the molding: Place the molding on top of the cabinets and press it into place.
- Secure the molding: Use a brad nailer to secure the molding to the cabinets.
- Fill any gaps: Fill any gaps between the molding and the cabinets with wood filler.
- Paint or stain the molding: Paint or stain the molding to match the cabinets or the rest of the kitchen décor.
Conclusion
Kitchen cabinet crown molding is a beautiful and functional addition to any kitchen. It can enhance the visual appeal of your cabinets, create a sense of height, conceal gaps, and protect the cabinets from dust and debris. By following the steps outlined in this guide, you can successfully install crown molding on your kitchen cabinets and enjoy its many benefits for years to come.

Adding Crown Molding To Kitchen Cabinets Young House Love

3 Ways To Enhance Your Kitchen With Crown Molding

11 Kitchen Cabinet Crown Molding Ideas For Your

Crown Moulding The Recently Rediscovered Kitchen Solution

Diy Kitchen Cabinet Upgrade With Paint And Crown Molding

3 Ways To Enhance Your Kitchen With Crown Molding

Home Decorators Collection Tremont Pearl Gray Painted Plywood Shaker Stock Assembled Kitchen Cabinet Crown Molding 96 In W X 2 5 D 3 H Cm8 Pg The Depot

Decorative Molding Timberlake Cabinetry

11 Kitchen Cabinet Crown Molding Ideas For Your

Cabinet Crown Molding Rogue Engineer


