Revitalizing Kitchen Cabinets with Rust-Oleum Paint
Kitchen cabinets often serve as the focal point of a kitchen, significantly impacting the overall aesthetic appeal and functionality of the space. Over time, cabinets can become worn, outdated, or simply no longer align with evolving design preferences. Replacing kitchen cabinets can be a substantial and costly undertaking. As such, repainting presents a more economical and efficient alternative for updating the kitchen's appearance. Rust-Oleum offers a range of paint products specifically formulated for kitchen cabinets, providing durable finishes and a variety of color options to suit different styles.
This article aims to provide a comprehensive overview of using Rust-Oleum paint for kitchen cabinets, encompassing surface preparation, paint selection, application techniques, and considerations for achieving a professional and long-lasting finish. The information presented is designed for homeowners and DIY enthusiasts looking to transform their kitchens without incurring the expense and disruption of a complete cabinet replacement.
Key Considerations Before Painting
Before embarking on a cabinet painting project with Rust-Oleum paint, several crucial factors must be addressed to ensure a successful outcome. These factors include assessing the existing cabinet condition, selecting the appropriate Rust-Oleum product, and meticulously preparing the surfaces for painting.
Assessing Cabinet Condition: A thorough inspection of the existing cabinets is the first step. Identify any areas with significant damage, such as deep scratches, gouges, or delamination. Addressing these issues before painting is paramount. Minor imperfections can often be filled with wood filler and sanded smooth. However, severely damaged cabinets might require more extensive repairs or, in extreme cases, replacement. Assessing the existing finish is equally important. Cabinets with a high-gloss finish or a particularly smooth surface will require more rigorous preparation to ensure proper paint adhesion.
Selecting the Right Rust-Oleum Product: Rust-Oleum offers a diverse array of paints suitable for kitchen cabinets, each with unique properties and application requirements. Options include Rust-Oleum Cabinet Transformations Kit, Rust-Oleum Chalked Ultra Matte paint, Rust-Oleum Oil-Based enamel, and Rust-Oleum Advanced Formula Cabinet Paint. The selection depends on the desired finish and durability. The Cabinet Transformations Kit, though somewhat more involved, offers a comprehensive solution for a complete cabinet makeover. Chalked Ultra Matte paint provides a vintage, distressed look, whereas Oil-Based Enamel offers exceptional durability and a smooth, glossy finish. The Advanced Formula Cabinet Paint often boasts ease of application and faster drying times. Carefully evaluate the specifications of each product to determine the best fit for the project.
Surface Preparation: Proper surface preparation is undeniably the most critical step in achieving a professional-looking paint job. Inadequate preparation can lead to poor adhesion, resulting in chipping, peeling, and an overall unsatisfactory finish. Thorough cleaning is essential to remove grease, grime, and other contaminants that can impede paint adhesion. Use a strong degreasing cleaner specifically designed for kitchen surfaces. After cleaning, sanding is crucial to create a slightly roughened surface, providing a better grip for the paint. Use sandpaper with a grit ranging from 120 to 220, depending on the existing finish. Sand all surfaces lightly, paying particular attention to areas with a glossy finish. After sanding, remove all dust with a tack cloth. Priming may be necessary, especially when painting over dark colors or bare wood. A quality primer will seal the surface, improve paint adhesion, and help achieve a uniform color.
Step-by-Step Painting Process
Once the cabinets are properly prepared and the appropriate Rust-Oleum product has been selected, the painting process can begin. This involves careful application techniques to ensure a smooth, even finish and optimal durability.
Protecting the Work Area: Before starting, protect the surrounding area with drop cloths and painter's tape. Cover countertops, floors, appliances, and any other surfaces that could be exposed to paint splatters or drips. Remove cabinet doors and drawers and lay them flat on a protected surface for painting. Label each door and drawer to ensure proper reinstallation after painting.
Applying the Paint: The application method depends on the chosen Rust-Oleum product and the desired finish. Brushing, rolling, and spraying are all viable options. Brushing is suitable for small areas and intricate details, while rolling is effective for covering larger surfaces quickly. Spraying provides the smoothest, most professional-looking finish, but requires specialized equipment and a well-ventilated workspace. When brushing or rolling, use high-quality brushes or rollers designed for the type of paint being used. Apply thin, even coats, avoiding drips and runs. Allow each coat to dry completely before applying the next. Typically, two coats of paint are necessary to achieve full coverage and a durable finish.
Sanding Between Coats: Lightly sanding between coats of paint can help to create an even smoother finish. Use fine-grit sandpaper (220 or higher) and gently sand the surface of the paint after each coat has dried. This will remove any imperfections and improve adhesion for the subsequent coat. Be sure to remove all dust after sanding with a tack cloth.
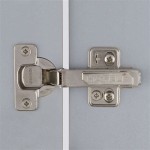
Reassembling and Finishing: Once the final coat of paint has dried completely, carefully reassemble the cabinets. Reattach the doors and drawers, ensuring they are properly aligned. Consider replacing the hardware (knobs and pulls) to further update the look of the cabinets. Allow the paint to fully cure for the recommended time (as specified by the Rust-Oleum product instructions) before placing items back in the cabinets.
Achieving a Professional Finish
Beyond the basic steps of preparation and application, several techniques and considerations can elevate the final result, resulting in a professional and long-lasting finish for the kitchen cabinets. These include addressing imperfections, using the right tools, and applying protective topcoats.
Addressing Imperfections: Even with meticulous preparation and application, minor imperfections can sometimes appear. These may include small drips, brush strokes, or areas where the paint is not completely smooth. Spot-sanding these imperfections with fine-grit sandpaper can often rectify the issue. For larger imperfections, applying a small amount of wood filler and sanding it smooth before repainting may be necessary.
Using the Right Tools: The selection of appropriate tools can significantly impact the quality of the finish. High-quality brushes and rollers designed for the specific type of paint being used are essential. For spraying, a good-quality paint sprayer with adjustable settings is crucial for achieving an even and consistent application. Using the correct tips and nozzles for the sprayer can also help to minimize overspray and ensure a smooth finish.
Applying Protective Topcoats: A protective topcoat can enhance the durability and longevity of the painted cabinets, particularly in high-traffic areas such as the kitchen. Topcoats are available in various sheens, including matte, satin, and gloss. Select a topcoat that complements the chosen paint finish and provides the desired level of protection. Apply the topcoat evenly, following the manufacturer's instructions. Allow the topcoat to fully cure before using the cabinets.
By carefully considering the factors outlined in this article, homeowners and DIY enthusiasts can effectively utilize Rust-Oleum paint to revitalize their kitchen cabinets, transforming the look and feel of their kitchens while minimizing the expense and disruption associated with complete cabinet replacement. The keys to success lie in thorough preparation, careful application, and attention to detail throughout the painting process.

Rust Oleum Kitchen Cupboard Paint Launches In 110 Colours

Rust Oleum Kitchen Cupboard Paint Serenity 750ml

Painted Kitchen Cabinets Rust Oleum

Kitchen Cupboard Paint

Rust Oleum Kitchen Cupboard Paint Leaplish 750ml Very Co

5 Easy Steps To Using Rustoleum Cabinet Paint Rock Solid Rustic

Rust Oleum Kitchen Cupboard Paint Serenity 750ml

Rustoleum Cabinet Transformations Kitchen Makeover Crafted N Transformation Colors

Kitchen Cupboard Paint

Rust Oleum Kitchen Cupboard Paint Steamed Milk 750ml Very Co
Related Posts