Kitchen Cabinet Painting: A Comprehensive Guide to Revitalizing Your Kitchen
Whether you're looking to update the look of your kitchen or simply restore its former glory, painting your kitchen cabinets is a cost-effective way to achieve dramatic results. With careful planning and a bit of elbow grease, you can transform the heart of your home into a space that reflects your style and personality.
This comprehensive guide will provide you with all the essential information you need to successfully paint your kitchen cabinets, from choosing the right materials to applying the finishing touches. Follow these steps meticulously, and you'll be able to create a beautiful and durable new look for your kitchen that will last for years to come.
1. Preparation is Key
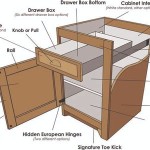
The key to a successful kitchen cabinet painting project lies in thorough preparation. Start by removing all cabinet doors and drawers. Then, clean the cabinets thoroughly with a degreasing cleaner to remove any dirt or grease that could interfere with paint adhesion.
Once the cabinets are clean, sand them lightly using a fine-grit sandpaper to create a smooth surface. This will help the paint adhere better and provide a more professional-looking finish.
2. Choosing the Right Paint
When it comes to painting kitchen cabinets, there are various types of paint to choose from. Latex paint is a popular option as it is durable, easy to clean, and available in a wide range of colors. For a more durable finish, consider using an enamel paint, which is more resistant to chipping and scratches.
Regardless of the paint type you choose, opting for a semi-gloss or high-gloss finish is recommended for kitchen cabinets. These finishes are easier to clean and are more resistant to wear and tear.
3. Priming and Painting
Once you have selected your paint, it's time to apply a primer to the cabinets. Primer helps to create a smooth, even surface for the paint to adhere to and prevents the natural wood color from bleeding through the paint.
When applying the primer, use a brush or roller to ensure even coverage. Allow the primer to dry completely before applying the first coat of paint.
Once the primer is dry, apply two coats of paint, allowing each coat to dry completely before applying the next. Use a brush or roller for a smooth, professional-looking finish.
4. Hardware and Finishing Touches
Once the paint is dry, it's time to reinstall the cabinet doors and drawers. If you're replacing the hardware, now is the time to do so. Choose new hardware that complements the new paint color and overall style of your kitchen.
To complete the project, apply a clear polyurethane finish to the cabinets. This will protect the paint from scratches and wear, and will help to keep the cabinets looking their best for years to come.
5. Enjoy Your Revamped Kitchen
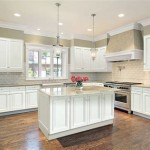
Congratulations! You have successfully painted your kitchen cabinets and given your kitchen a fresh, new look. Enjoy your обновленный kitchen and the compliments you're sure to receive from family and friends.

How To Paint Kitchen Cabinets Like The Pros

7 Expert Tips For Flawless Kitchen Cabinet Painting

Durable Kitchen Cabinet Painting 10 Year Warranty Columbus Oh

How To Paint Kitchen Cabinets Like The Pros

How To Paint Kitchen Cabinets Best Color Ideas Cost

Pro Tips For Painting Cabinets In Your Home Paintzen

Painted Kitchen Cabinet Ideas Architectural Digest

How To Paint Kitchen Cabinets The Love Notes Blog

Painted Kitchen Cabinets One Year Later The Palette Muse

15 Best Painted Kitchen Cabinets Ideas For Transforming Your With Color
Related Posts

