Essential Aspects of a Kitchen Cabinet Painting DIY
Revitalizing your kitchen cabinets through painting can bring a fresh and updated look to your home. While it may seem like a daunting task, it's entirely possible to achieve a professional-looking finish with a little preparation and attention to detail. This guide will provide you with the essential steps and tips for a successful DIY kitchen cabinet painting project.
Preparation is Key
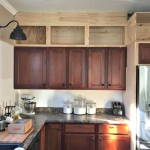
Thorough preparation is crucial for a successful paint job. Start by removing all cabinet doors and hardware. Thoroughly clean the cabinets with a degreaser to remove any grease or dirt that might interfere with paint adhesion. Next, sand the cabinet surfaces lightly to create a smooth base for the paint. Use a fine-grit sandpaper to avoid damaging the wood.
Choose the Right Paint
The choice of paint is essential for durability and the desired finish. Opt for a specifically designed kitchen cabinet paint that is resistant to wear, moisture, and heat. Consider a semi-gloss or satin finish, which provides a durable and easy-to-clean surface. Remember to stir the paint thoroughly before applying it.
Prime for a Smooth Finish
Applying a primer will create a uniform surface and help the paint adhere better to the cabinets. Use a high-quality primer that is compatible with the paint you have chosen. Apply the primer evenly to the cabinets, using a brush or roller. Allow the primer to dry completely before painting.
Apply the Paint
Start by painting the inside of the cabinets and the back of the cabinet doors first. This will prevent visible brushstrokes from being noticed when the doors are closed. Use a high-quality brush or roller and apply thin, even coats. Allow each coat to dry completely before applying the next. For a smooth finish, consider applying three or more coats.
Sand and Finish
Once the paint has completely dried, lightly sand the surfaces to remove any imperfections. Wipe down the cabinets to remove any dust. Apply a clear polyurethane or a water-based topcoat to protect the painted surface and enhance its durability. Allow the topcoat to dry thoroughly before reattaching the hardware and doors.
Tips for a Professional Finish
- Use a high-quality brush or roller for smooth application.
- Allow each coat to dry completely before applying the next.
- Use a tack cloth to remove any dust or debris before painting.
- Protect your floors and countertops with drop cloths.
- Allow plenty of time for the paint and topcoat to dry thoroughly.
By following these steps and tips, you can achieve a professional-looking finish for your kitchen cabinet painting project. With patience and attention to detail, you can transform your kitchen into a stylish and inviting space.

Diy Painting Your Kitchen Cabinets The Right Way

How To Paint Kitchen Cabinets In 7 Simple Steps

A Diy Project Painting Kitchen Cabinets

Diy Painted Oak Kitchen Cabinets Makeover

20 Diy Painted Kichen Cabinet Ideas A Cultivated Nest

Pa Wedding Photographer Diy Painted Kitchen Cabinets Before After

How To Paint Kitchen Cabinets Without Sanding Sustain My Craft Habit

Update On Our Diy White Painted Kitchen Cabinets 2 Years Later

20 Diy Painted Kichen Cabinet Ideas A Cultivated Nest

How To Simply Update Your Cabinets With Paint In A Day This Is Our Bliss
Related Posts