Kitchen Cabinet Refacing Veneer: Elevate Your Kitchen's Style and Functionality
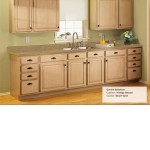
Kitchen cabinet refacing with veneer is an elegant and cost-effective way to refresh the look of your kitchen. By overlaying a thin layer of veneer over your existing cabinets, you can give them a whole new appearance without the need for a complete remodel.
Benefits of Veneer for Kitchen Cabinet Refacing
- Durable and long-lasting: Veneer is a robust material that can withstand daily wear and tear, ensuring your cabinet doors and drawers remain pristine for years to come.
- Versatile designs: Veneer comes in a wide range of wood species, colors, and textures, allowing you to customize your kitchen to match any décor.
- Cost-effective: Refacing with veneer is significantly less expensive than replacing your cabinets entirely, making it an attractive option for those on a budget.
Choosing the Right Veneer
When selecting a veneer for your kitchen cabinet refacing, consider the following factors: * Wood species: Choose a wood that complements the existing décor and style of your kitchen. Popular options include oak, maple, cherry, and walnut. * Color: The color of the veneer should match or coordinate with the countertops, backsplash, and flooring. * Grain pattern: Consider the grain pattern of the veneer and how it will affect the overall look of your cabinets.Installation Process
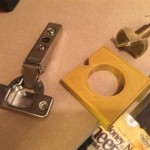
The installation process for veneer kitchen cabinet refacing typically involves the following steps: 1. Remove existing hardware: Remove all handles, knobs, and hinges from your cabinet doors and drawers. 2. Clean and prepare the surfaces: Clean the cabinet doors and drawers thoroughly to remove any dirt or debris. Sand any rough edges or imperfections. 3. Apply adhesive: Apply a thin layer of adhesive to the back of the veneer. 4. Position and press the veneer: Carefully position the veneer over the cabinet door or drawer and press it firmly into place. 5. Trim excess: Use a sharp knife or razor blade to trim any excess veneer around the edges. 6. Reinstall hardware: Once the veneer is secure, reinstall the handles, knobs, and hinges.Maintenance Tips
To keep your veneer kitchen cabinets looking their best, follow these maintenance tips: * Clean regularly: Wipe down your cabinet doors and drawers with a soft cloth and a mild cleaner. * Avoid harsh chemicals: Avoid using harsh chemicals or abrasive cleaners that can damage the veneer finish. * Protect from moisture: Keep your cabinets away from excessive moisture to prevent warping or peeling.
Diy Cabinet Refacing Budget Friendly Made Easy Wisewood

Diy Cabinet Refacing Budget Friendly Made Easy Wisewood

Refinishing Kitchen Cabinets Modern Refacing Made Easy Wisewood

Refinishing Kitchen Cabinets Modern Refacing Made Easy Wisewood

How To Reface Kitchen Cabinets With Veneer

Refinishing Kitchen Cabinets Modern Refacing Made Easy Wisewood

Cabinet Refacing Advice

Cabinet Refacing Instructions Wisewood Veneer

Cabinet Refacing Process And Cost Compared To Painting

Kitchen Cabinet Refacing Review Why We Chose It For Our Home Kaitlin Madden
Related Posts

